This feature article, “Center-Fire Handloading,” appeared originally in the April 2006 issue of American Rifleman. To subscribe to the magazine, visit the NRA membership page and select American Rifleman as your member magazine.
It’s trendy these days to claim that there’s no reason for hunters to handload ammunition, but you’ll never hear it from me.
Handloading is much more than saving money or accessing good bullets. Yes, you can save money by “rolling your own;” and while factory ammunition has expanded the options, a handloader still has far more bullet choices available. Handloading also allows customizing ammo for optimum performance and accuracy from individual rifles. More than anything else, there is a certain satisfaction in closing the bolt on a cartridge you constructed, and handloading brings you closer to the whole shooting process. Taking a trophy animal, shooting a tight group or simply smacking a tin can with something you essentially designed and built brings a feeling of satisfaction and pride that can never occur with store-bought ammo.
Personally speaking, I like the control, and I like the involvement. The technical side of me is fed by the satisfaction of developing a load that is the very best that can be put in a particular gun, while the hunter side of me is satisfied by more complete immersion in the process.
Handloading centerfire rifle and handgun cartridges is the most diverse of all the aspects of building your own ammo. It can be as simple as putting together a few rounds to take deer hunting or as complex as developing your own wildcat cartridges. It is an interesting, challenging and satisfying hobby. And it is easy to get started.
The best way is to have somebody with experience show you how; but with mentors in short supply these days, an alternative can be found in the NRA Reloading Course—taught by certified instructors—or the many excellent books and videos on the market.
Two Rules
Two handloading safety rules that my grandfather taught me more than 30 years ago have served me well.
Never have more than one can of powder on your loading bench at any time. When you have finished with one powder, pour the unused portion back into that can. Seal it up and put it in storage away from the loading bench before bringing another powder to the bench. That prevents mixups as to which powder has been used and prevents inadvertently pouring unused powder into the wrong container and contaminating the powder in that can.
Never stand up a case in the loading block until after it has been charged with powder. Instead, keep the cases loose in the trays for every operation up to and including charging with powder. After charging, place the case in a loading block for the first time. That helps prevent charging errors such as double charges or no powder at all. Double-check by holding the loading block with the charged cases under a strong light to check the powder levels before seating the bullets.
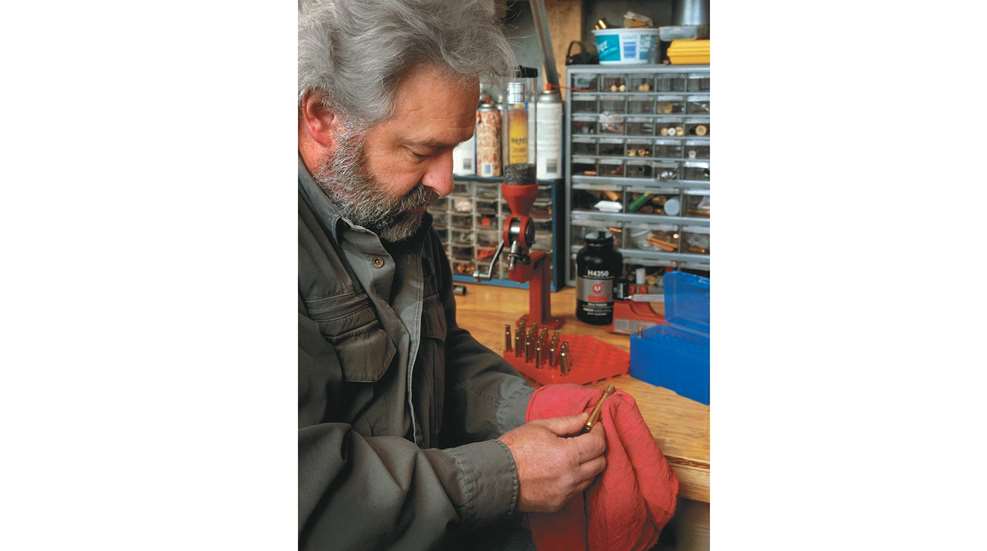
The first thing you’ll need is a place to work. The best option is a bench and work area that is dedicated to handloading. Lacking that, you can use any area where you can work without distractions—even the kitchen table. This is serious business, and you must be organized and distraction-free. Don’t talk on the phone, watch TV or do anything else when you are handloading. You must keep your attention focused on the task at hand. Handloading is safe, but like most things in life, it is not idiot-proof.
Which Powder?
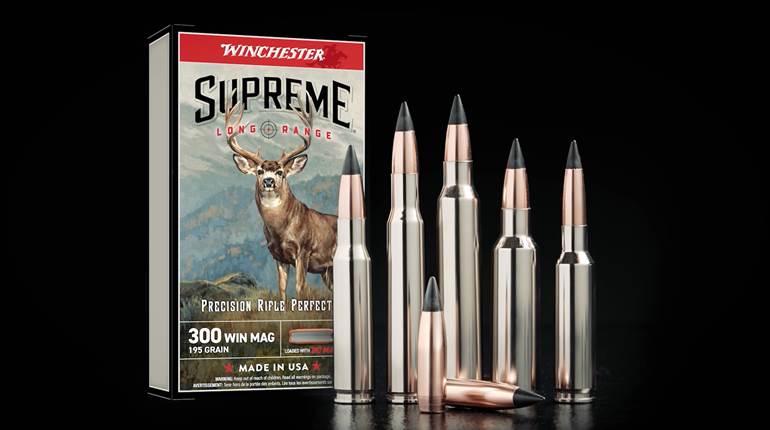
One area of confusion for any handloader concerns which powder to choose. For example, the Speer No. 13 Handloading Manual lists 15 different powders for my favorite 165-grain bullet in the .30-’06 Sprg.
A good rule of thumb is to start with the powder that produces the highest velocity. But, while that is a good place to start and will usually produce good results, it is not always the best choice.
Often, the best balance of velocity and accuracy is exhibited by powders producing slightly less velocity. Some manuals, such as Nosler’s, list the most accurate powder tested. My choice for the 165-gr. .30-’06 Sprg. load of IMR-4350 is listed by the Nosler Reloading Guide No. 4 as the most accurate powder tested. It’s listed as producing the third highest velocity, while the Speer No. 13 manual lists it as second highest. Each of those lists a different powder for the highest velocity.
The scenario is almost exactly the same for my 180-gr. .300 Win. Mag. loads using RL-22 powder. Speer lists it as second highest in velocity, while Nosler has it as third. Nosler also lists it as the most accurate powder tested. Once again, both show different powders producing the highest velocity.
My point is that you should look not only at the highest velocity listed, but also look for consistency from manual to manual (you really should have more than one manual, anyway), and if a powder is in the top three in each book, then that powder is likely a good candidate to start with.
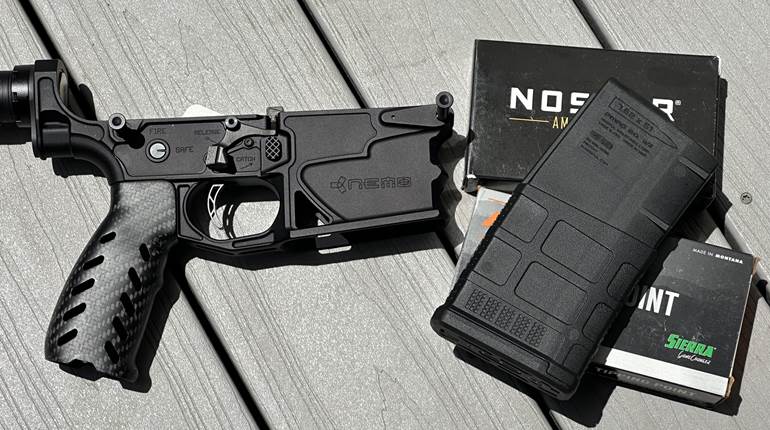
The Necessities
You will need a press. A simple, single-stage model is the best type to start with. For now, stay away from progressive loaders. There are many good presses on the market, and I can personally recommend a couple. First is the RCBS Rock Chucker. I have one that my parents gave me for Christmas when I was still in junior high school. It has served me well for more than three decades, much of which included some pretty intensive competition shooting. It was not uncommon to load and shoot more than 10,000 rounds a season in those days, and that press never let me down.
Recently, I have also been using Hornady’s Lock-N-Load Classic single-stage press with great success. The quick-change Lock-N-Load feature eliminates the need to thread each die in and out every time you make a change. It may not sound like a big deal, but over the course of several loading sessions, you will come to appreciate this feature a great deal. Regardless of which press you choose, don’t under-buy. Get a good, high-quality press, and you will never regret the few extra dollars.
Perhaps the single most important tool is the scale. Electronic scales have dominated in recent years, but they are a little costly when you are starting out. They primarily offer speed and ease of use rather than any enhancement in accuracy over a quality balance-beam scale. Those will cost much less and are a better place to start.
An adjustable powder measure is handy, but not necessary. You can get by without it, but it will be slow. While not expensive, a powder funnel is a necessity. The funnel has a flare on each end so that the smaller end will fit into the cartridge case mouth, allowing the powder to flow into the case.
You’ll need a loading block with holes appropriate to the cartridges you’ll be loading. Fit is important, as the block must hold the cartridges without allowing them to tip over or spill but still allow for easy insertion and removal of the cases. You’ll also need a few trays to hold the cartridges during most of the loading operations. Mine measure 6"x9", and I bought them in the household section of the local department store. Large margarine tubs also work.
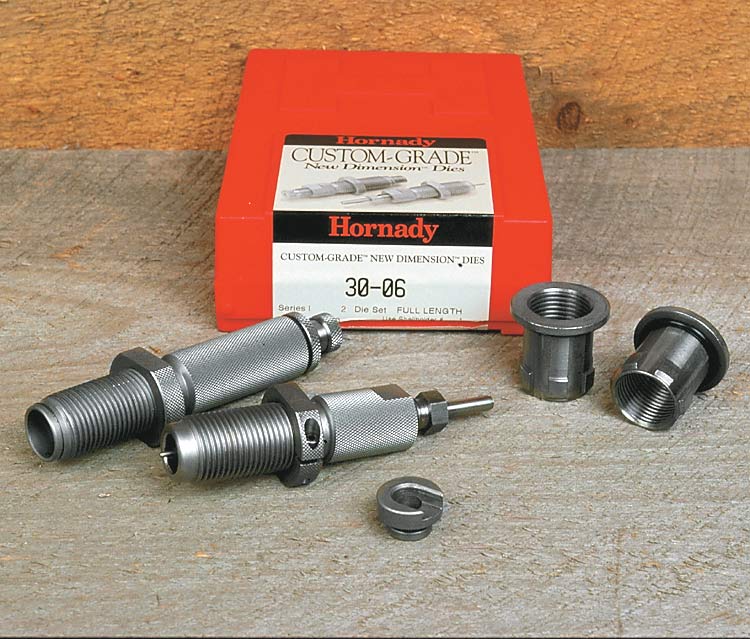
You will need dies and a shell holder to fit your cartridge along with some case lube, a lube pad and a nylon brush the diameter of the bullet to lube inside the case mouths. Another much easier option is to use spray lube. I have another separate loading block that I use only for that purpose, as it can get messy, and it’s best to keep the lube away from primers and powder. Spraying is really much easier than rolling the cases on a lube pad and then running a lubed brush inside each case mouth. Finally, you will need a primer tray and a deburring tool; both are inexpensive.
At least one current handloading manual is a must. There are lots of them on the market. For now, buy the newest manual published by the company that makes the bullets or the powder you are going to be using. Components change subtly over the years, and the newest manuals will ensure you’re using the right data for new components. These manuals will have explicit instructions on how to handload that will go into much more detail than a short magazine article can. Follow them religiously, and always match the recipe exactly. Start with one of the lower powder charges, and slowly work up while shooting at each stage to check for accuracy and pressure signs.
If you are starting from scratch, look into the kits from RCBS, Hornady, Lee and others that include almost everything—except components—you will need to get started. I would add a hand-held priming tool such as those from RCBS, Hornady or Lee. They are inexpensive and will save you a lot of frustration. You are going to end up with one anyway, so get it now. You will also need a dial caliper sooner or later, and life will be easier if you choose sooner.
For now, I’ll simply cover the basics of handloading once-fired cases for a bottleneck-style centerfire rifle cartridge. There are many advanced tips and techniques that can be applied later to fine tune the process, but they are more than can be covered here.
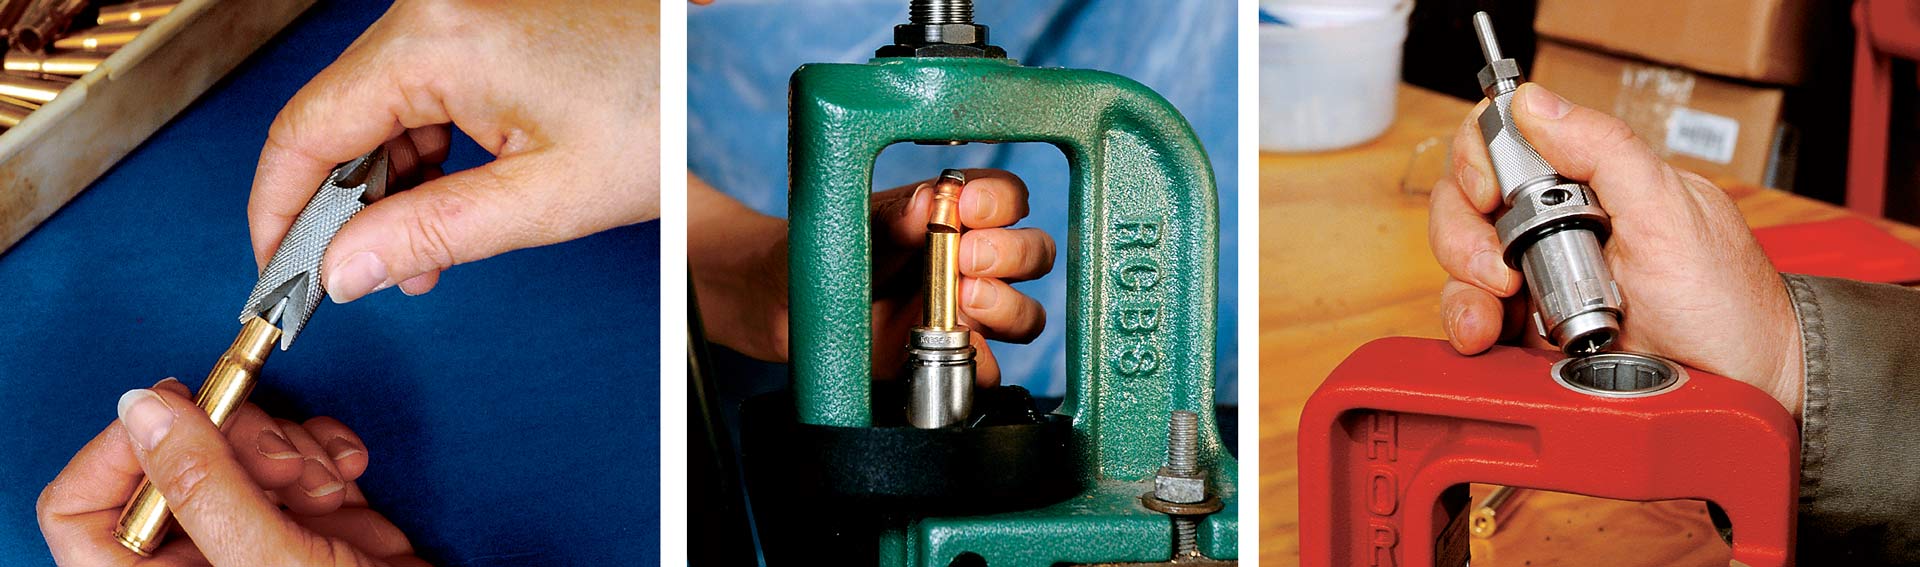
Because the case is once-fired it is assumed that it will not need to be trimmed for length; however, if you have a dial caliper, go ahead and confirm that your cases do not exceed the maximum length listed in the loading book. Make sure the cases are clean and not severely tarnished. Inspect each case to make certain there are no physical defects. Lightly lubricate the inspected cases either by rolling them over a saturated lube pad or by standing them in a loading block and hitting them with a thin coat of spray lubricant. A thin coating is enough; too much causes problems such as dents in the case shoulder. If you use the lube pad, roll the nylon brush on the pad; and insert it in each case mouth with a twisting motion to lube the inside of the case mouth.
Resizing brings the case back to the proper outside dimension, ensuring that it will chamber easily in the rifle. It also ensures that the neck will hold the bullet with the correct tension.
Adjust the full-length resizing die according to its instructions, usually to just bump the shell holder when the press ram is in its topmost position. The depriming pin should protrude from the die enough to be just below the bottom of the case when it’s fully inserted into the die. Place a lubricated cartridge in the shell holder, and lower the handle on the press as you guide the case into the die. Fully cycle the handle, but remember to move your fingers out of the way. The spent primer should pop out of the case and fall away; if it does not, adjust the depth of the depriming pin until it does. It is best to complete each step with all the cases before progressing, so continue resizing until every case is done.
Clean the lube from the sized cases. First, wipe them with an old towel to remove the bulk of the lube. The rest is removed best by tumbling in ground corncob or walnut shells. But a case cleaner is something that most handloaders do not have at first, so lacking the equipment for that, wiping with a damp rag—when using water-soluble lubricants—will work.
Using the deburring tool, lightly deburr the case mouth inside and out. That also puts a slight bevel on the case mouth, allowing the bullet to seat without shaving metal from its sides.
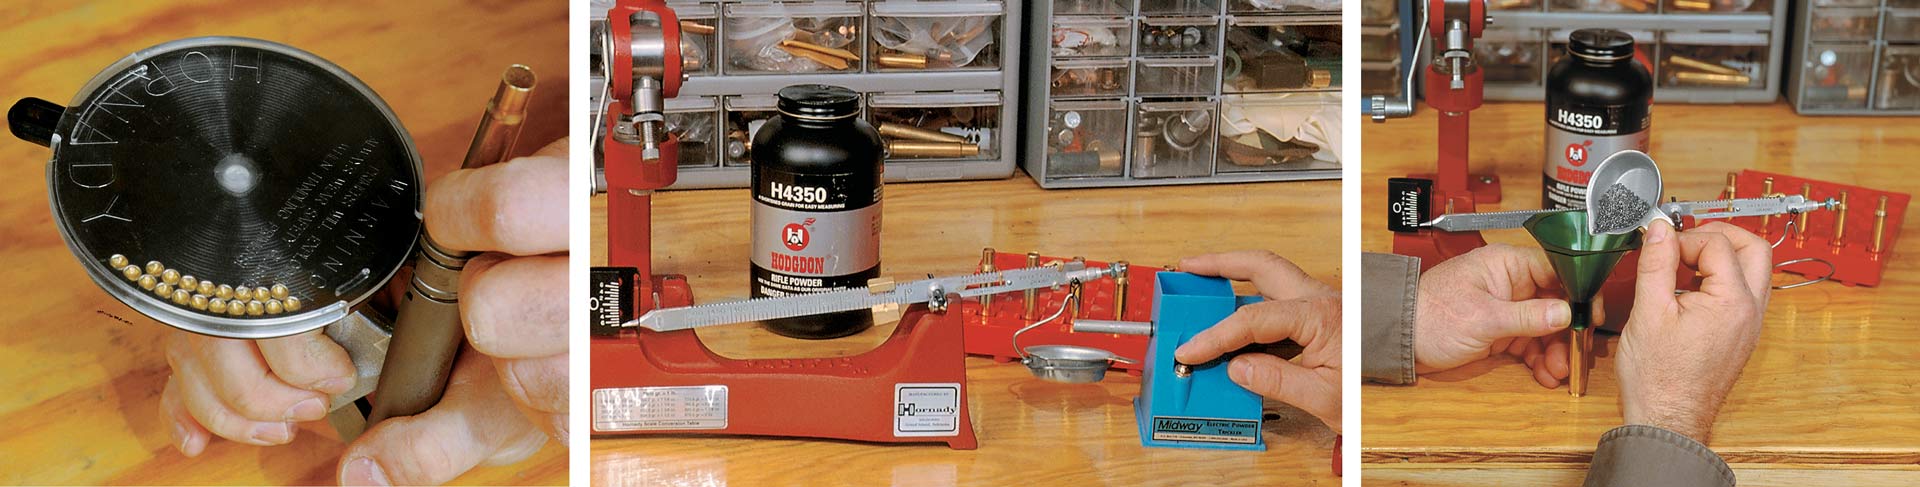
Make sure the cases are dry and free of lube. Then, use the hand-held tool or the priming feature on your press to seat the correct primer chosen from the recipe in the manual. Primer seating depth is very important. It should be seated solidly against the bottom of the primer pocket, but not hard enough to deform or crush the primer. Crushing the primer breaks the priming pellet and causes erratic ignition. If the primer is not seated deeply enough, the force of the firing pin hitting it can push the primer deeper into the primer pocket, causing it to absorb energy and possibly create a misfire. Also, a high primer may not allow the bolt on your rifle to close properly. Your priming tool should be designed to allow a feel for when the primer seats fully. When correct, the primer should be just below flush with the cartridge head. High primers are easy to find, just stand the case up on a hard flat surface—a piece of glass is perfect. If the case rocks, the primer is too high and needs to be seated deeper. It’s not as complicated as it sounds, and after seating a few primers it becomes easy.
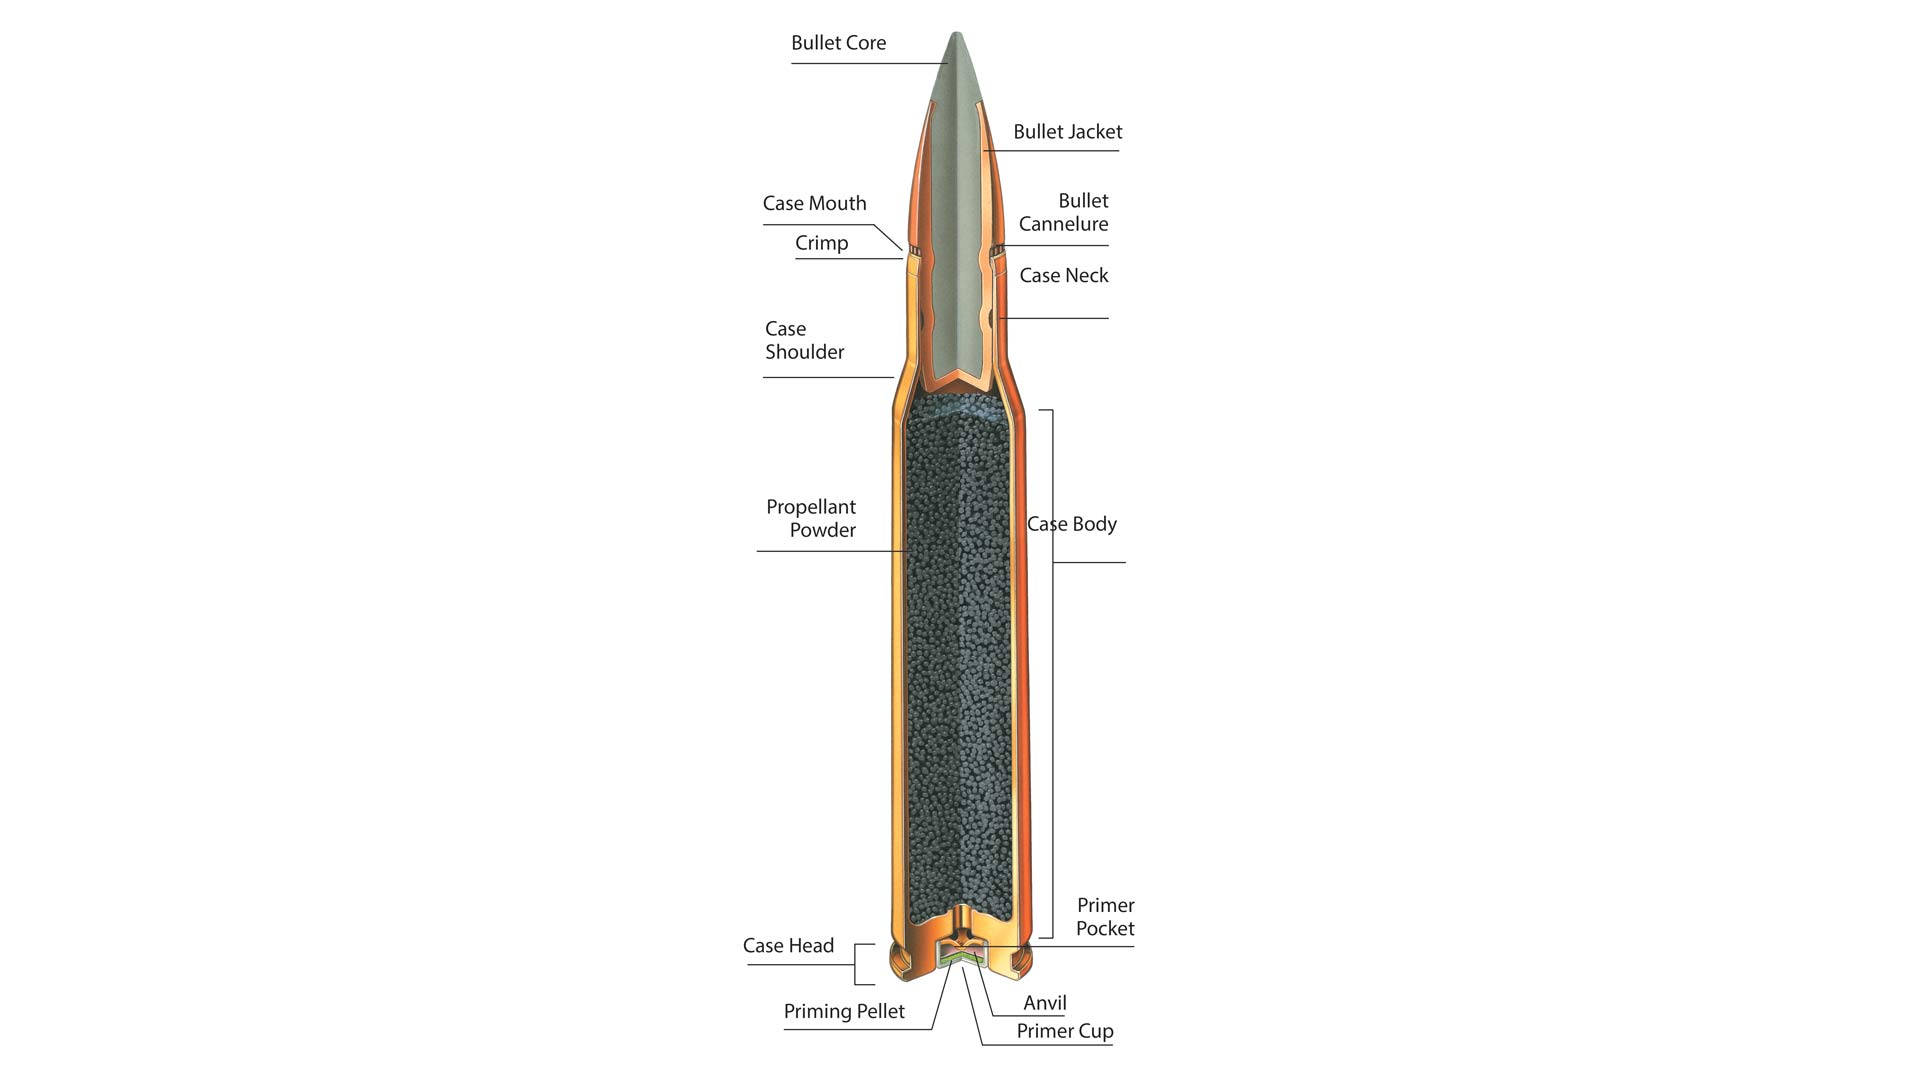
Weigh out the correct charge of the proper powder on the scale. This should be the starting charge listed in the manual for your initial loads. You can work up from there later if you wish, but always begin with the suggested starting load. One trick when adding powder to the scale is to use a teaspoon to trickle the powder slowly into the scale pan. Later, you will likely want to invest in an adjustable powder measure and a powder trickler that will speed up the process considerably. Once you have the correct charge, pour it into the case using the powder funnel, then stand the charged case up in the loading block. When all the cases have been charged, hold the block under a strong light and look into the mouth of each case to make sure that each powder charge is to the same level in the case and that each case has been charged with powder.
Install the seating die in the press, but do not turn it down to contact the shell holder. Instead, follow the instructions with your dies for adjusting the bullet-seating die to either crimp or not crimp as recommended for your cartridge in the loading manual. Remember, if you crimp you must have a bullet with a cannelure.
If you have a dial caliper, you can now seat a bullet to the maximum overall length listed in the book. Start with the seating stem turned back to seat the bullet out farther than necessary. Place a charged case in the shell holder and, while holding a bullet aligned with the neck, slowly cycle the press. It’s a little tricky to hold the bullet until the die takes over that chore and then get your fingers out of the way before they are pinched, so go slowly at first. Measure the resulting overall cartridge length with the caliper and then adjust the seating stem down a little and cycle the cartridge through the die again. Repeat that process until the bullet is seated to the correct overall length, and you have a finished cartridge. Lock the die in that position and each succeeding cartridge will be the same overall length.
If you don’t have a dial caliper, make up a dummy cartridge without a primer or powder. Seat the bullet out in the case so that it’s in the neck only enough to hold it, and try to chamber it in your rifle. The bolt likely will not close. Turn the seating adjustment on the die one-half turn to push the bullet in a little deeper into the case, and try it in the gun again. Keep doing that until the bolt closes easily. Now, turn the adjustment screw one more full turn, and lock it in place. If the cartridge functions through the gun’s magazine and the bullet is seated the equivalent of one caliber into the neck, the ammo should work fine. You can gauge how deeply the bullet is seated by holding the point of the loaded bullet and the point of an unloaded bullet side by side on a flat surface. Use the base of another bullet as a measure to ensure that you have at least one caliber of seating depth (e.g. 0.30" deep for a .30-’06 Sprg., 0.27" deep for a .270 Win., etc.).
If you did not tumble them, it’s a good idea to re-wipe the cases with a damp cloth to remove any residual lubricant and inspect them again. Put the ammo in a box, label it with the exact load info, and go shoot ’em!
Now, tell me you aren’t hooked.
—Bryce M. Towsley
Most Popular