This compilation of "Glass Bedding A Rifle Stock, Part I & Part II," appeared originally in the June and July 2006 issues of American Rifleman. To subscribe to the magazine, visit the NRA membership page and select American Rifleman as your member magazine.
Be Warned
It’s no secret that glass bedding a rifle stock can often do wonders for accuracy. If you believe all you read on the subject, it’s also an example of a home-gunsmith project that anybody can complete with wonderful results; don’t believe everything you read.
In the early days of synthetic hunting rifle stocks, I decided I needed one. When it arrived, what was in the box might have passed for a stock, but barely. It was a crude lay-up that lacked everything from a butt pad to holes for the action screws. I spent days sanding, drilling, shaping and filing, then I mixed up about two pounds of bedding compound and filled the stock to the brim before bolting everything into place. When all that excess bedding compound squirted out, I should have asked for help. I was so focused on the gun that by the time I noticed the big glob on the floor, I had already stepped in it several times. In my many trips to the kitchen for more paper towels, I had a nice, even layer throughout the house. What wasn’t on the carpet was on my shirt or in my hair.
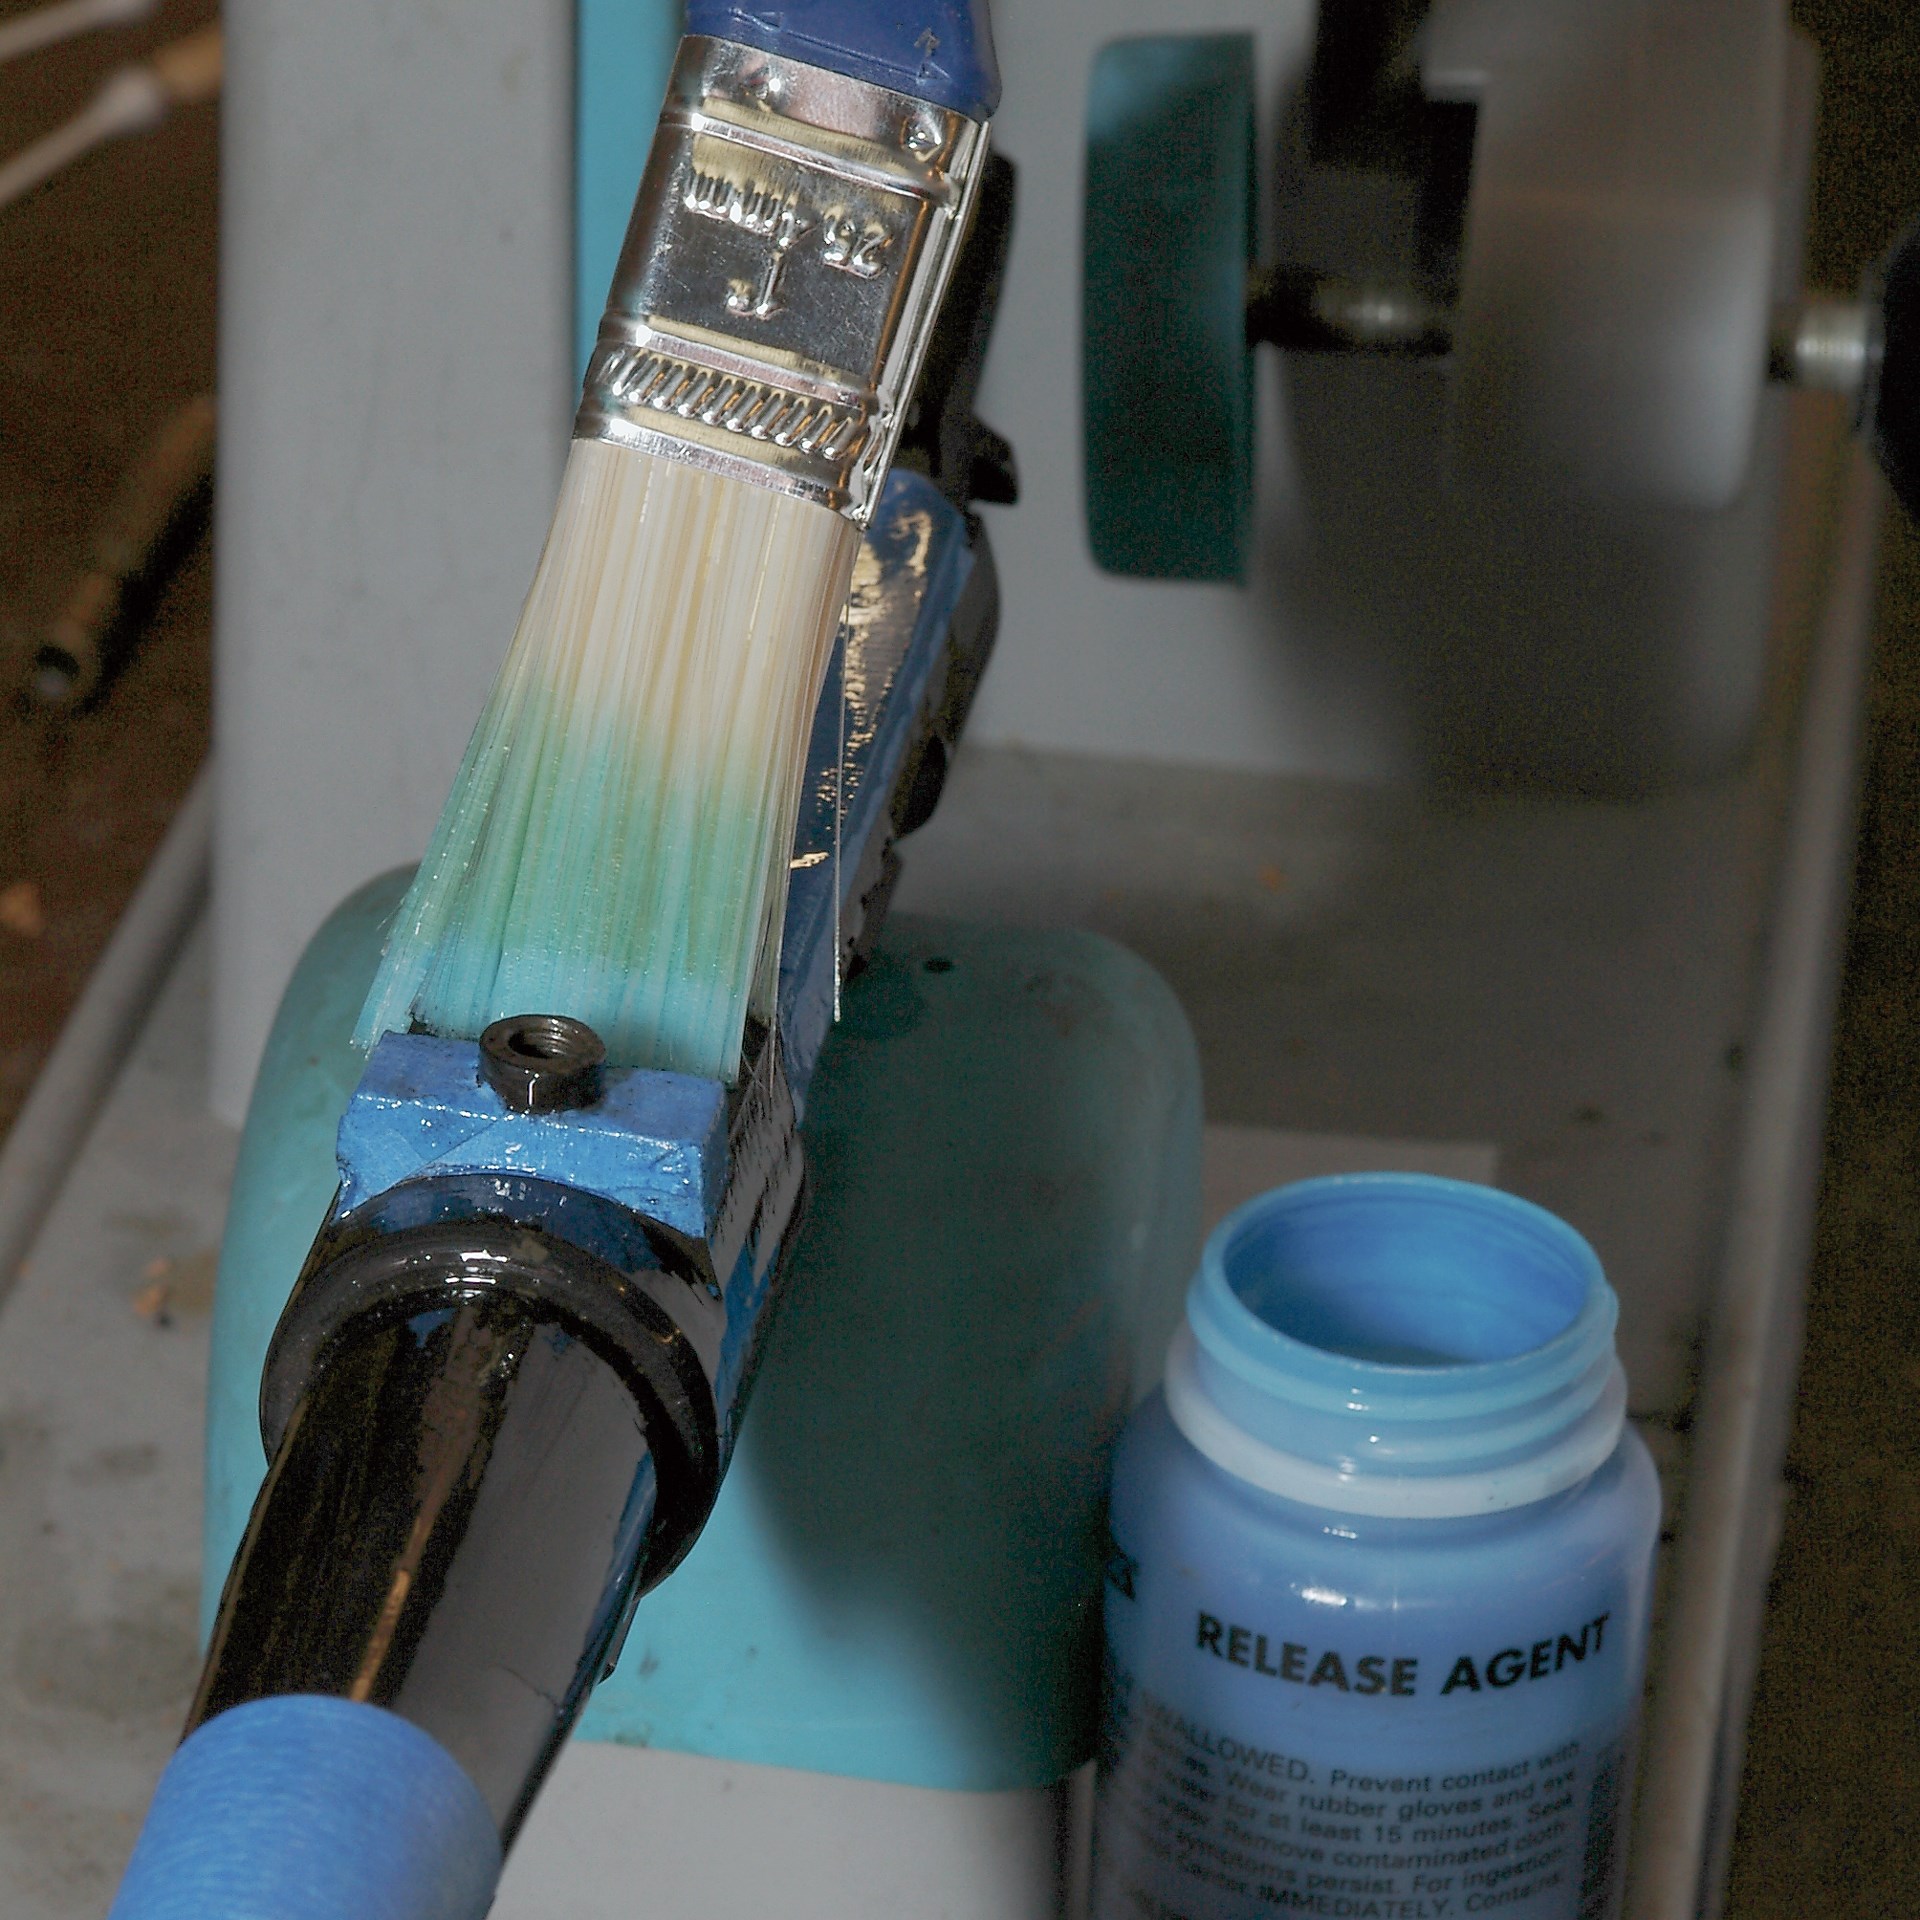
One important step is to apply release agent to the underside of the action and any part you do not want bedding compound adhering to.
None of it was water-soluble. The directions recommended using vinegar to clean up—great if you have some on hand. I didn’t. In rushing to the store, I didn’t notice the bedding compound all over my pants, which transferred nicely to my truck seat.
Read The Directions
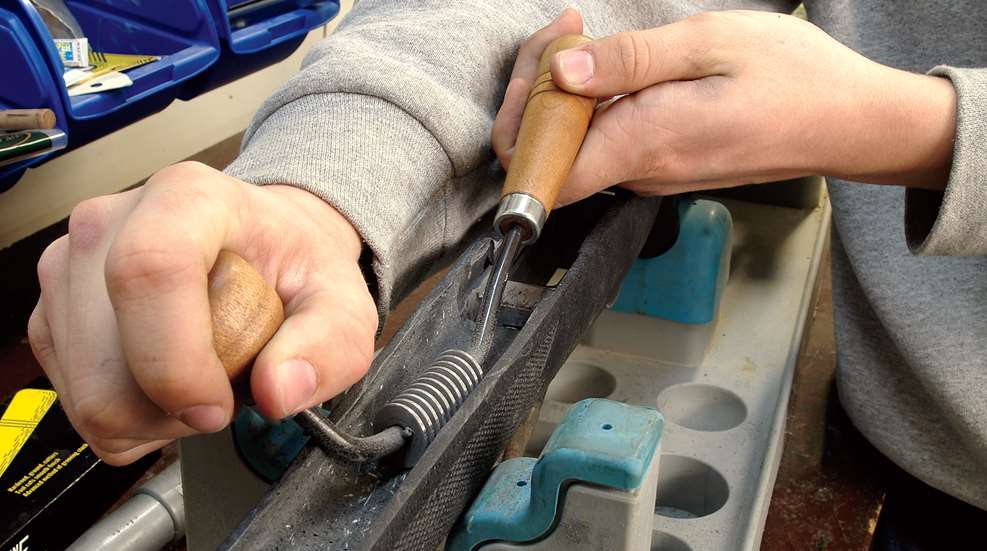
One way or the other, all messes clean up eventually, and most marriages survive them. The next day, I was ready to remove the barreled action from the stock. I had “bedded” the entire gun in one operation and compound had squirted into all the holes and filled every void, forming a mechanical lock. After several hours of trying to separate the parts, I finally read the directions that came with the bedding kit, which mentioned the holes and voids—mostly stuff about avoiding filling them.
Hours later, I found a gunsmithing book that suggested chopping the stock off the action with an axe, but before I went to the shed to get my hatchet, I decided to give it one last shot. With one knee on the stock, I yanked on the barrel, and then on the wooden dowel in the action, alternating back and forth until suddenly everything popped free! I fell backward off the stool I was standing on with one foot, and the barreled action crashed beside me on the cement floor, breaking the trigger assembly off.
I have glass bedded dozens of rifles in the years since. And while there were few mistakes made on that first one, those years of experience have allowed me to correct them. Like most guys, I wait until I am in trouble before I read directions. (That’s why I get in trouble.) Read them first, and make sure you have everything you need before you start.
A thorough stock-bedding job involves:
- Removing a thin layer of stock material from the interior
- Putting the gun back together to check fit
- Carefully removing any offending high spots
- Covering the stock with masking tape to protect its finish from bedding compound.
Getting Started
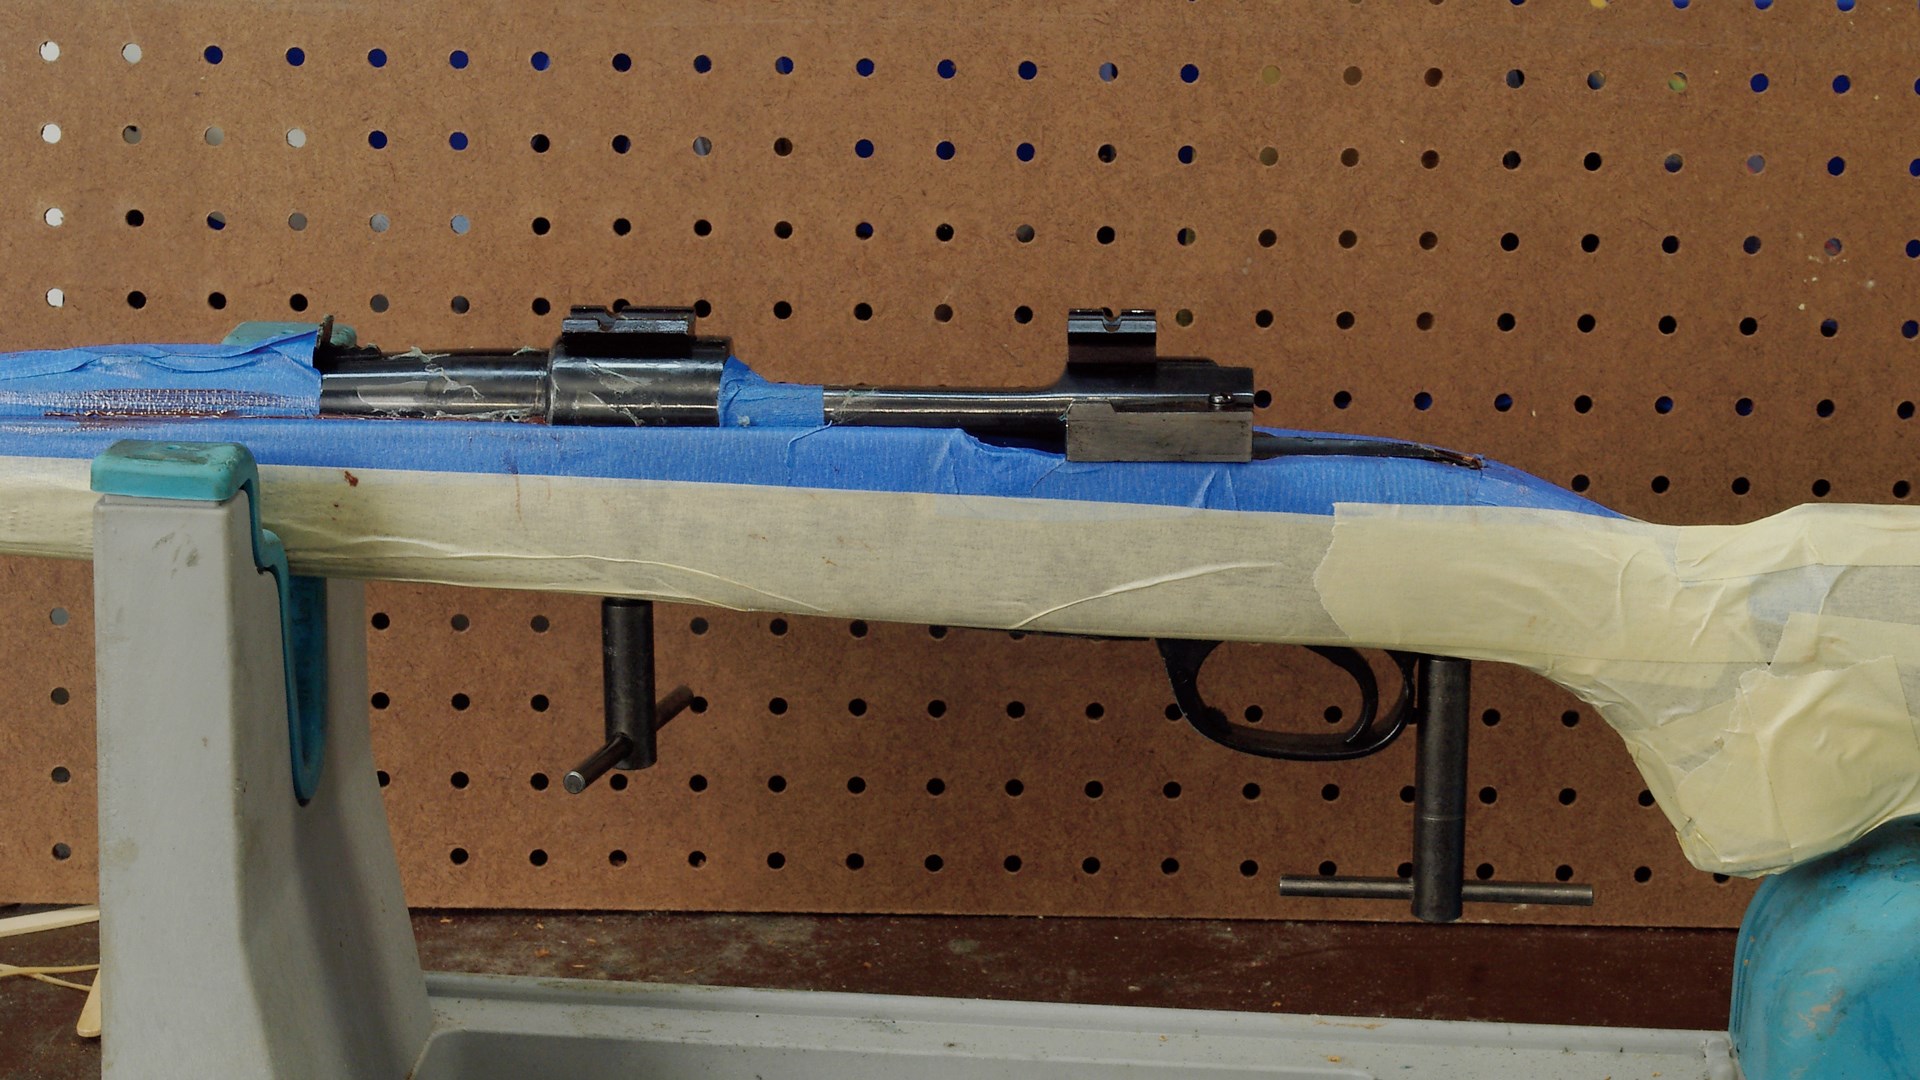
These guidelines are for wood or laminate stocks, but apply to most synthetic stocks, too. Remove the action screws and take the rifle apart. Slide the magazine-follower spring out of the floorplate, and place it and the magazine box in a safe place. Place the stock in a cradle that will hold it while you work.
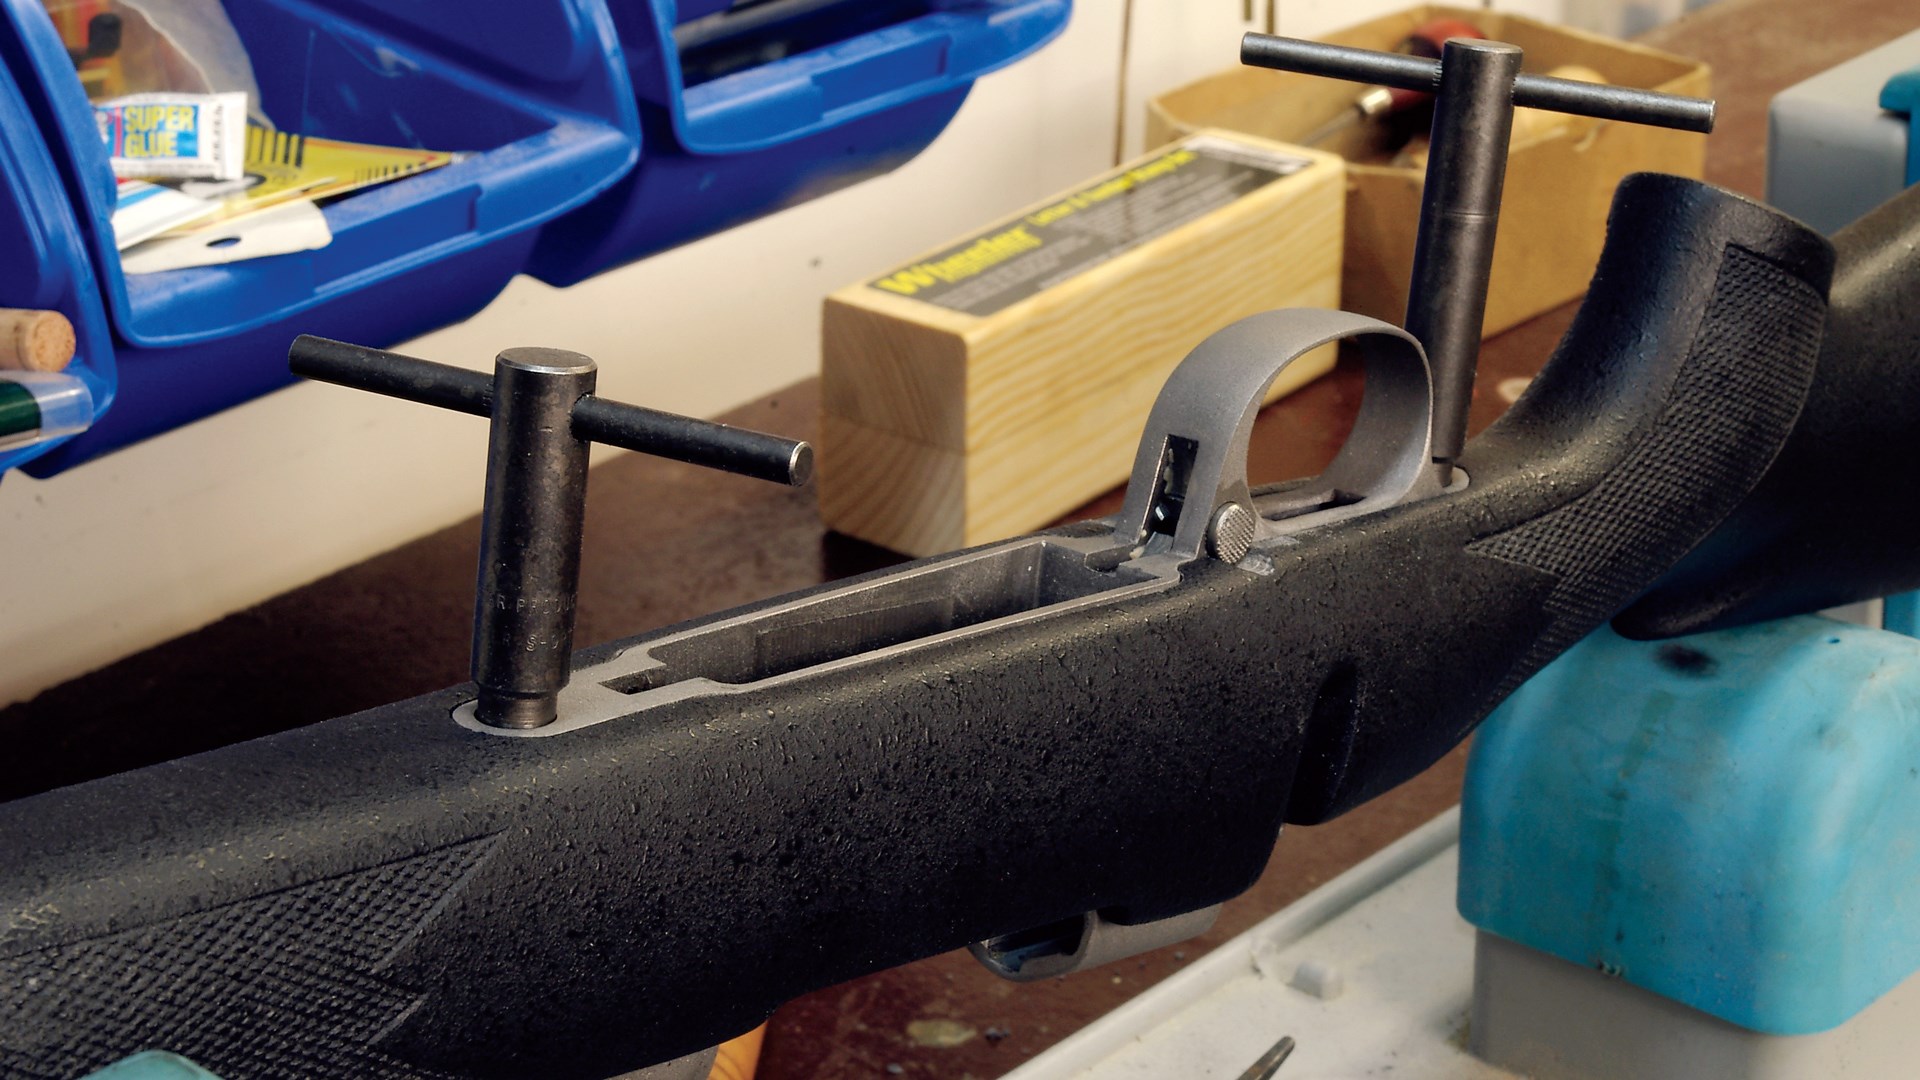
The bedding process will require disassembly and reassembly several times.
Remove a thin layer of wood everywhere the action or recoil lug contacts the stock ahead of the magazine, leaving a small strip about 1/4" wide between the action screw and the recoil-lug mortise to support the action until the bedding compound has hardened. Do the same to the area where the recoil-lug face contacts the stock on the load-bearing side. Don’t worry about keeping the areas you cut away neat or smooth—the rougher the surface, the more contact area for the bedding compound to mate with. The idea is to create a gap between the metal and the wood, and the small strips you leave in place ensure that the action rests in the same place as it did before you removed the wood.
Drilling Down
Next, put the gun back together without the magazine “guts” and snug the screws tight. Wrap a dollar bill or similar-thickness paper around the barrel and slide it between the barrel and stock to make sure there is clearance. If the stock contacts the barrel, mark the spot with a pencil and, after taking the rifle apart, remove the wood from the offending area.
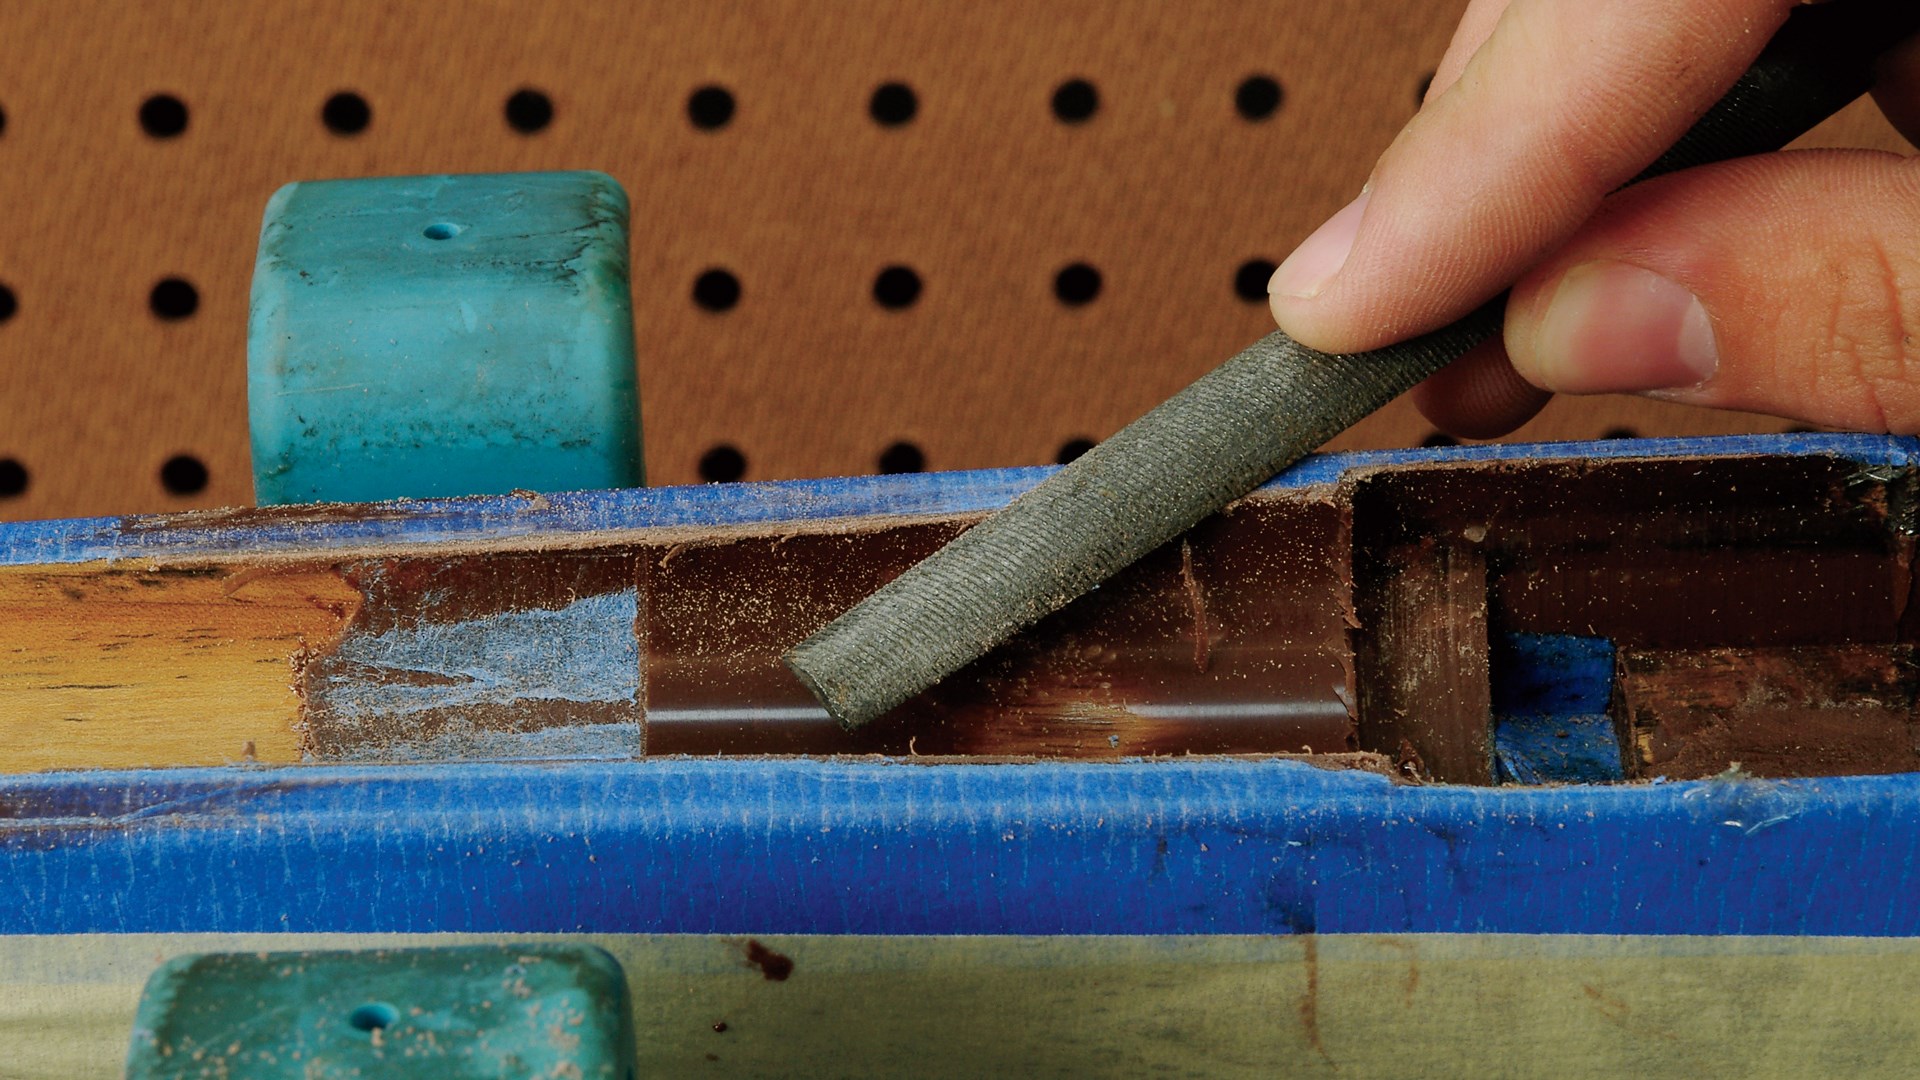
Carefully remove any offending high spots with a file or rasp.
The area under the barrel will not show, but remember that the inside edge of the barrel channel will, so, go very carefully when working on this top edge of the channel. Put the gun back together, and check the clearance again. Repeat until the only places in front of the magazine making contact are the thin strips of wood you left to support the action and recoil lug. The action should sit high enough in the stock that the centerline is above the stock. The barrel should fit evenly in the barrel channel without big gaps, including underneath.
More Prep Work
Cover all the outside surfaces of the stock with masking tape. Overlap it into the barrel channel, and use a razor blade to trim it to the edge. I find it best to cover the entire stock with masking tape. Sooner or later you will have bedding compound on your fingers while handling the stock, and it can be tough to remove without damaging the finish. Fill the magazine cutout, and any other places you do not want bedding compound to flow into, with clay.
Cover the stock with masking tape to protect its finish from bedding compound.
Degrease the metal parts of the barreled action. Fill the magazine gap in the action with clay, as well as any screw holes or other places that should not have compound in them. Cover the recoil lug, except the load-bearing rear face, with two layers of masking tape. That will create a gap around the recoil lug except where it transfers the recoil to the stock.
Nuance Or Nuisance?
Most rifles shoot well with the front of the action and the first few inches of barrel glass bedded and the remainder of the barrel left floating. But some simply prefer pressure on the barrel near the stock’s fore-end tip. It seems everyone has an opinion on this, but in this article we’re mostly concerned with the process.
To bed the front of the action and the first few inches of barrel only, while leaving the rest of the barrel floating, begin by placing two layers of 2" electrician’s tape along the barrel. End it where you want the bedding to end and cut the ends square. That will create a gap between the bedding and the barrel. Try putting the gun together to make sure the tape isn’t hitting the barrel channel and consequently preventing assembly. This is one of those things best discovered before you have the bedding compound in place. If the fit is too tight, switch to a single layer of tape, or try masking tape, which is thinner.
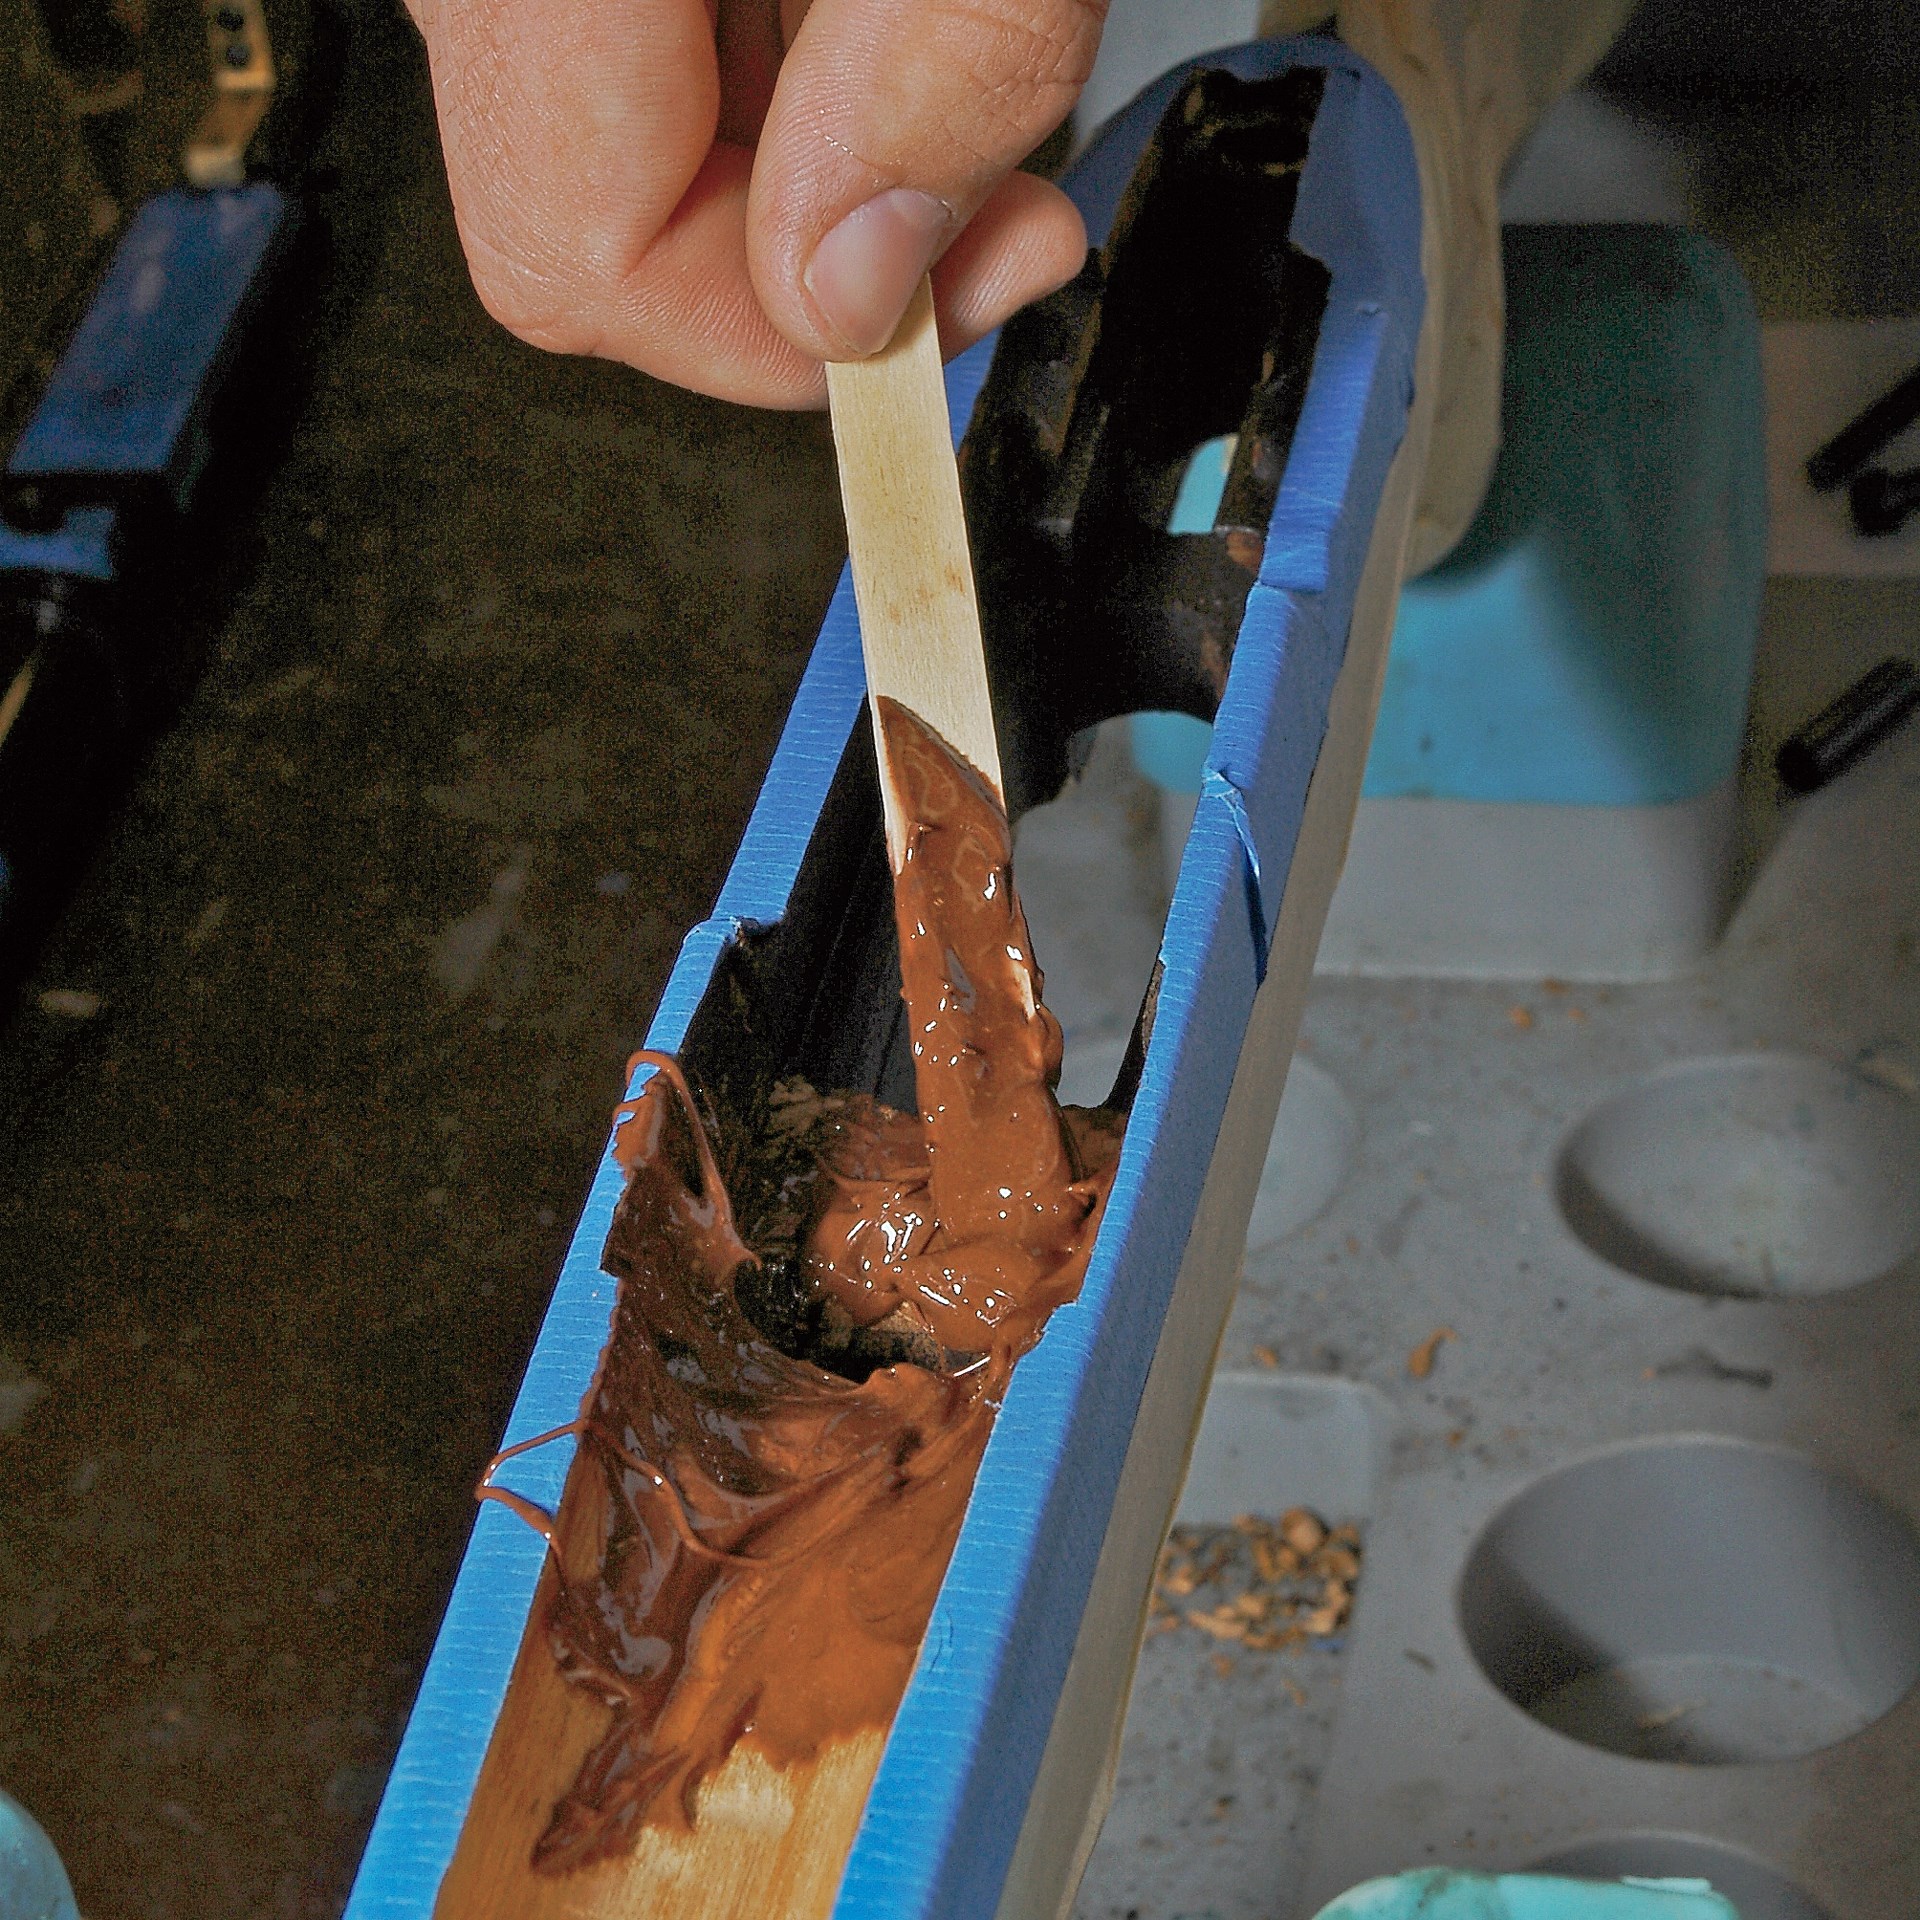
Apply the mixed and dyed compound to the stock using a flat wooden stick.
Now paint the entire barreled action with the release agent supplied with the bedding compound. Coat all the metal, tape and clay. Let it dry and repeat. Hold the gun under a light to make sure you have complete coverage. Let the release agent dry completely. Don’t forget to coat the action screws and inside the holes, as well as the trigger guard and bottom metal. Coat the tape along the top and down the sides of the stock. Be careful not to get release agent on the inside where you want the bedding compound to stick.
Putting It To Bed
One of the best bedding kits on the market is the Miles Gilbert Bedrock Glass Bedding Kit sold by Midway USA. The main compound is a two-part epoxy, and the kit comes with enough materials—release agent with applicators, measuring spoons, mixing cups, brown and black dyes, microballoons, and modeling clay—to bed two stocks. It includes comprehensive instructions, but the following explanation should help get you started.
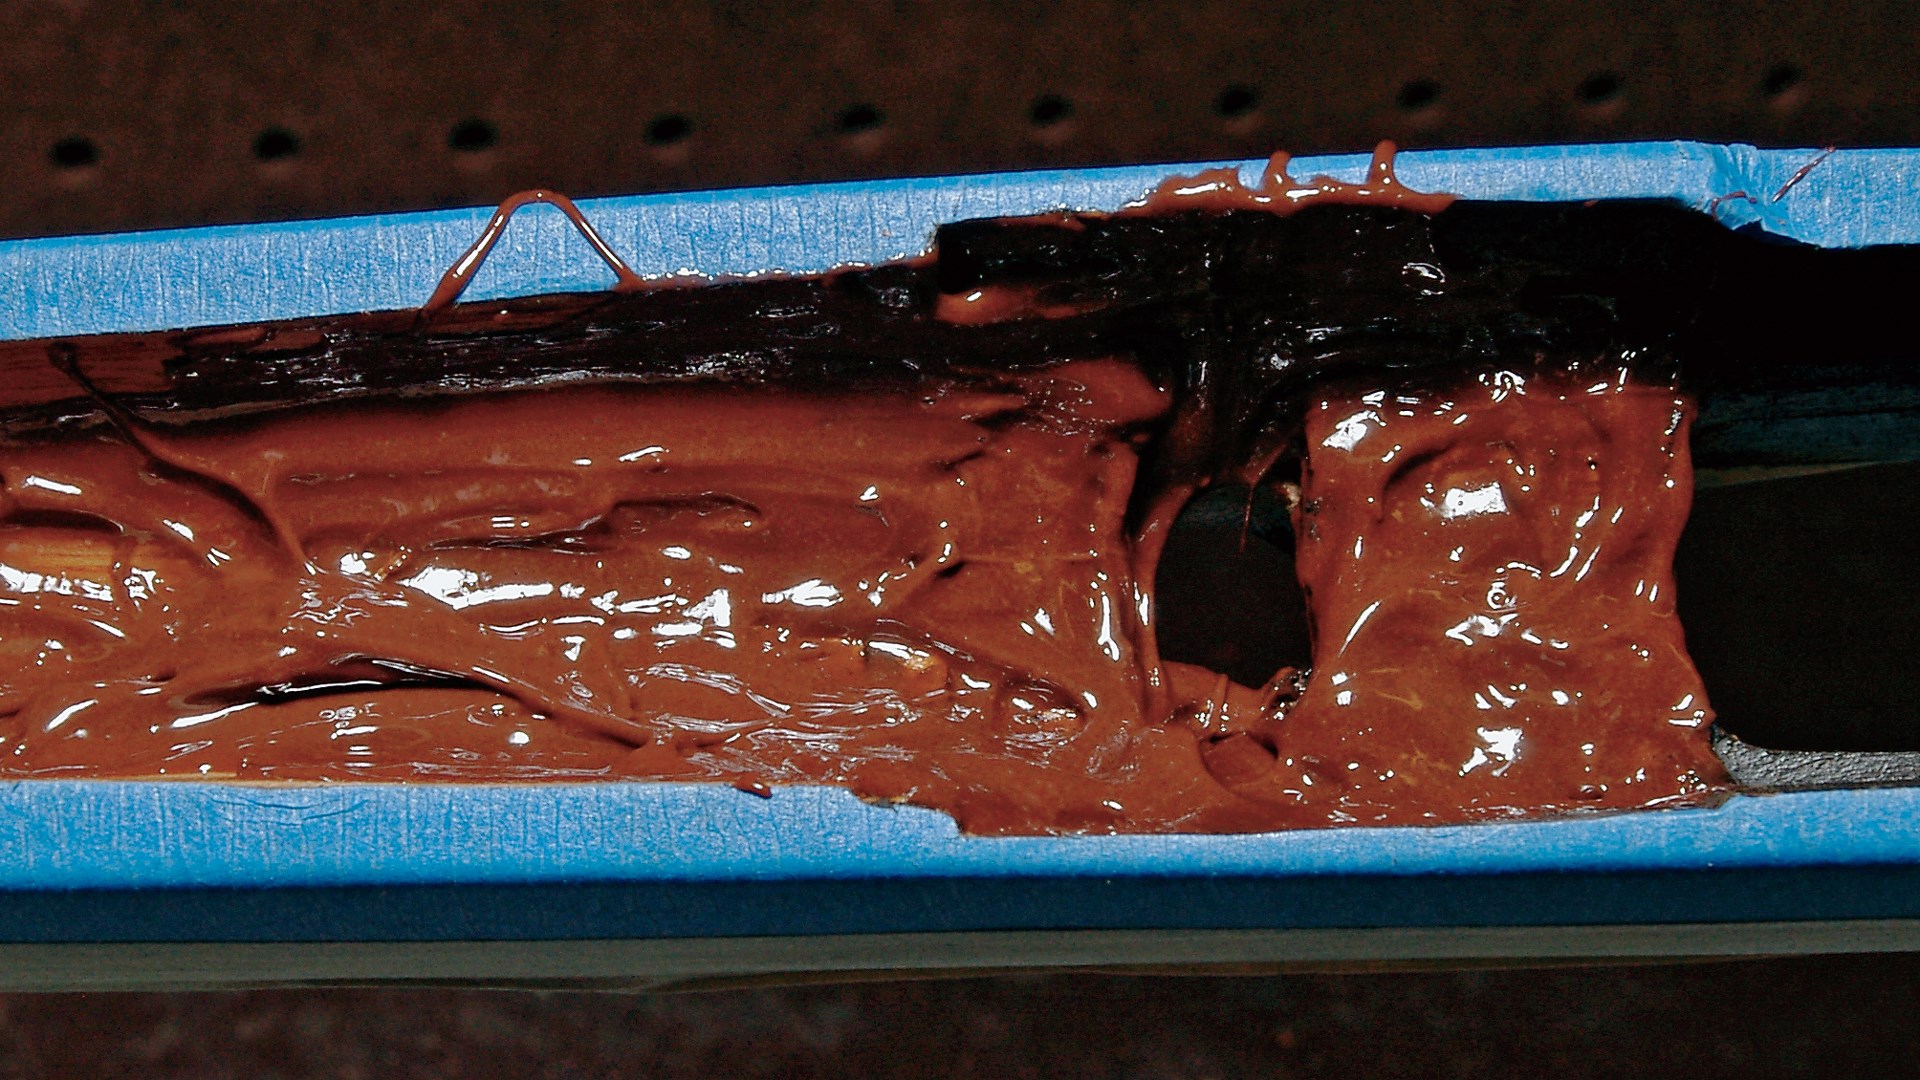
Generously distribute the compound across the entire area to be bedded.
After mixing the bedding compound well, use a flat wooden stick to spread it in the stock around the recoil lug, action and the first few inches of the barrel channel. It’s always best to bed one section of the gun at a time. For example, bed the forward action half and recoil lug area in one step. If you plan to bed the barrel or the rear of the action, do those in their own separate steps. Use a Q-Tip to make sure the hole for the action screw is clean of bedding compound. Put another Q-Tip into the screw hole in the action, and guide the other end through the hole in the stock as you carefully place the barreled action into the stock. After the action is seated, pull out the Q-Tip. Use a few more to make sure the action screw hole is clean and free of compound, then attach the bottom metal and insert the action screws. Snug them—but not too tightly. You want the action fully seated but not crushing the fibers in the stock.
Clean up the compound that oozes out. A flat wooden stick that has been cut to match the contours of the barrel works well—then leave the gun alone overnight. Resist the temptation to check on it until the bedding compound has hardened fully. The next day, remove the action screws, turn the gun over, and clamp it in the cradle. Place a wooden dowel in the action and alternate pressure on it and the barrel. Keep rocking back and forth until the action comes free. If you have trouble, put the gun in a freezer for a few hours to contract the metal. If you still have trouble, you can use a slide hammer tool that will “snap” the action free from the bedding compound.
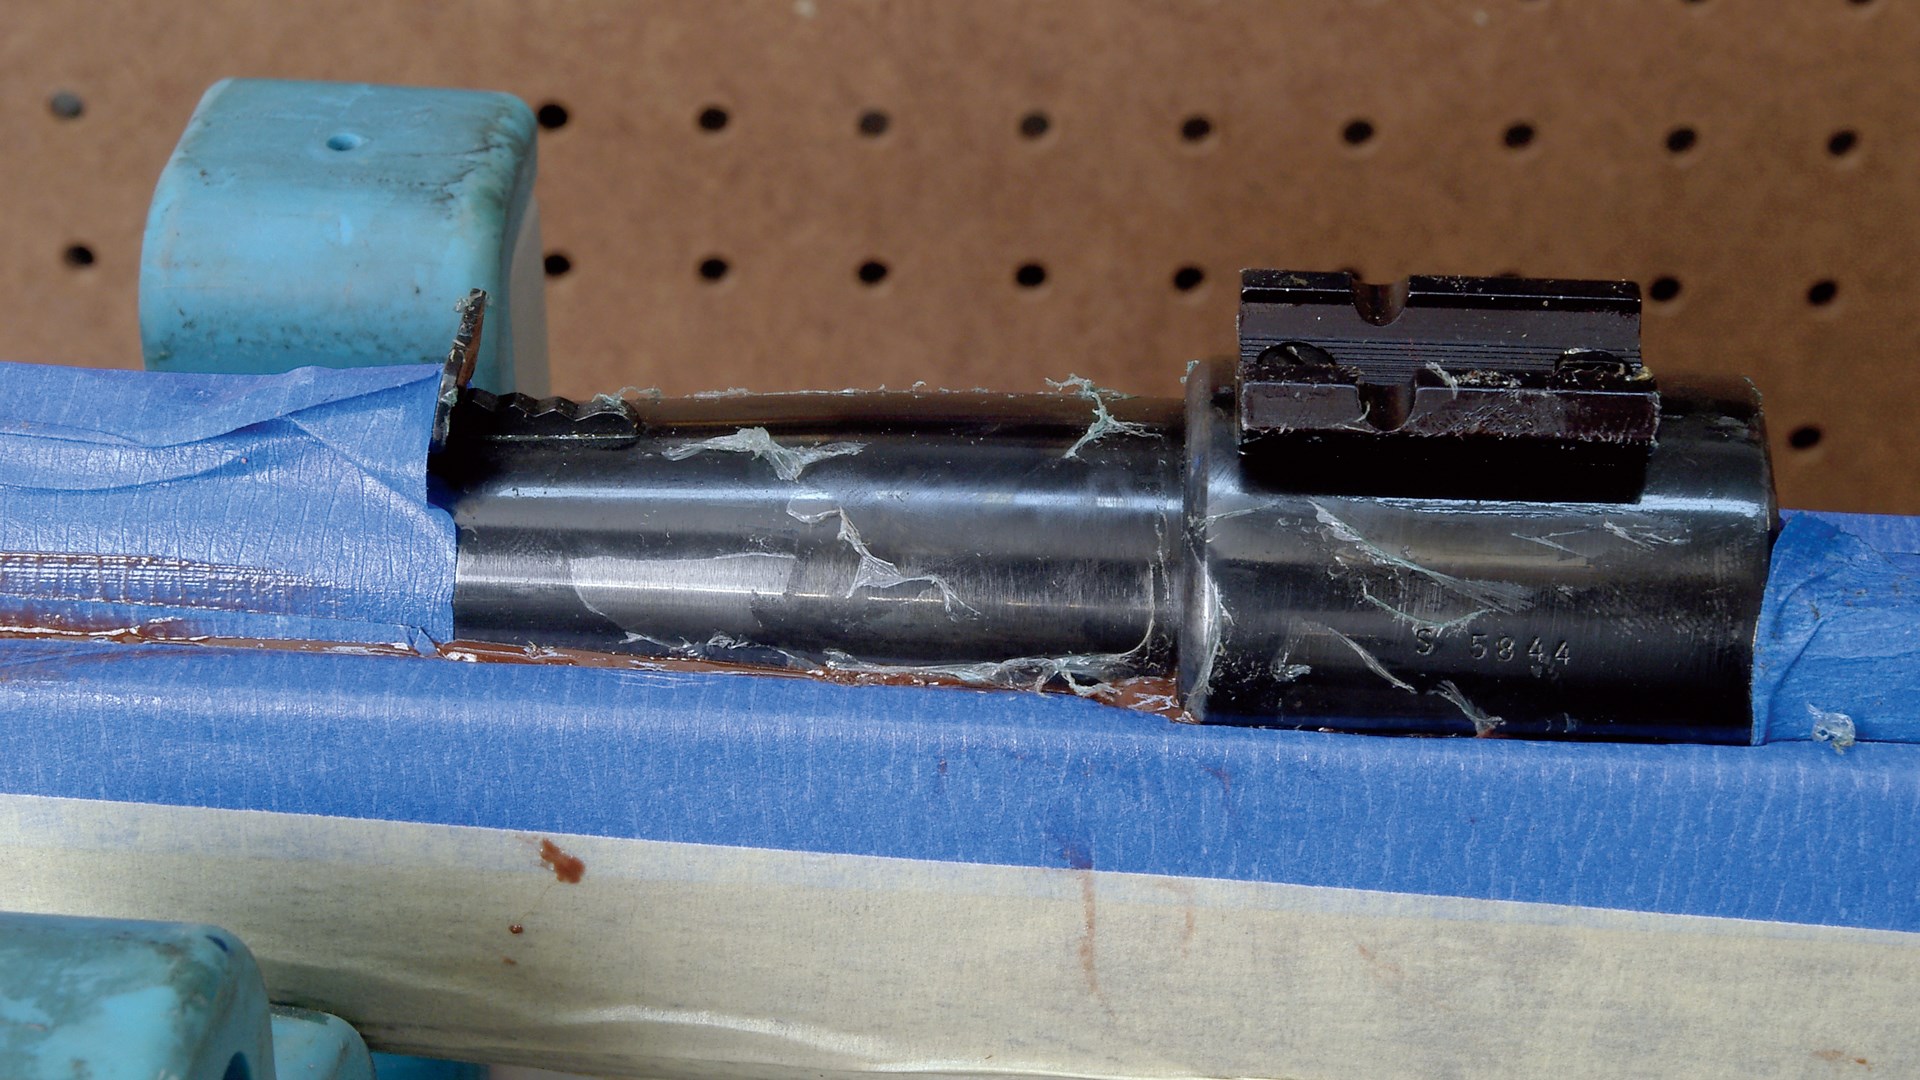
Once the action is free of the stock, use a small knife or dental pick to remove the tape from the recoil lug mortise. The compound is still soft and will cut or file easily to clean up the areas where it does not belong. Usually, you will need to smooth the top of the stock with a small file to even the compound with the wood.
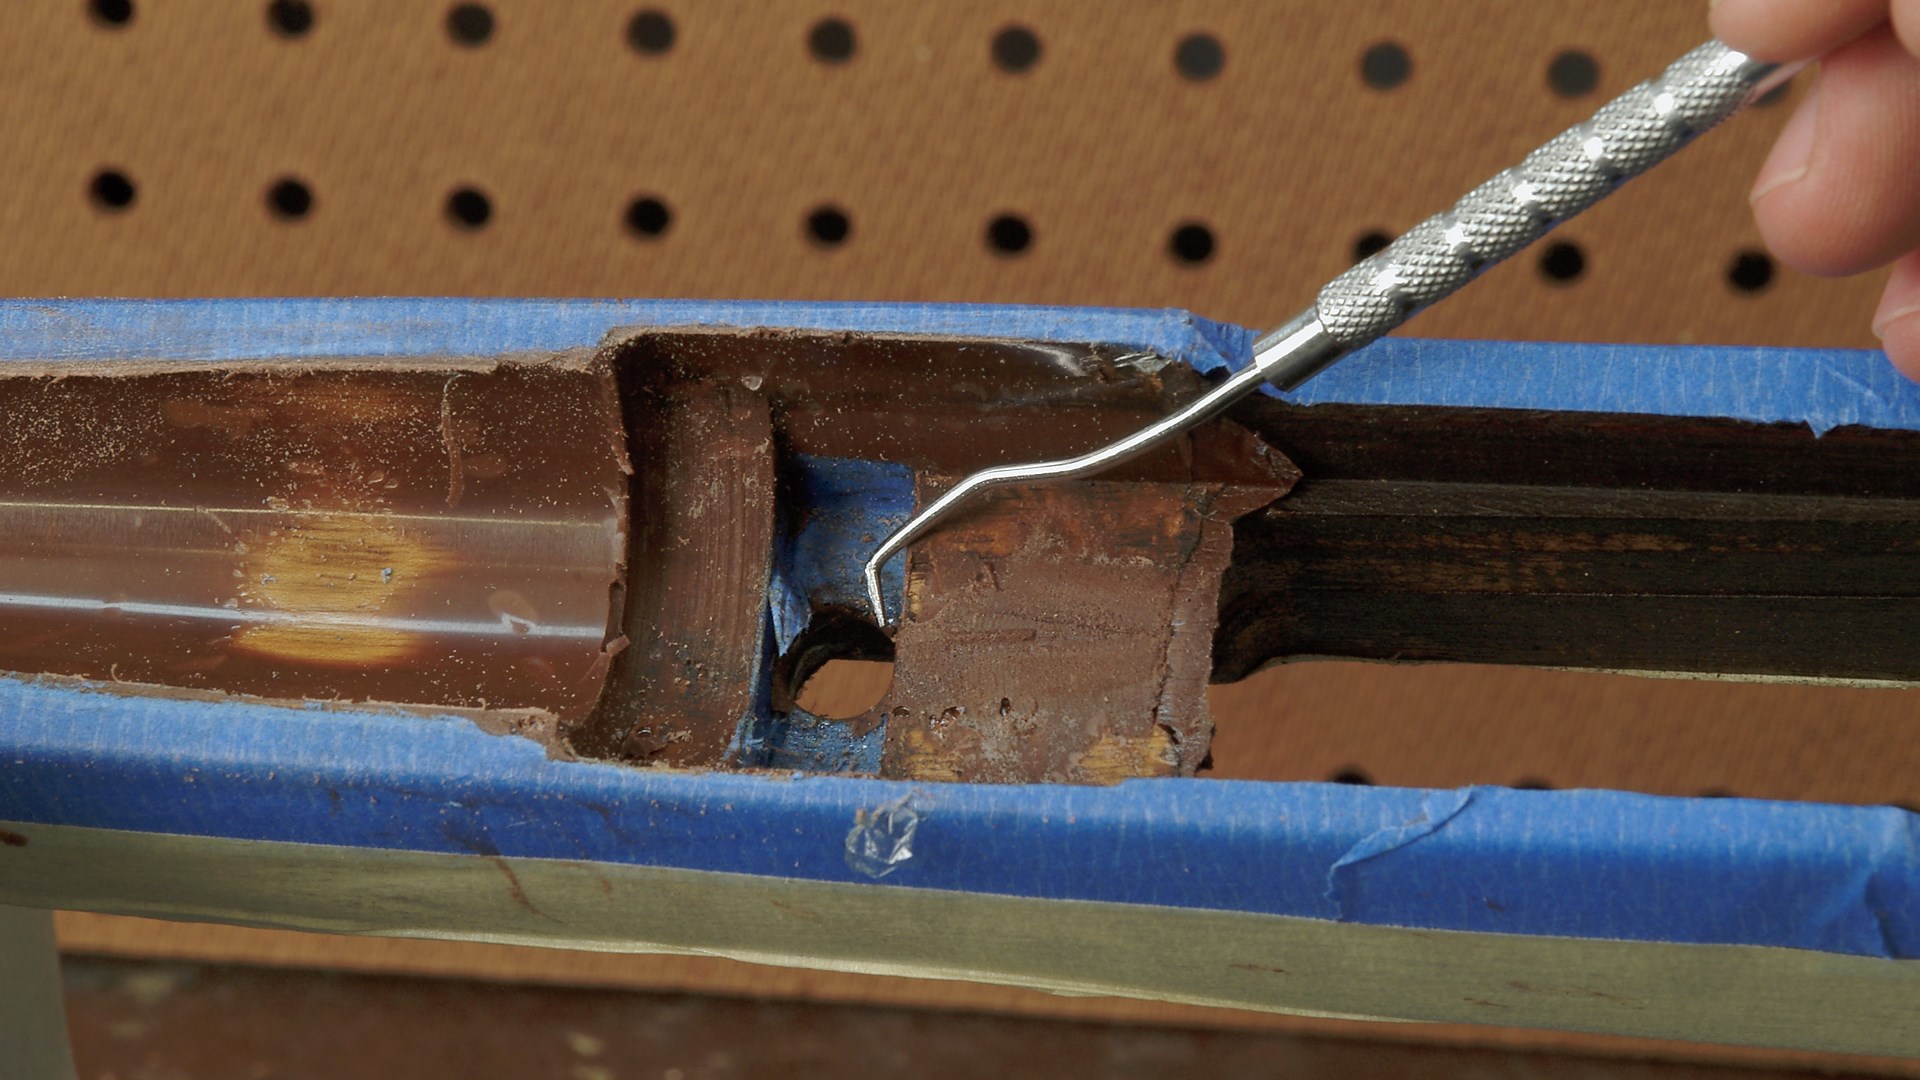
Clean any excess tape out of the recoil-lug mortise after the bedding has hardened.
If there are gaps or missed spots, they can be filled by repeating the process. Just remember to clean the release agent off so the compound will stick. If you are going to bed the barrel channel or the rear of the action, repeat the process until you have completed everything.
Wrapping Things Up
When all bedding is complete, remove all clay, masking tape and release agent. Coat any exposed wood with a sealer. Wipe the metal down with a rust preventative and put the gun back together, including the magazine parts. The action should fit tightly into the stock with no rocking or movement as you alternately tighten and loosen the screws. Finish with the screws snug but not tight. Check the barrel channel for clearance. If it’s good, put the gun away for a week, then tighten the action screws, and you are ready to head for the range.
If the rifle is still not shooting well after bedding, try an inch-wide shim between the barrel and the stock an inch or so back from the fore-end tip. Because the shim will become permanent, plastic is better than cardboard. Experiment with different thickness and placement until you find one that makes the gun shoot the way you want.
Mark the shim’s location with a pencil. Take the gun apart and coat the barrel with release agent. On either side of the shim’s location, sand the barrel channel to bare wood; but leave a 1/4" strip that corresponds with the shim that is untouched. Trim the shim to a quarter-inch wide, and place it in the barrel channel. A drop of Super Glue will help keep it in place. Cover the shim well with bedding compound and leave at least 1/2" on either side. Use enough on both sides to ensure the shim is trapped and encapsulated. Reassemble the rifle. The shim will maintain the exact pressure on the barrel until the bedding compound has hardened. The next day, take the stock off the rifle and trim the compound to the width of the original shim. (The shim should be left in place.) Clean up the release agent, seal the bare wood, and put the rifle back together.
There you have it. No, stock bedding isn’t the quick and easy process I originally thought it to be, but it can be done—and done well—with the proper preparation and patience.