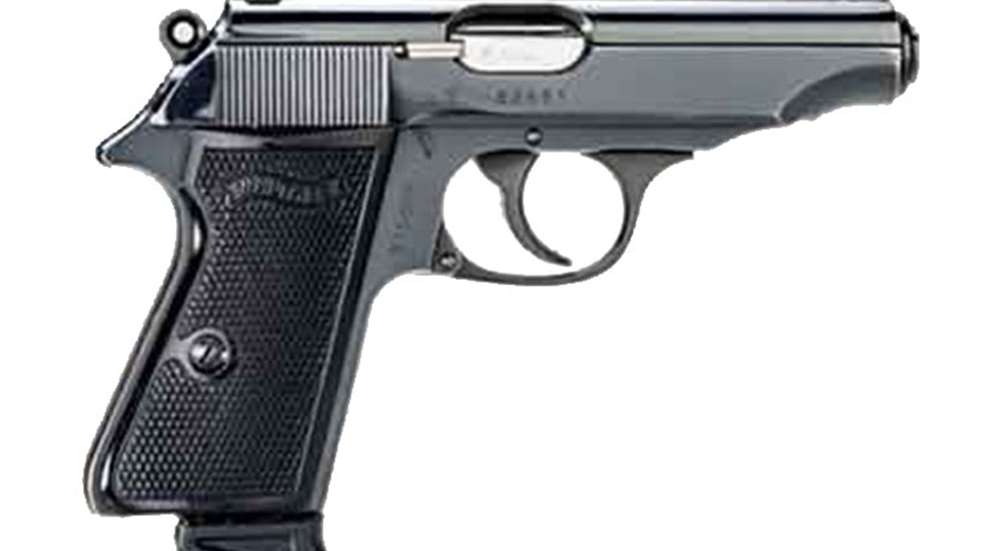
Editor’s Note. Longtime contributor to “Exploded Views” E.J. Hoffschmidt did hundreds of them for American Rifleman over several decades, including the Walther PP pistol. Here we offer some tips and tricks for disassembling your PP that may reduce frustration—and unnecessary, unsightly scratches.
1) Ignore Hoffschmidt: Do NOT TRY TO PRY OUT THE EXTRACTOR. REMOVE THE SAFETY FIRST. That little extractor spring is surprisingly strong, and if you attempt to dismount the extractor before removing the safety (following Hoffschmidt’s drawings and the NRA Firearms Assembly book), you're just itching to leave the unsightly tracks on the extractor, its plunger, or (worse) the slide.
2) Ignore Hoffschmidt: DO NOT REASSEMBLE IN REVERSE ORDER: Install the extractor last.
3) Ignore Hoffschmidt. DO NOT TRY TO PRY OUT THE TRIGGER BAR. You’re liable to break it. Instead, remove the trigger pin first. That lets the trigger come partway out, whereupon the trigger bar is easily jiggled out. If necessary use a dental pick to push the trigger bar out FROM THE INSIDE, otherwise you’ll leave scratches on the frame.
4) Ignore Hoffschmidt. DO NOT ATTEMPT TO REMOVE THE TRIGGER GUARD PIN BY DRIVING IT OUT. The pin is dog-bone shaped and is retained by tension from the trigger guard (which is a big leaf spring that serves also as the slide buffer). Their holes are not concentric and the trigger guard must be squeezed to line them up; the pin can then be pushed out easily. If you don’t, you’ll damage the pin and possibly wreck the frame.
TO REMOVE THE EXTRACTOR:
FIRST MAKE SURE THE GUN IS UNLOADED. Remove the slide. Slip a thin piece of plastic or cardboard under the opened trigger guard to hold it open and reduce adjacent scratching of the frame; it is much easier to smoothly and accurately position the slide for dismounting and remounting if you don't have to fight the trigger guard spring at the same time. (A 2”x1” flat piece of plastic cut from a motor oil bottle works well and is durable.)
Place the dismounted slide inverted on a workbench. Removal of the safety is a three-handed job, so until you get the hang of it, it's easier if you hold the slide in a padded vise. Otherwise you can hold it down with the heel of one hand while you work. The muzzle end of the slide should point toward you (it's easier that way, also less confusing to follow the directions below).
With any handy slender tool (I prefer a bamboo skewer, as I don't like to leave scratches behind as enduring evidence of a brand of gunsmithing malpractice) push the firing pin forward as far as it will go, and turn the safety down about half way toward "safe." Remove the skewer and the firing pin should stay forward. If it doesn't, you turned the safety too far or not far enough. (If during this procedure the firing pin escapes and pops back to its rearmost position, you won't be able to continue. Start over.)
Now, using a little screwdriver or any handy slender tool, push from the INSIDE of the slide against the side of the safety drum closest to the lever until the lever moves outward. Make sure the lever stays in a "middle" position between "Fire" and "Safe."
PUSH the safety drum out to the left. DO NOT try to pry it out with a tool under the lever. Eventually it can be pushed out far enough to grab it with your fingernails and pull it the rest of the way out.
AGAIN: In case it did not impress you the first time: DO NOT try to pry it out with a tool under the lever. You will leave scratches on the safety and outside of the slide and you might even break off the lever.
As the safety comes out, be prepared to catch the firing pin, which demonically wants to eject itself (under pressure from the compressed firing pin spring) into the darkest corner of your workshop.
Observe that the inside (right-hand) end of the safety drum has a pair of detent holes. These mate with a pointed detent plunger on the rear end of the extractor spring. Once that spring is relaxed by removal of the safety, the extractor will fall (or can be shaken) out. Be prepared for that, and keep the slide over the workbench; otherwise you'll wonder where it went. The extractor spring and its two plungers can be pulled forward, past the ejection port, and out of the slide. Don't try to pull it out the back. Now is an opportune time to clean any gunk out of the extractor spring tunnel.
To reassemble the safety, DO NOT proceed in reverse order. Leave the extractor and its spring and plungers until last. Begin by replacing the firing pin and spring. Then insert the safety drum into the slide with its lever in the "middle" position between "Safe" and "Fire."
Push the safety into through the slide just short of the firing pin and push the firing pin all the way forward so the safety can slide past. Move the safety lever into the fire position. The firing pin should pop back rearward into the safety drum. Now insert the extractor spring with its attached plungers —the pointed safety detent plunger to the rear and extractor retainer to the front. Make sure the extractor retainer is correctly oriented with its tongue facing outward to properly capture the extractor.
Now hold down the slide firmly on the workbench and, using the stud of the extractor as a tool, compress the extractor spring into its tunnel until the extractor can be snapped down into its slot in the slide. Rock it back and forth to make sure it’s engaged; the retainer tongue should override the rear of the extractor.
You're done.