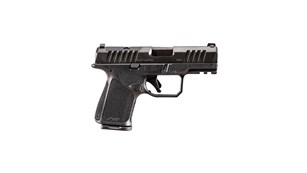
The “keep it simple, stupid,” or KISS, principle applies to most things in life. Training with a defensive handgun is no different. To employ a handgun effectively in a defensive situation, you must be able to get it into play smoothly and deliver accurate hits before the attacker injures or kills you. And the only realistic way to accomplish that is to practice the skills you could reasonably be expected to use in a life-or-death situation before it occurs. They include drawing the handgun, hitting the target, moving, using cover, reloading and clearing a malfunction. The following is a 100-round training regimen, consisting of five drills, that takes all these skills into account. Become proficient with them now, and you will be better-prepared for the dark day when trouble comes to call.
The Dot Drill (24 shots)
I strongly believe that most defensive handgun practice should start with the gun holstered. This lets you practice your draw stroke or handgun presentation more frequently. When practicing basic skills most shooters draw the handgun only once and burn through an entire magazine before they holster again, if at all, which wastes precious opportunities to practice handgun presentation.
Position a target with six 2-inch circles at between 5 and 7 yards. Shoot one shot at each circle, drawing the handgun from the holster before each shot. The goal is to fire one shot at each circle and hit each target once. This is not a speed drill, but rather it’s an accuracy and gun-handling drill to help you establish a foundation for gun presentation, sight alignment and trigger control. Conduct this drill four times at the beginning of every trip to the range.
The Failure Drill (24 shots)
Il Ling New, an instructor at Gunsite, is one of the best firearm instructors I know. She believes practicing head shots at between 5 and 7 yards is a great way to stay sharp. Why? According to New, “The idea is to become absolutely confident in making that shot, at least at that distance, every time, under all conditions and on demand. If I can do that, I am well-equipped to deal with bad things that may happen to me. Vital zone shots at 15 yards should be easy if one can do head shots at seven yards.”
I agree, but to maximize training opportunities I like to incorporate head shots with torso shots in what’s called a failure drill. The failure drill presents the problem that you have engaged an attacker with two shots to the torso and they have had no effect. To stop the attack, you transition to the head as a target and fire one shot.
Position a silhouette target at between 5 and 7 yards. At the signal, draw your handgun and fire two shots in quick succession to center mass. Then, immediately fire one shot to the center of the head. You’ll have to slow down to make the head shot count. Something between three and four seconds is commonplace. Perform this drill eight times during each practice session to establish your average time. Work toward a goal of completing the drill with no misses in less than three seconds.
New also stresses the importance of practicing head shots from every position you can think of; not just while standing square in front of the target. You can do the same with the failure drill.
The 45 Drill (25 shots)
Even a disciplined shooter’s reaction to a stressful situation can be chaotic. The first few times police officers and good competitive shooters are subjected to close-quarters, force-on-force training, a common reaction is to point their handgun at the threat and to pull the trigger until they run it dry. The same response has been observed in gunfights. Adrenalin surges prompt the shooter to thrust the gun forward and pull the trigger fast and repetitively.
We cannot simulate the stress levels you’ll experience in a life-and-death encounter, but we can simulate your reaction. This is why I believe the adrenalin dump drill is important. If your reaction is going to be to shove the handgun toward the target and start yanking on the trigger, then learn how to do it effectively. I call my version of the adrenalin dump drill “The 45 Drill,” because the drill has four elements of five—five shots at a 5-inch circle at 5 yards in five seconds.
This is a difficult task for many shooters, especially when drawing the handgun from concealment. If you can successfully perform this drill on demand, under time, with no misses, you should be able to pass any shooting requirement necessary to obtaining a concealed carry license. Practice it five times each training session. At first you’ll probably have several shots land outside the 5-inch circle, and your time will be slow. Slow down your shot cadence even more and strive to get all five shots in the circle. Once you can do this consistently, gradually speed up with the ultimate goal of completing the drill in less than five seconds.
The El Prez—Modified (24 shots)
The likelihood of your being attacked is slim, and the likelihood that it will be by multiple attackers is even slimmer. But the threat of multiple attackers is not the only reason we practice multiple-target drills. Learning to transition from one target to the next, especially when they are set at different ranges, teaches you to obtain a sight picture quickly and to control your shot cadence based on range to the target.
One of the most famous multiple target drills was made so by Gunsite founder Col. Jeff Cooper. It’s called the El Presidente. I’ve modified it through the years as a means to help me evaluate shooters and track skill development. My modifications come from my experience as a police firearm instructor and what I’ve learned from other shooters I respect and trust.
For instance, Sheriff Jim Wilson believes you should learn to shoot from cover. This makes perfect sense; there’s no use standing in the open while the bad guy shoots at you. “Top Shot” winner and former British Army Capt. Iain Harrison likes to incorporate movement, and this makes sense too—a moving target is harder to hit. And, if you stand in one place when you practice, you’ll likely do the same in a fight. Caleb Giddings, “Top Shot” competitor, revolver aficionado and active competition shooter, believes the ability to reload your handgun in a hurry is important. While it’s unlikely a defensive encounter will reach the point at which a reload is necessary, the steps to reloading are similar to those required to clear a malfunction.
This 12-shot drill is somewhat unrealistic, but it does provide the opportunity to evaluate a variety of handgun skills and is a good benchmark to use as an evaluation tool. Place a silhouette target at 3 yards, one at 5 yards, and one at 7 yards. Space them 5 feet apart laterally. Start by standing in front of the right or left target, and at the signal engage each target with two shots working from the closest to the farthest. Then, move laterally about 10 feet to cover, reload and repeat the drill from behind cover.
Completing this drill in less than 10 seconds with all kill zone hits demonstrates a high level of proficiency. Times between 12 and 18 seconds with no misses will be average. Run this drill twice at the end of each practice session. Use it as a standard evaluation exercise and over time you’ll see improvement in each skill the drill targets. Take your total time and add five seconds for every miss. Add the times from both runs together and divide by two to get your score.
Other Training Tips
The basis for all marksmanship training is sight alignment and trigger control. Both must be mastered before realistic self-defense training can begin. One of the best drills for learning and sustaining these skills is dry-fire. Some shooters look at dry-fire as pointless. It’s not. The best shooters in the world do it regularly. It’s a very good way to develop hand/eye coordination and kinesthetics or proprioception—the unconscious perception of movement and spatial orientation arising from stimuli within the body itself.
Any time you dry-fire, remove all the ammunition from where you are practicing, double and triple check that your handgun is unloaded and be sure that you are working—pointing your handgun—on a safe direction. Using a snap cap is a good idea, regardless of whether your handgun maker recommends one.
Basic dry-fire is nothing more than pointing the unloaded handgun at a target and squeezing the trigger while you keep the sights aligned on the target. You want to execute the trigger pull without disturbing the sights. Handgun-mounted lasers can help tremendously and there are even training lasers designed just for this purpose. If you flinch or snatch the trigger it will show up as a wiggle or jerk of the red dot on the target.
You can also dry-fire all of the drills explained here. However, unlike revolvers that let you experience a real trigger pull over and over, you will have to cycle the slide or cock the hammer of some semi-automatics when dry-firing. This is not an issue for individual shots, but it is not compatible with multi-shot drills. Don’t worry; just go through the motions of the failure drill, the 45 and the modified El Prez. You may not experience a true trigger pull for each shot, but you will still be establishing a foundation that commits to memory the presentation and manipulation of the handgun, movement, and sight alignment.
Becoming proficient with a defensive handgun is no different than becoming a good golfer or typist; proper practice is the key. Iain Harrison told me that he believes a .22 Long Rifle pistol is a great training tool, and he often takes a brick of ammunition to the range. This makes perfect sense; .22 Long Rifle ammunition is very affordable when compared to center-fire defensive handgun ammunition. The handguns also have minimal recoil and muzzle blast, both of which are detrimental to establishing the basics of marksmanship.
I believe one of the best training tools you can acquire is a .22 Long Rifle conversion kit for a semi-automatic handgun or a .22 Long Rifle revolver that is an understudy to the revolver you carry for personal protection. This lets you train at a fraction of the cost, but with a handgun that emulates the one you carry. I’ve run thousands of rounds through a Kimber .22 Long Rifle conversion kit for an M1911 and routinely used it as a practice tool and as a trainer for new shooters. As you progress through your training you need to incorporate shooting with one hand—both left and right. Start this process with the rimfire handgun or conversion kit.
How often should you practice? I’ve said before that, financially, we are all somewhere between a single box of ammo and a bodyguard. Not only are our pocketbooks a constraint, but we also have to operate within time limitations. The correct answer with regard to how much you should practice is simple: as much as possible. Some need more practice than others to develop skills and sustain them. You’ll have to find a balance based on how proficient you want to become and what your pocket book and your watch will allow.
