Once all the parts were in order, I traveled to Kamas, Utah, to the headquarters of MOD Outfitters. Mike and Gary inspected the components to verify that they were sound and that all of the small bits and pieces were present and accounted for.
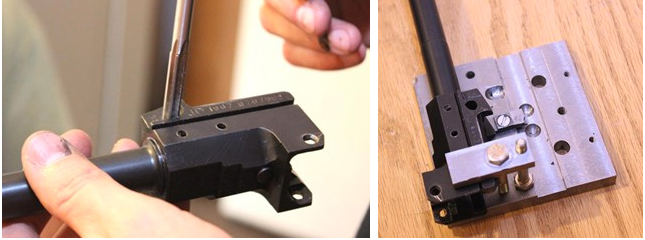
For most rifle designs the receiver is considered the foundation of the gun. However, in the case of the AK platform, it’s the front trunnion block around which the rifle is built. This block is the first piece to be added to a new barrel. 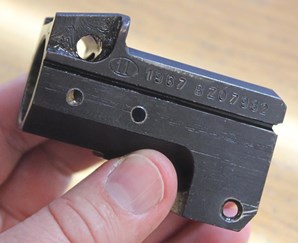

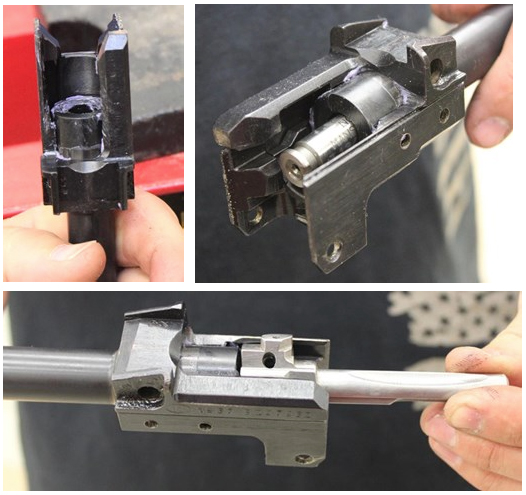
The chamber end of the barrel is greased and pressed into the front trunnion using a hydraulic shop press. It's important to buffer the threaded muzzle with something relatively soft, like a penny.
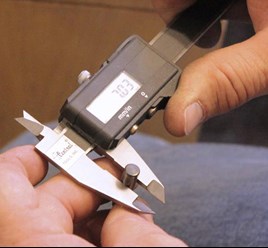
Once the barrel looks like it’s in the right position, the cartridge head space is checked using the bolt, a Go gauge, No Go gauge and a cartridge case. Correct headspacing is critical to proper rifle function, so the barrel will be pressed in or out of the front trunnion by small degrees until the spacing is just right.
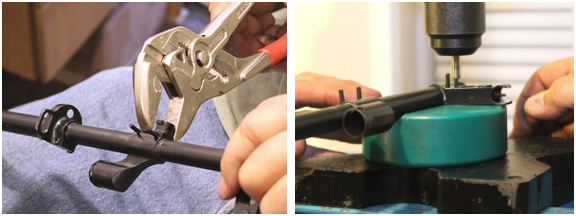
Because the barrel must be aligned to the trunnion for proper headspacing, new barrels do not have a notch in them for the support pin that secures the barrel to the trunnion. The process of cutting the notch starts with filing out as much metal as possible without damaging the trunnion. The barrel pin is checked with digital calipers to ensure it’s the right size.
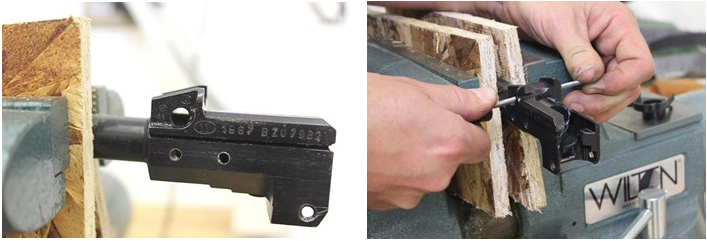
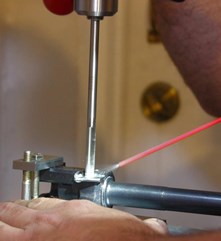
An end mill cutter bit used in a drill press produces better results for this step than a typical drill bit. The cutter is checked against the trunnion for size, the barrel assembly is clamped into a jig, and then the barrel pin channel is milled at high speed with spray-on lubricant to keep everything moving smoothly.
With the channel cut, the barrel pin is greased and pressed into place. Now that the trunnion is secured to the barrel the headspacing is checked again. 
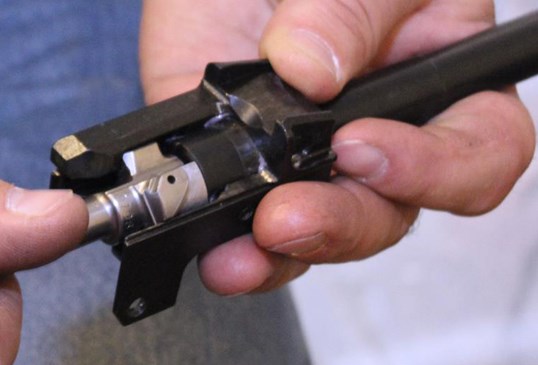
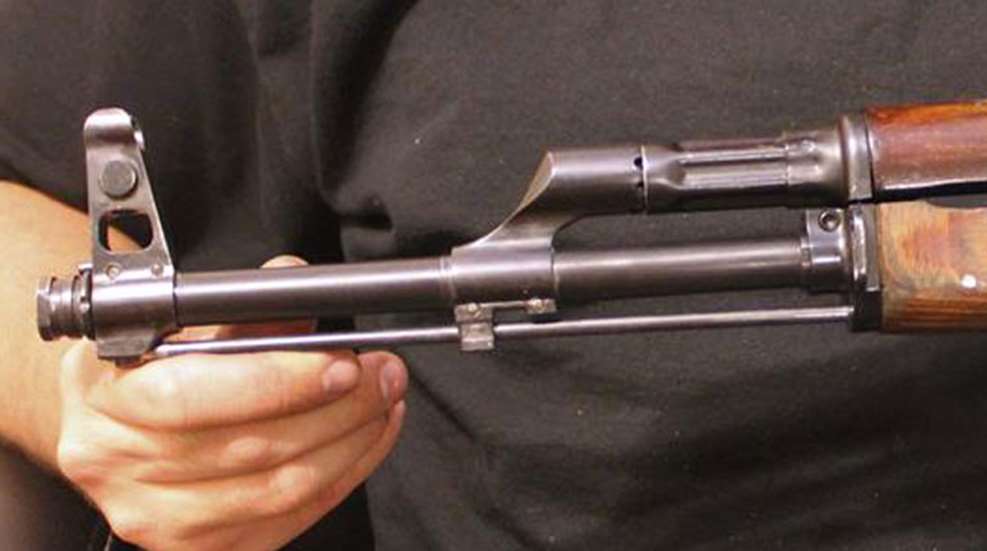
The next component to be attached to the barrel is the rear sight base. It rests against the front trunnion, so the alignment must be carefully checked before and during the process of pressing it into place.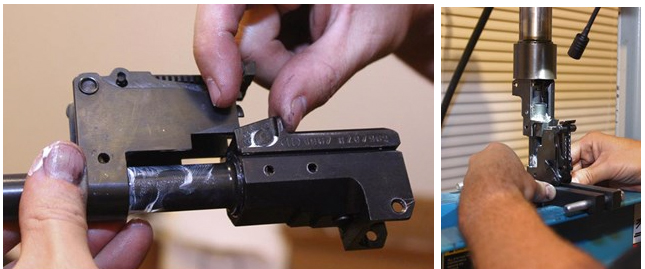
An alignment guide is used to check the position of the gas-port block in relation to the rear-sight block before placing the barrel assembly back in the press. Don't forget to slide the lower handguard band into place before attaching the gas block. 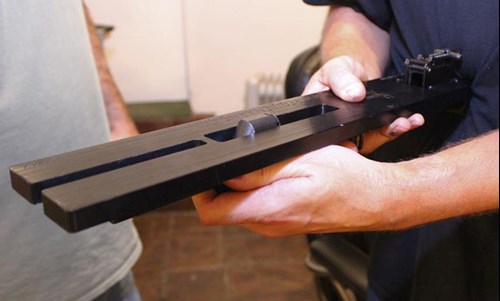
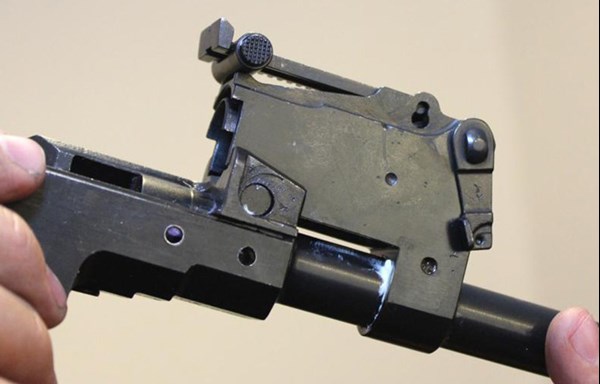
The gas block is pressed on to the barrel with the gas tube held in place to watch the spacing. There should be just enough play to allow the gas tube to be removed for cleaning when released from the rear sight base. Mike plugs the barrel's chamber and blows through the muzzle to verify the gas port is clear.

The last part to be pressed onto the barrel is the front sight base. If it's installed carelessly there's a good chance it will lean to one side and spoil the sight picture. Mike and Gary were careful to ensure the front sight's alignment was correct before pressing it into place.
The result of taking the time to check and re-check part placement throughout the barrel population is a nice straight line-up from the back to the front of the barrel assembly.
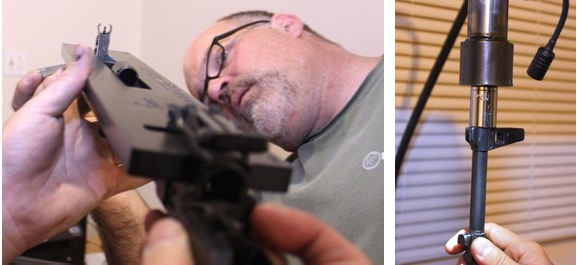
The gas port block and front sight pin channels are then drilled into the barrel. 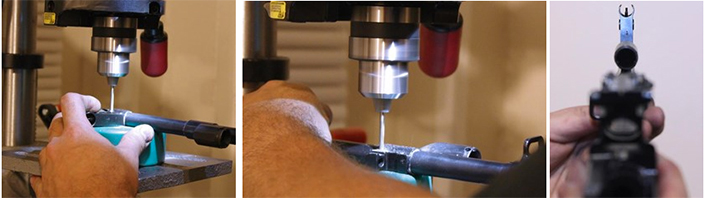
The pins for both units are set in place with pliers and then driven home with the shop press.
With the barrel fully populated the rest of the supplied barrel parts were installed to check for proper fit. The gas tube, wooden handguards and cleaning rod all snapped into place without any need for adjustments. Thanks to the quality of the parts (and the skill of the team), the barrel population went smoothly.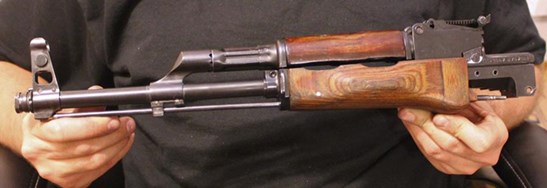
Continue Reading "Build Your Own AK":
Build Your Own AK-47: Introduction
Build Your Own AK-47: Part 1--Selecting Components
Build Your Own AK-47: Part 2--Populating the Barrel
Build Your Own AK-47: Part 3--Populating a Factory-Built Receiver
Build Your Own AK-47: Part 4--Bending and Welding a Receiver Flat
Build Your Own AK-47: Part 5--Refinishing and Reassembly
Build Your Own AK-47: Part 6--At the Range
Build Your Own AK-47: Conclusion