So you have accumulated a small but heavy crate of lead alloy ingots lounging in your garage. What you need to do is convert it into shootable bullets. Here’s how:
Gearing up
My first casting set up consisted of an iron pot on a Coleman stove, a lead ladle and a couple of two-cavity moulds. At the time I had virtually no money, but a fair amount of time. It would take the better part of a couple of days to cast 500 bullets. Results were off and on, but as the casting sessions progressed my bullets finally achieved a degree of consistency. Toward the beginning, though, a lot of wrinkled and rounded-base bullet failures went back into the melt for another try.
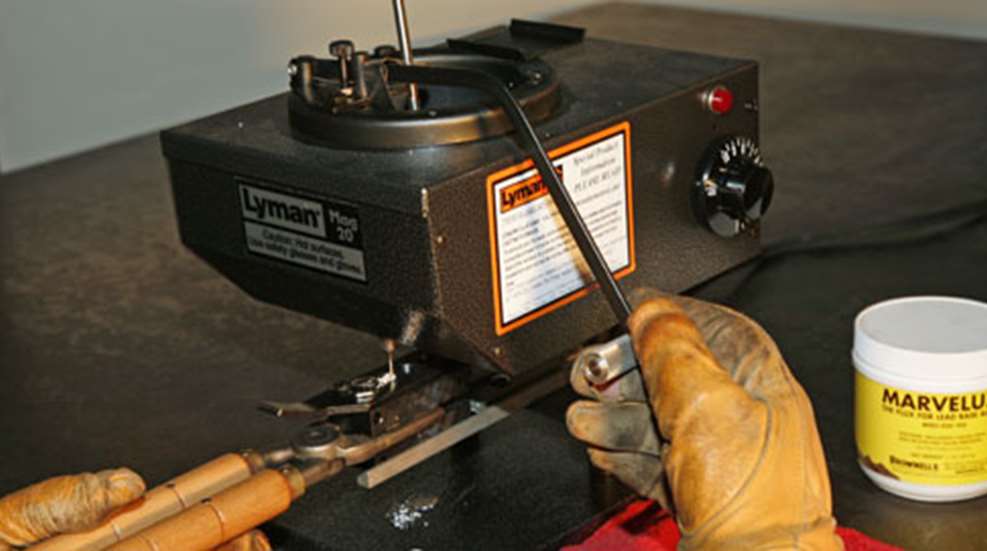
While it is still possible to produce very good bullets in this manner, most casters have gone to the electric furnace. The electric furnace is faster, safer and offers the capability of controlling the temperature of the melt, hence the ability to keep the alloying metals in the alloy. The furnace can be the most expensive single piece of equipment you will need, though if you become very active in cast-bullet shooting you can spend a lot more on a variety of moulds. Prices for furnaces range from $60 for a Lee Production Pot to nearly $500 for an RCBS or Lyman Mag 20. I have cast good bullets from a Lee furnace—and a lot of my shooting buddies use them as well—but I appreciate the conveniences that my Lyman and RCBS furnaces provide. Most furnaces provide a bottom-pour option; meaning they have a spout located at the bottom of the pot with a valve activated by a lever on top of the pot. If you are casting a lot of bullets the bottom-pour option can save a lot of time.
Next up on the equipment list is bullet moulds. If you are an active shooter, plan on getting several. Many pistol bullet moulds are available in four- and/or six-cavity configurations. They cost more than a two-cavity—upward of $90 for the Lyman four-cavity ones—but are well worth the money in return for the production capability. In years past there were some concerns regarding the consistency of bullets from a four-cavity mould, but today’s much tighter manufacturing tolerances largely make that a moot point except for the benchrest crowd. Lee makes some six-cavity aluminum moulds for those wanting to really pump up the volume. I personally have not tried one yet, but one of our Cowboy Action Shooters uses one to crank out a high volume of .38-caliber bullets. He has yet to voice any complaints.
You will need something to hold onto the mould with as you pour molten lead into them. Some try to get by with homemade handles, but the commercially made ones are as good or better and not that expensive. Some try to get by cheaply with one set of handles, moving them from mould to mould, but in my opinion that is a waste of time. I prefer a set of handles for each mould.
One last necessary piece of equipment is a thermometer. The temperatures shown on most furnace power dials are meaningless. A lead thermometer costs between $30 and $40, and offers some repeatability in maintaining melt temperature. Some experienced casters have learned to adjust the temperature by the way it looks and pours, but until you develop that skill, a thermometer will help you stay consistent.
Safety First
As I mentioned in the introductory article, any time you are working with molten lead, your workplace needs to be well-ventilated. A few other safety precautions are needed as well. Eye protection is absolutely mandatory at all times. At a bare minimum, that means safety glasses, preferably with side shields. A full-face shield is better, in addition to the glasses. Pay attention to the clothing you wear. It should be all cotton. Cotton burns—and can be extinguished—but synthetics usually melt when hit with heat. If molten lead splashes onto you, it will be far more painful and damaging if your clothing melts and fuses to your skin, rather than simply smoldering or igniting. Gloves can be cotton or leather, your choice. Leather protects better, but cotton usually offers better dexterity.
Getting Started
If your pot has a mould rest, adjust it so that it centers the spout hole with about a 1/4 to 1/2 inch of clearance. If, like me, you aren’t terribly coordinated, you’ll probably need a seat that puts you at near eye level with the pour spout so that you can visually align the sprue hole with the spout.
If your furnace is brand new you’ll need to wipe off the rust preventative in the pot and the bottom-pour valve. Your should also do this for brand new moulds. You do this, of course, before you plug in the furnace or heat up the mould. I typically use brake cleaner because it evaporates quickly. Everything must be clean and dry before you apply heat or molten metal to it. Getting your melt established for the first time will take a while—upward of an hour. Stack as many 1-pound ingots in the pot as it will accept, turn the heat on high and get the other stuff you’ll need arranged so that you can work quickly and efficiently. Rest the mould on the edge of the pot to pre-heat it. Stack several ingots around the edge of the pot for the same reason. As the ingots begin to soften and melt, you can carefully smash them up a bit to spread the heating surface and hasten the melt. Continue adding ingots until the pot gets fairly full.
Once you have a pot full of melt, you’ll need to flux it to ensure all the alloy components are mixed into the molten metal. Fluxing means that you deprive the surface of the melt of oxygen so that elemental alloy components won’t oxidize and float to the top. Casters are as opinionated about fluxes as politicians are about social issues. Each will swear that his or her flux is the best and is ready to defend that choice. A partial list of suitable fluxes includes: bullet lube, candle wax, sawdust, used motor oil, a wooden paint-stirring stick, chassis grease, Marvelux and planer shavings. Take your pick, but don’t overdo it, especially with those that contain volatiles like used motor oil and grease. Too much might heat the workplace up to an unacceptable level and create a flash fire. Stir the dross so that the alloy components mix into the melt. Scrape off the residual dross—I use a slotted tablespoon dedicated for this operation—and discard.
It’s likely that the first bullets you pour will be wrinkled. Some will be incomplete or have rounded bases. This is because the mould and/or the melt are too cold. Simply return these bad casts to the pot and try again. You may experience spout freeze, where the lead solidifies in the spout and won’t come out. Increase the heat until it thaws. If dross returns too quickly, try lowering the heat a bit. Make small changes so that you don’t constantly chase heat.
A Few Tips
As you develop your casting technique, try to get full, but not sloppy, sprues. You need a full sprue to ensure you have enough lead to completely fill out the mould. When the lead solidifies in the mould it shrinks ever so slightly, thus drawing a very small amount of lead into the mould. Larger, heavier bullets—say those weighing more than 300 grains—are especially susceptible to this. Some casters prefer to use a lead ladle to pour larger bullets, holding the ladle to the mould a second or two longer to ensure the bullet fills out the mould completely.
Also, make sure you give the lead enough time to fully solidify before knocking off the sprue and dumping the bullet. If you see a significant tear on the base of the bullet or a smear of lead across the top of the mould, you are going too fast.
Choose the tool you use to beat on the sprue plate carefully—no metal of any kind! When I started out, I used a discarded hammer handle. For two-cavity moulds it worked fine, but on my four-cavity moulds I ended up beating it like I was driving nails. Some casters like a dead-blow hammer. They work OK, but the plastic coating melts on the hot sprue plate. I plan on making a dedicated mallet of hardwood, heavy enough to handle the four-cavity moulds I often use. To give the head some heft, I’ll drill it out, fill it with shot and plug it.
Most casters dump their just-cast bullets on a convenient shop rag. I like to soak it in a bit of water—not sopping wet but damp—as I believe the cooling via evaporation helps the bullets cool a little quicker.
In the beginning it’s a good idea to measure and weigh your bullets. Measuring will determine whether you’ll need much sizing, if any, and weighing them will determine whether your technique is correct. For most of my pistol bullets I like to keep them within plus or minus 0.5 grains. If you are an accuracy buff with a long-range rifle the ± 0.2 grain is better. To achieve that degree of accuracy you’ll need a pouring technique that is perfect, repeatable as a metronome and an alloy that is perfectly consistent.
When you complete a casting session, leave the pot between a quarter and half full. It will melt quicker the next time you get going.
Part 3 addresses lubing, sizing and loading cast bullets. The act of putting it all together results in a much more pleasant shooting experience.