About six years ago, mini red-dot sights (MRDS) starting showing up on service pistols in large enough numbers to constitute a distinct trend. That snowball started rolling and is in the process of turning into an avalanche, with the trend washing over from the early adopters to regular duty and CCW holders. However, the transition to using the MRDS as a primary sighting system can trip up some shooters, and it is worth looking at a few pointers to get the most out of the dot.
The Dot is always right. Once the dot is zeroed, the shooter simply places the dot on the intended target and presses off the shot, regardless of where the dot is in the viewing window. Beginners make the mistake of trying to center the dot perfectly in the window and then hold it there as if it was a front sight that must be aligned in the rear notch. A dot shooter can barely catch a glimmer of dot in the corner of the window and still be certain that the bullet hole is going there. (This assumes away the minor elevation difference between the line of sight and bore line, typically a non-issue in most defensive or duty shooting scenarios) Slowing down to center the dot is just that—slowing down—and to no purpose.
Trying to steady the dot does likewise, particularly at close range. If the dot is “painting” the target area as you swing onto target, or the pistol recovers from recoil, that is enough information to crash the trigger and get the hit. New dot shooters tend to want mightily to steady and still the dot before engaging the trigger. This is usually counterproductive within a car length or so. Once the target is so distant and/or small that the dot movement is actually leaving the target, the shooter must let the magic light settle enough to be confident of actual placement. The great majority of shots don’t require this and the dot can bounce around as a “streak” well within the intended hit area with no ill effect. This takes some practice to accept.
Lose the rear sight. If you want to accelerate your transition to shooting well with the dot, take the bold move and remove the rear sight from your pistol. Seriously. For those of you who are already halfway through your angry remark in the comments section, hear me out. Many shooters have spent a lot of time and energy training the subconscious mind to align the front and rear sights. Thus when the dot is saying “go” but the front sight is not correctly in the notch, there is a moment of cognitive dissonance where the shooter has to reconcile what he sees rather than simply run the trigger.
I frequently see shooters going through this tug of war where the dot has given them enough info to shoot but they are dressing up the front sight out of long habit. Even more distinct is the shooter who is presenting the pistol out toward the target and is trying to track down the front sight into the notch rather than simply catch “flash” of dot and get to it. Ditching the rear sight is the “burn the ships on the beach” approach of committing to the new optic that forces the shooter to react to the dot rather than the back up irons.
“But what about back ups?!! The dot can fail, batteries can die, etc.” In watching new-ish dot shooters, I see a maddening sequence play out. They lose their dot for whatever reason (still far too common) and then their immediate action tends to be an elaborate and time-intensive hunt for the dot, a quizzical reaction to the loss, then a deliberate switch to irons with another aiming process starting from scratch. This type of practice is slow and ill-suited to the timeframes where it would apply “for real.”
There is another way. With the rear sight removed, I simply took a tiny strip of “100 m.p.h.” tape and applied it at the base of the Trijicon RMR to mimic the bottom of the rear sight notch. My first guess was close, but with a little bit of shooting I was able to get it exactly placed and determine how much front sight to hold over the rough “rear.” Once I was sure, the tape was replaced with a paint-pen mark. Now I have the full window to use for the dot without the obstruction and distraction of the rear sight. (It is remarkable how much of the relatively small optic window a suppressor height rear sight obscures.) The front sight remains in place to help guide the shooter into coarse alignment to initially find the dot (over time familiarity and muscle alignment take this task). And the front over the paint/tape mark serve just fine as emergency sights.
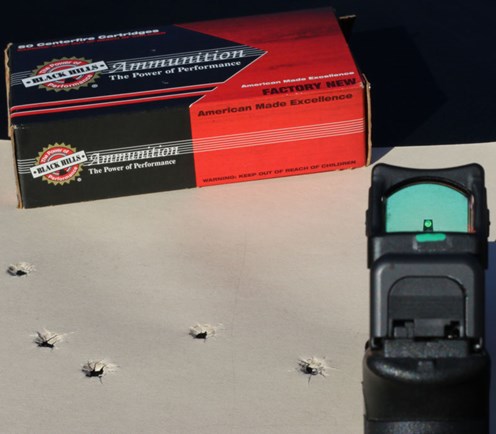
I suspect many readers may doubt that such a coarse sighting arrangement could work very well at all. I can put all shots in the B8 black at 20 yards this way and hit 8” steel out to 35 reliably. Running the plate rack at 10 yards I am only slightly behind my times with “real sights” with the witness mark emergency setup.
Losing the rear was all positives for me. More information/less clutter in the primary mode, no distraction, and a quicker transition to backup without over-verification. I highly recommend it as a transition tool, and once the shooter has full confidence in the dot he can reassess whether a rear is needed or desired.
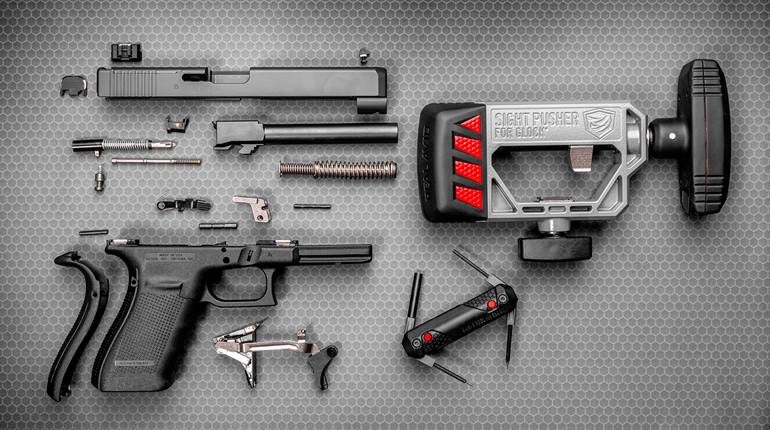
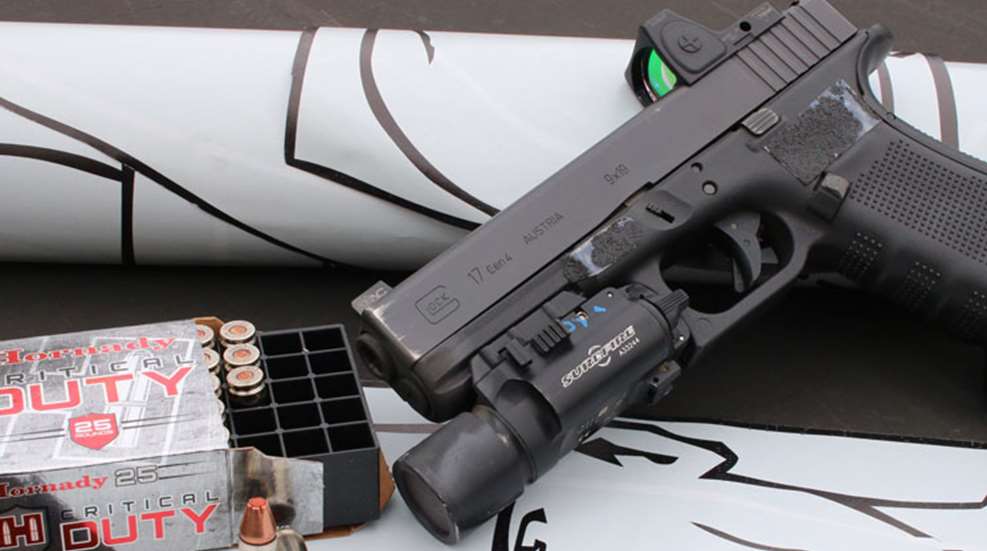
Mount it low. There are three broad solutions for mounting MRDS on a handgun; external mounts, factory plate-mount solutions such as the Glock MOS, and having your slide milled down specifically for an optic. The solutions are basically listed according to their height over the bore. External is simplest to retrofit and reversible but is rather high. MOS-type approaches are lower but the plate adapters themselves add some height to gain the versatility to mount different optics. The direct milled approach is typically the most expensive, irreversible, somewhat risky, and the lowest—making it the easiest to transition to.
I have tried all three approaches and each can work pretty well. However, the slide milled with a mounting pocket as low as possible is head and shoulders the most intuitive to use and speeds up the transition tremendously. Some future handgun will likely be designed to incorporate a dot on the exact sighting plane where current designs have their iron sights, but for now as close as we can get is with the dot on the next plane higher. The lower the dot is, the more likely the shooter can maintain much of their current muscle/wrist alignment so that when they push the pistol out the dot is visible.
I had Guerrilla Armament near Camp Lejeune, N.C., mill my “dot gun” and watched the process on the CNC machine. The mount was milled as low as it can go and the pocket actually had little threaded posts to give as much rigidity to the Trijicon as possible. The arrangement is rock solid, rugged, and precision fit to the optic. They said minor differences in the optics themselves sometimes take slight fitting to the mount, usually just hitting a high spot in the coating with some sandpaper to allow it to seat.
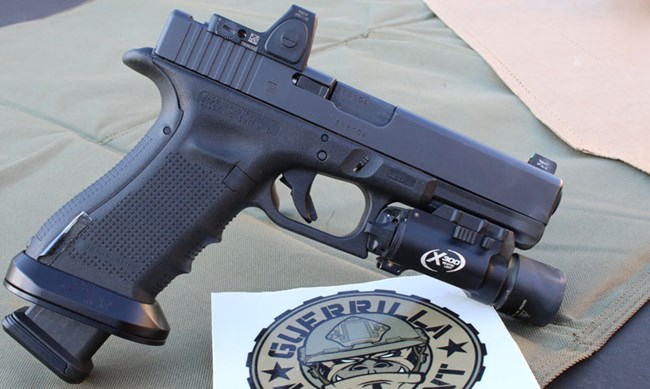
Having the slide specifically milled for the MRDS allows it to sit as low as physically possible.
All milled slides are not equal. There are many reputable shops doing this kind of work, but the demand has also led to a fair amount of sad tales of wobbly mounts, flickering dots, or destroyed slides. If shooters were only using reputable MRDS mounted in slides milled by better shops the dot would have an even stronger portion of the market. However, cheaper “as-good-as” dots mounted in bargain milled slides virtually guarantee many dots will have erratic performance.
Ignore the dot. One of the most heard complaints from those who are considering the dot or experimenting with one is that it seems to actually slow the shooter down up close where the shooting is easy. And that is a fair statement if you are trying to use the dot for each shot inside of 5 yards on an unobstructed target. What I teach students is to simply use the optic window as a “picture frame” and if the intended impact area is framed up inside of the window, press the shot, dot or not. Most often on a close shot the shooter may not have the pistol fully extended with his or her head precisely behind it, leading the dot to typically be just out of immediate view vertically. However the slight elevation that is hiding the dot often cancels out the height over bore offset, so the picture frame method tends to find shots impacting within an inch or so radius of the “aim point.” It works beautifully for most.
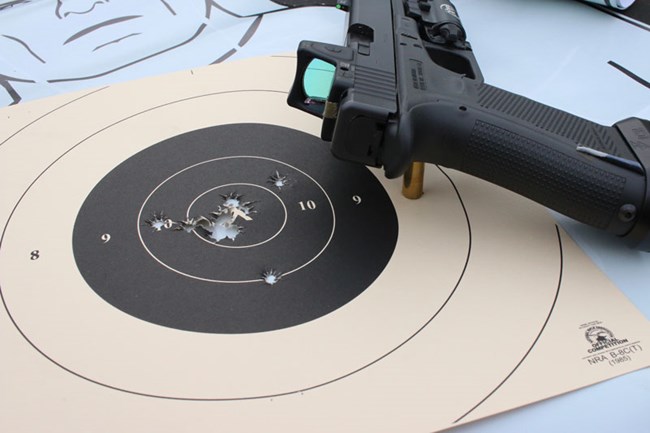
Results of fast pairs at 4 yards using just the optic frame as a coarse index
It seems counterintuitive that the answer for speeding up the dot up close is to not use it, but so it goes. As a shooter gains familiarity and has fully transitioned to the dot he may have the dot up close and can “paint” with it at warp speed, but the experienced hands will tell you that up close they are often using a coarser index.
Another scenario where I sometimes ignore the dot is in support-side shooting. My support side is fine with moderate tempo shooting with the dot, but as I push speed or movement, the decreased degree of control on the support side leads to “losing” the dot more often or if there it sometimes is frenetically dancing. In either case inside of the common 5-15-yard zone I simply shift to the emergency iron front and witness mark to make the shot. In a multi-shot string across multiple targets some hits may be dot guided and others get the “go” signal from the coarse emergency sights—I am fine with that.
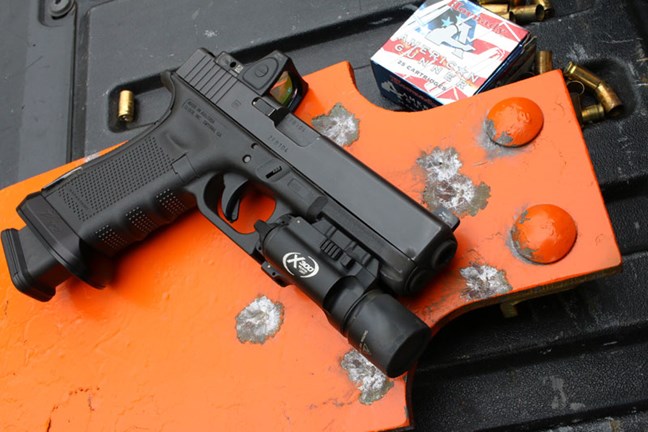
The Dot can really boost hits on long or tough shots. This 70 yard group would be difficult to replicate with stock Glock sights.
Control the Dot. The dot-equipped handgun really comes into its own on distant and/or relatively difficult shots, and is the strong draw to the system. However, to get the most out of the system there is a slight change in approach that will help. Many newer dot shooters try to keep the dot in place on its intended aimpoint, and then ever so gently keep it there without disturbing it as they break the shot. The issue is that the dot displays movement vividly compared to a steel front sight. Compounding this further, most shooters are running dots on striker-fired pistols which tend to require a healthy degree of trigger movement to fire the shot. They begin to roll the trigger through release, see the dot begin to move … and snatch the trigger the remainder of its travel in an attempt to speed the release.
The path to success runs through learning to move the dot ever so subtly using nothing but trigger-finger pressure. The shooter presses through the takeup in the trigger, and as they address that last bit of resistance they are gently moving the dot where they want it to be if it has strayed, or keeping it in place by keeping the pressure straight to the rear. The best way to exercise this is in dry fire, focusing on gently correcting the dot up/down and side-to-side with the trigger held past any takeup at “the break.” Once the shooter can provide subtle input to the dot position via trigger finger control, the hits will come quickly.