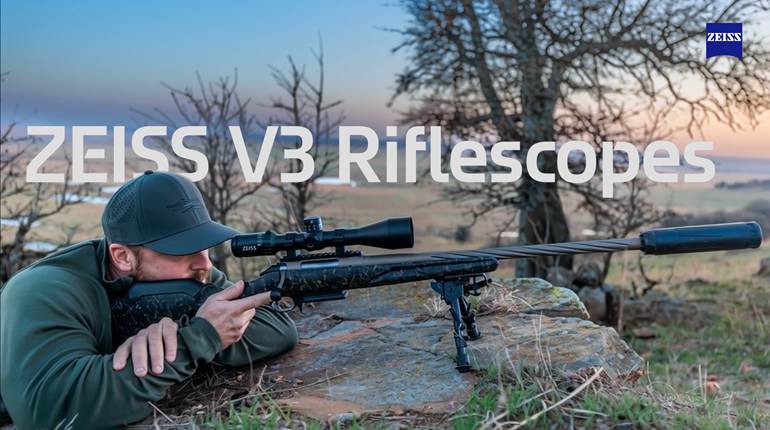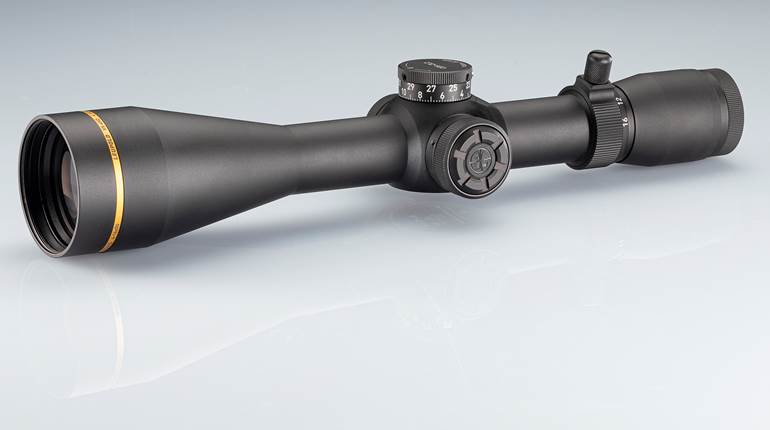
Working with riflescopes seems pretty straightforward, and in most cases, it is. However, there are a few little shortcuts that can make it easier to work with your optic and stay on target at extended ranges:
TIP—Which way to turn
Fortunately, most riflescope turrets have indication marks telling you which way to turn them. But sometimes these marks can be worn, or you might have to change your position behind the rifle to see them. In those instances, there’s a simple rule of thumb to help you remember which way to turn.
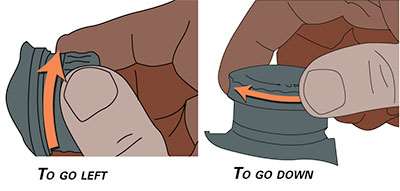
For the windage turret you push forward with your thumb—clockwise—to go left (push left) and pull toward you—counterclockwise—to go right (pull right). With the elevation turret you push—clockwise—to go down (push down) and pull—counterclockwise—to go up (pull up.)
TIP—Zero confirmation
Many hunters zero their rifles at extended distance to maximize their point-blank range. But, when they arrive at camp and want to check their zero, they may only have a 50-yd. range to work with.
To simplify the process, after zeroing your rifle at distance, shoot a target at 50 yds. and then fold the target up and place it in your rifle case. When you get to your hunting destination simply put that target up at 50 yds. and shoot it to confirm that your zero has not wandered. If you do not hit the same hole, adjust and reconfirm accordingly.
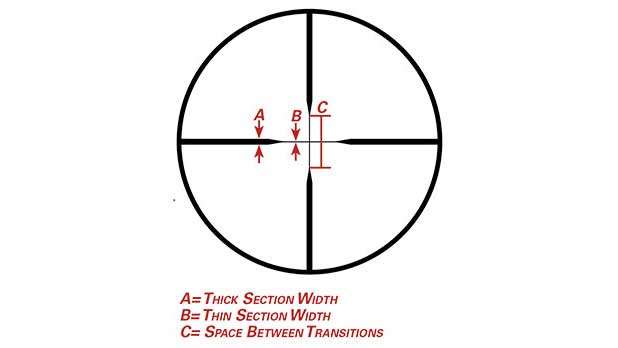
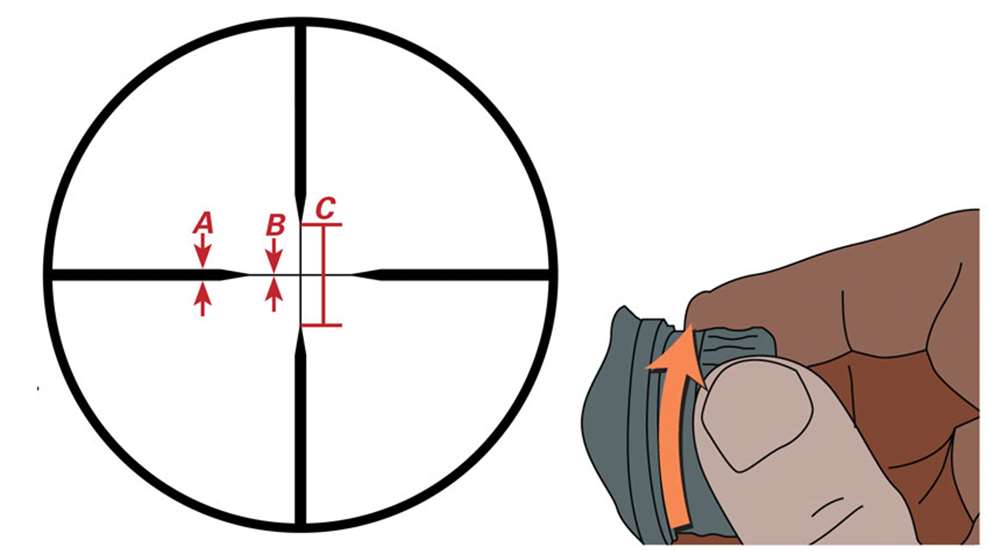
TECHNIQUE—Maximizing the duplex reticle
Ballistic reticles are all the rage nowadays, but the old duplex-style reticle can still work pretty well for holding over the target at extended distances and off to the side to correct for wind. The trick to making it work is knowing the subtension (measurement) of the scope’s reticle at various distances.
The width dimensions of the thick and thin sections of a duplex reticle can be useful, but the space between their transitions is the easiest to work with. In a first-focal-plane riflescope, this measurement remains constant regardless of magnification; with a second-focal-plane riflescope, this distance changes with the magnification.
You can find out what this distance is by consulting the manufacturer’s specifications or by comparing the reticle to an inch-grid target at 100 yds. If the space measures 4" at 100 yds., it will equal 8" at 200, 12" at 300 and so on. Just multiply the measurement of the space by the distance to the target in yards and divide by 100.
To apply this reticle in the field, let’s assume your bullet drops 12" at 300 yds. and that the gap measurement mentioned above equals 4" at 100 yds. To compensate for the trajectory of your bullet you would simply hold the bottom taper point of the center crosshair dead-on at that distance. Similarly, if you’re also shooting in a 10-m.p.h. crosswind at 300 yds. and your bullet deflects 6" at that distance, you would also want to hold half of that gap into the wind.
Where this technique gets complicated, but can be even more effective, is with a second-focal-plane riflescope. This is because the gap measurement changes with the magnification. If that gap measures 4" at 6X, it will measure 2" at 12X. This can allow you to adjust the gap size—the hold-over or wind correction—by adjusting the magnification.
It takes some practice on the range to become proficient with this technique, but it works. The best way to apply the technique with a second-focal-plane riflescope is to confirm and then remember the magnification setting for the distances you might shoot at in advance. If you know you need 20" of correction to hit at 400 yds., work with your scope on the range to determine what magnification adjusts this gap measurement to equal 20".