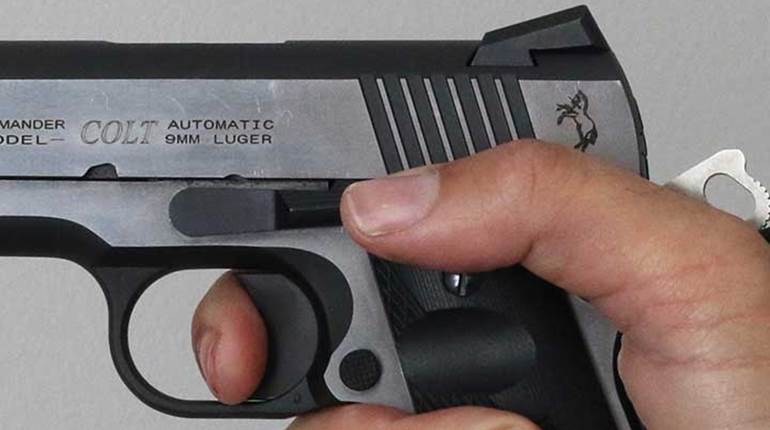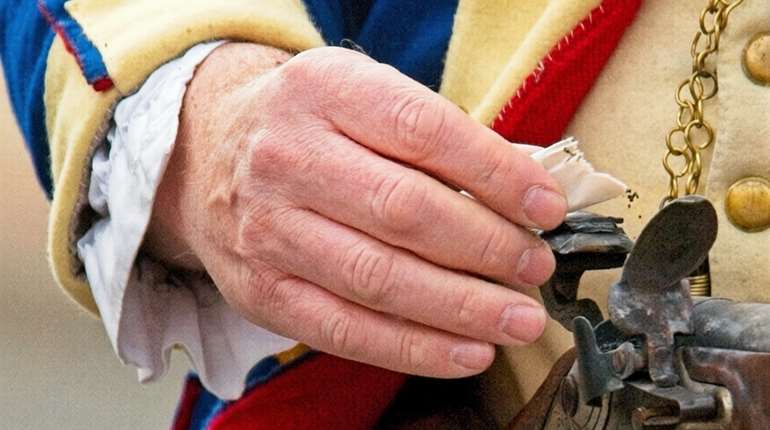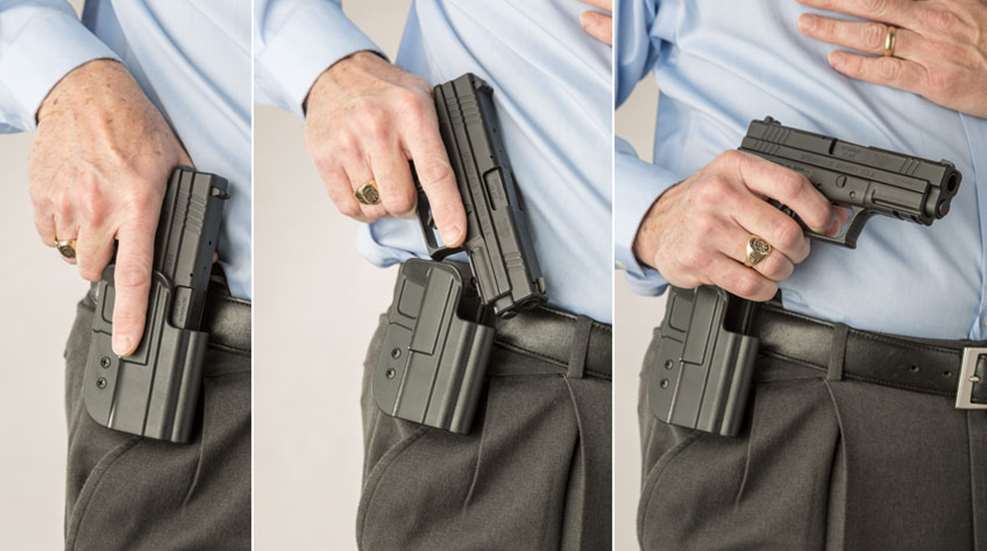
Drawing a handgun from a holster and aiming it at a target is typically described as a process involving multiple steps, but it’s worth bearing in mind that some encounters may be too close and sudden to allow the entire sequence to play out. One of the most important aspects of the conventional sequence of “presentation from a holster” is the “rotate” step. Once the shooter has grasped the gun, and as soon as it has cleared the holster, he or she rotates the gun to bring its muzzle in alignment with the target—and that happens fractions of a second before the weak hand would otherwise join the strong hand and the arms would be extended and presented forward to allow for conventional alignment of the sights. But it is exactly that time savings that could make the critical difference in a violent close encounter.
Remember, isolating the rotate technique is a compromise, and, as such, demands several considerations. One is the position of the weak hand—the shooter should keep it pressed against his or her chest so as to eliminate the possibility of its being “covered” by the muzzle and inadvertently struck by a discharged bullet. A second is that shooting from the rotate position necessitates “point shooting”—itself a technique that must be practiced in an appropriate setting and with appropriate precautions for safety. The latter should involve a cleared firearm—one that may be equipped with a laser aiming device that will help train into the user’s muscle memory in order to ingrain the proper positioning of the gun.
Keep in mind, as well, that the foregoing does not address the type of carry from which the pistol may be drawn. Some carry methods are more compatible with the rotate-to-fire technique than others. For instance, traditional strong-side carry will likely involve less movement of the gun and fewer opportunities for covering one’s body than would, for instance, small-of-the-back carry. In any case, for the safety of the shooter and bystanders, it is imperative to keep the muzzle pointed downward and angled slightly away from the body before the rotation toward the target begins.
As with any technique, this one should be practiced with an unloaded firearm in “slow motion” until it is mastered—and only then tested with live ammunition and/or at full speed.