The bent-knee sitting position (shown above) is easier and faster to get into and also gets the shooter a bit higher—but it is not as steady as the crossed-leg sitting position.
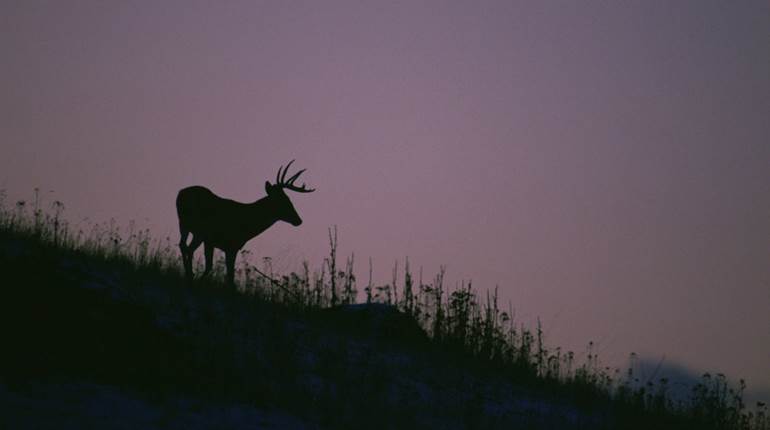
In some ways we live in a fortunate time. During my lifetime I’ve seen our whitetail deer herds increase dramatically. I’ve also seen mule deer populations decline, but our elk herds are still exploding, and all North American big game is way up from the dark days of the early 20th century meaning that, today, most American hunters have more opportunity than our fathers and grandfathers had. I fully understand that shooters greatly outnumber hunters, and that’s fine. But most shooters are hunters, too, at least some of the time.
If you go back a generation or two, most of those writing about hunting and shooting were at least casually involved in formal competition. Their writing was well-sprinkled with references to formal shooting positions and the use of a tight sling. Also, many had some form of military background and were trained in the four classic “NRA shooting positions” of prone, sitting, kneeling and standing (formerly called “offhand”).
Things are different today. A much smaller percentage of Americans receive military training, and although the disciplines are not necessarily less popular, a smaller percentage of shooters and hunters participate in High Power, Smallbore and other disciplines that require the formal shooting positions. These curves apply equally to my peers, colleagues and friends: We are able to do more actual hunting than our predecessors, but fewer among us have formal training.
To me this is regrettable, because I think consistently accurate field shooting at big game remains grounded in the four basic shooting positions (along with the equally basic principles of breath control and trigger press). There are times when these positions may be used in the field almost as if on a target range, so the more familiar and proficient the shooter is with these positions the better off he or she will be. On the other hand, in the field there are no range masters and no drill instructors, and there is just one rule that follows safe use: Make the most accurate shot possible. The basic positions can thus be endlessly modified and augmented to achieve greater steadiness. Here’s a brief review of the four basic positions, their applications and how they can be “improved” under field conditions.
PRONE
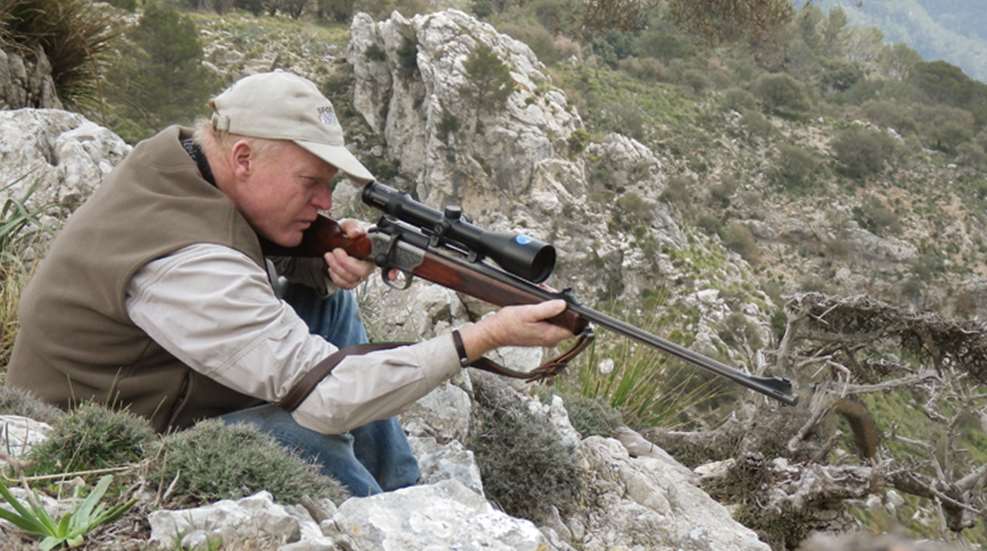
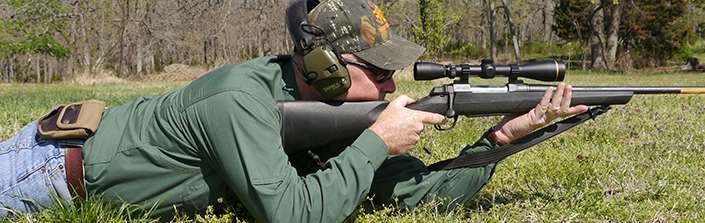
The general rule is that the closer you can get to the ground, the steadier you are, so prone is the most well-supported of the four positions, and steadier still when augmented with a tight sling. Exactly how you lie behind the rifle is somewhat a matter of comfort and practice; but in the field it will be dictated by terrain—there aren’t that many places that are dead-flat! The two big secrets are to ensure that both elbows are solidly grounded, and that your supporting elbow is as directly under the rifle as possible. The idea is to utilize bone structure to support the weight of the gun, minimizing wobble-inducing muscle fatigue.
The regrettable thing about prone is that it can’t be used very often; from such a low position it doesn’t take much brush or terrain to obscure or block the bullet’s path. On the other hand, there’s no rulebook. Your body doesn’t have to be level, and there are innumerable ways you can combine prone with natural rests and shooting aids, both to increase steadiness and to gain some elevation.
A bipod with adjustable legs is certainly one way. Laying over a pack is another, and there have been several times when I’ve piled up every pack in the party and laid across them to get the proper height. An adjustable-height bipod like the Harris is a marvelous tool. I don’t carry one all the time, but I do use them in extremely open country where natural rests seem unlikely. Honestly, my default position is to rest over a pack, because that’s something I almost always carry. As we’ll see, the pack can be used in many positions; but since prone is the steadiest, it should be the first option if you can find a way. A pack set against or atop a rock or log may allow you to lie against your improvised rest rather than sit behind it, and for most of us—with practice—this will be steadier.
Whether using a bipod or some combination of natural and man-made support, when shooting prone over a rest, I do something a bit different with my supporting hand. If you are more comfortable keeping it on the fore-end be my guest, but I borrow a page from the benchresters: my supporting hand curls back to the toe of the stock, snugging the butt into the shoulder and often adjusting the height. This is steadier and more accurate for me than grasping the fore-end, but there’s a caution. If the rifle is to be rested freely, make sure the fore-end is solid on the rest. A couple years ago I was prone with my rifle over a pack, and I had to really scrunch it up to get enough height. Just as I finished the trigger press the fore-end slid off the high point. I felt it go, but it was too late to call back the shot. The bullet hit exactly where it should have: three feet to the right and two feet low! If I’d kept a hand on the fore-end I might have been okay, but over the years I’m pretty sure using my supporting hand in good benchrest form has saved more shots than it has messed up.
SITTING
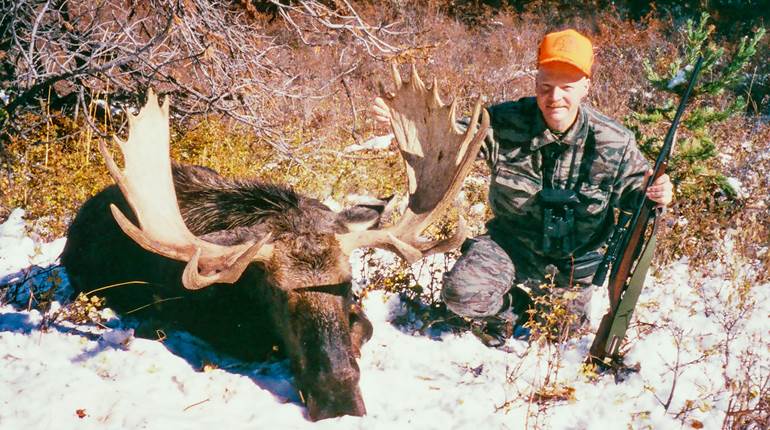
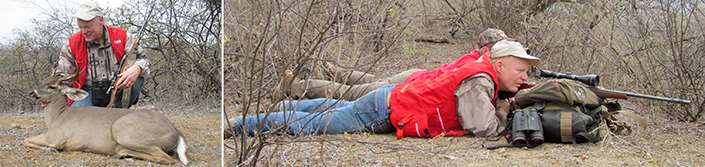
When properly assumed, the sitting position is nearly as steady as prone—especially in combination with a tight sling. But even though not quite as good, the “sit” is the hunter’s friend because it gets you above a lot of obstructions that often make prone impossible. The formal sitting position begins with crossed legs, support-side leg out, sides of the feet flat to the ground. This takes a lot of practice, and you need to be limber to do it right, almost like a combination of yoga and gymnastics—but it works, and I’ve often used it in the field. I took my best-ever pronghorn from a formal sitting position with a tight loop sling (detached from the rear swivel) at a distance of about 250 yds. On the last day of a buffalo hunt in Tanzania, I did exactly the same thing. We were totally stuck on the edge of a bedded herd, and the bull we wanted was 150 yds. out, completely surrounded by other buffalo. After four hours of sweltering in the sun, the herd finally moved, and, of course, the bull we wanted was among the last to get up. There was no rest and no cover, so I detached the rear sling swivel, made a loop for my upper arm and got into a low sitting position. When the bull stepped clear, my shot struck him on the center of the shoulder, no problems, thanks to practice in this position.
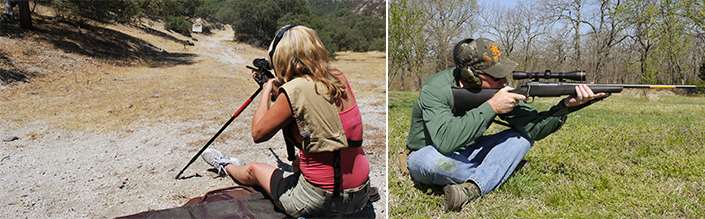
A common modification far outside any rules of competition is the bent-knee sitting position: legs at about a 45-degree angle, soles flat to the ground. This is not nearly as steady as the crossed-leg sitting position, but it has advantages: It is faster to get into and also easier (you don’t have to be quite as limber). It also gets you a bit higher, when properly done, the crossed-leg sit is very low. Either way, the big secret is to get your elbows over your knees, not on top of them. As girth increases with age this gets more difficult, but if you simply rest your pointy elbow bones on top of your rounded knees you’re looking for trouble.
Okay, with no natural rest or shooting aid available the sitting position is great, but the competition-illegal improvements are endless. A low tripod or bipod is awesome to sit behind. Some bipods have legs that telescope long enough, and the three-legged shooting sticks I carry have sections that unscrew for lower positions. Once again, a pack over a log or boulder can be great, but you can also use a pack to sit on to get the height just right. Unlike range situations, shots at game can come at any weird angle, and getting the height right for both you and the shot makes a huge difference.
KNEELING
In the kneeling position the support-side knee is bent more or less 90 degrees, and the support-side foot is planted on the ground and pointing toward the target. The strong-side knee is grounded, the legs are set about 90 degrees to one another, and, for the purpose of this discussion, you can either sit on that heel, sole to the ground, or you can put the side of your foot to the ground and sit on the side of your boot. The same caveat applies as in sitting: Get your supporting elbow out beyond your supporting knee, not on top of it.
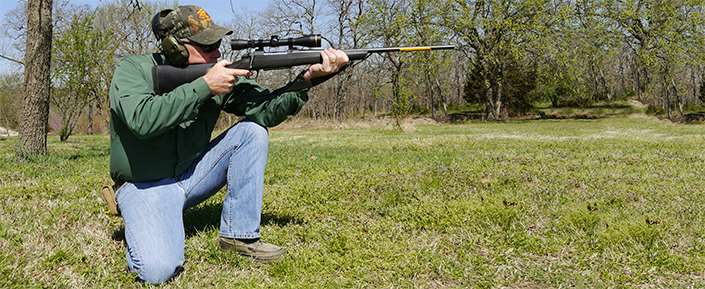
Full disclosure: When I was shooting Smallbore, kneeling was my worst position. Although much steadier than standing, for me it isn’t nearly as steady as a good sitting position. It is, however, extremely useful for fast shots at medium distances. You simply drop to one knee, raise the rifle and fire—good for those fast-breaking situations when maybe it’s a bit far for a quick standing shot, but it doesn’t appear there’s time to find a steadier position. A hasty sling is a great addition to the kneeling position, and with practice can be assumed as you’re dropping to one knee—no time wasted.
Given a choice, I’d always look for a steadier position than kneeling, but aside from speed it has the advantage of getting the rifle several inches higher than any sitting position. With that in mind, it can be augmented in much the same way as sitting, using tripods, bipods and natural rests. The pack has much the same uses, but you can also put a pack (or rolled up coat) between your butt and your heel, adjusting the height.
The primary reason kneeling is less steady than sitting is because the shooting elbow is flapping in the breeze, unsupported. On the target range that elbow should be horizontal, and the shooting arm is pulling the rifle into the shoulder. In the field, all bets are off. Most of the time kneeling is chosen for speed; but, if you can stabilize the shooting elbow, the whole position will be steadier. So perhaps you can ground that elbow into a nearby tree or support it on an upright pack. In Wyoming a little while back, we’d been working a really great mule deer for hours. Just at dusk he stepped into a little draw below me, no natural rest handy and too much roll to the ground for sitting. I tried kneeling and it just wasn’t steady enough—too much wobble—so I put my pack on top of a sagebrush next to me and stabilized my elbow on it. That made a big difference and resulted in a great buck.
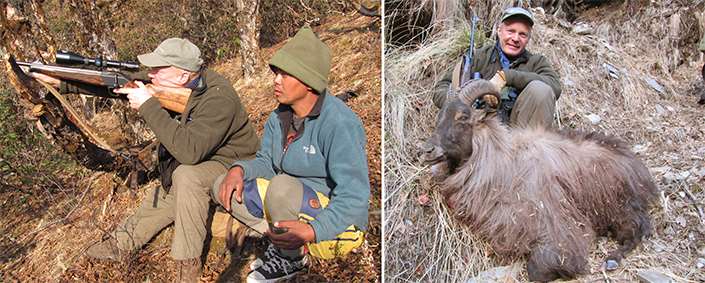
Since no one is keeping score, you can blend or modify positions as required. Though horribly illegal in competition, what about a reverse kneeling? If the fore-end is stabilized, then you can raise your shooting knee and use it to stabilize your shooting elbow. In Nepal I had a chance to take a tahr at long range, but the terrain was awful, sloping down at an extreme angle. I found a tree branch for the fore-end, sat on a pack for height and used my shooting-side knee for my shooting elbow. It worked!
STANDING
Taking a shot at game from an unsupported standing position is just plain silly if there’s any other option whatsoever. That said, there are times when there is simply no choice but to take the shot or lose the chance. Still, standing is the court of last resort—to be used only when there is no other option. It is not only the least steady position, it’s the most difficult position to master. So, although it should be used very little, it should be practiced a lot for those close encounters when there’s no other option. With practice, an unsupported standing shot should be consistently “doable” at 60 or 70 yds., much farther than that, then hopefully there are split-seconds to come up with something better.
The formal standing position, body bladed to the target, support-side hip out-thrust as an elbow rest, is almost never used in the field—it isn’t fast, and if there’s time to assume that position there should be time to do something else. Standing shots in the field are usually a whole lot more like shotgunning: feet shoulder-width apart, support-side foot pointing toward the target, shooting-side foot slightly back, about 45 degrees away from the target. The encounter may be fast but, just like stepping into a covey rise of quail, it’s essential to take a split-second to plant your feet. Practice on the range, starting very close and working your way out over time. Under no circumstances is standing a long-range position—even 100 yds. may be a bridge too far. But pie-plate accuracy at about 70 yds. should be attainable.
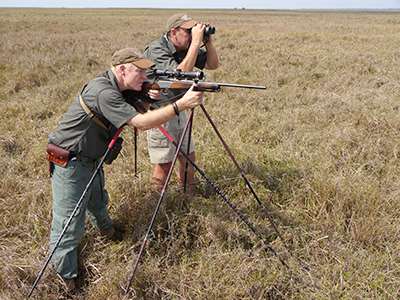
As far as improvement, the sky is the limit. You can stand behind a tall rock or against a stout tree, and you can carry a monopod, bipod or tripod that’s a ready-made standing rest. Because three-legged “shooting sticks” are in such universal use in Africa, I usually carry a set of three-section sticks from African Sporting Creations almost everywhere I go. The reason shooting sticks are so prevalent in Africa is because they allow steady shooting over low brush, and also because so much African brush is too thorny to drop into. They work, and I’ve found them to be handy in a whole lot of places. As mentioned earlier, taken down they can be useful in modified sitting and kneeling positions, but they’re awesome to augment a standing position.
As with any shooting aid, practice is required. It is not good to marry yourself too much to any one position or type of rest. Ideally, the successful field shooter has a huge repertoire of ways to get steady. However, since I use them a lot I’m more comfortable with three-legged sticks than a standing bipod, and I admit to being darn near useless with a monopod. But all shooting aids require practice. The tricky parts are getting the height right and figuring out how to best use your supporting hand. For me the right height is level with my first shirt button, so I can lean into the sticks. Then I grasp the fore-end with my thumb and forefinger, using the other three fingers to tie the rifle into the rest. That works for me, but you need to figure out what works for you.
With practice, three-legged sticks should be very steady for shooting to 150 yds., but there’s more. As with kneeling, the biggest problem is the unsupported shooting elbow. Thus there are several tricks that can change the game. Have a buddy stand to your strong side (left for lefties; right for righties). He can bend down and grasp the sticks, adding stability to them, and you can rest your elbow on his shoulder. So long as he holds his breath, this quick trick can nearly double your effective range off sticks. Another trick is to make sure your buddy also carries sticks. A second set of sticks can be used under your shooting armpit, what the folks at FTW Ranch, in their Sportsman’s All-Weather All-Terrain Marksmanship shooting school, call the “chicken wing.” Or a second set can be put under the butt, effectively creating a standing benchrest.
The only limit is creativity, but don’t forget to practice standing on your hind legs and shooting. In a close encounter you may have time for a shot, but you can’t afford the movement necessary to set up sticks or get into a steadier position. So be ready for that worst-case quick offhand shot—but for the majority of situations, when you have time to get steady, start with the basics and then throw the rulebook away.
USING A SLING
A tight sling essentially creates isometric pressure that aids steadiness. The formal target sling actually has no attachment to the rear sling swivel; its purpose is to form a tight loop above the bicep on the supporting arm, creating pressure from the front swivel to the arm. The “military sling” doubles as a carrying strap, but has a loop at the midpoint so the rear swivel can be detached and it can be used as a target sling. Use of both of these are probably lost arts to most hunters today, and that’s okay, but don’t forget the hasty sling!
Assuming a hasty sling is so fast it should, with practice, become second nature. Most “carrying straps” can be used, although the extra-wide “cobra-type” slings may be too stiff. With the sling attached to both swivels, let it hang free below the rifle. Thrust your supporting arm between rifle and sling and wrap your arm around the sling, clockwise for right-handers and counter-clockwise for lefties. Snug the web of your hand tight against the sling swivel stud, palm up, and (simultaneously) bring the rifle to your shoulder. This creates isometric pressure across your chest that aids steadiness in a wide variety of shooting positions—and definitely in unsupported prone, sitting, kneeling and standing.