In “Getting Started,” I discussed how you should prepare your carbine for a session at the range, including maintenance procedures and proper loading techniques, along with how to get into the prone position.
Now that you have some basic familiarity with manipulating and handling the rifle, it’s time to learn how to zero it, so that you can effectively hit the target. I’ll also cover how to shoot from the standing position.
Zeroing Procedures
Before you start sighting in, ensure that you have a solid, repeatable shooting position. While it is best to zero from the prone position or off a bench, I usually zero my carbine from a field position without the aid of sandbags or a bench, as that more realistically  approximates how I would shoot in the field. Either way, stability is paramount when zeroing, and benches and sandbags certainly help, I would just recommend that if you utilize support, always confirm your zero from field-shooting positions.
A solid shooting position should allow you to be relaxed throughout the process. Your goal is to shoot tight groups. Without them you really cannot make accurate sight adjustments. I shoot a minimum of five rounds per group and, to keep them tight, I have to have a good, natural point of aim and a slow, consistent trigger squeeze, all the while watching my breathing. During the zero process, take a large breath and slowly release that air until you hit the natural respiratory pause. As you are releasing, you can start to prep your trigger, but do not press through until you feel your breathing stop for a partial second. If at this point the round does not fire, do not release the trigger. Just take another breath and start over; this time the round will fire. An important part of the shot is follow-through, meaning that you should watch your sights lift from the target as the rifle recoils. If you can see the same clear sight picture as each round fires, the shots will group. Once you have a group, simply measure the horizontal and vertical distances between point-of-aim (where you wanted to hit) and point-of-impact (the center of the group) and make the appropriate adjustments to the sight system you are using. Then, shoot another group and repeat this process until your rounds are impacting right on the point-of-aim.

Understanding Trajectory
If, like me, you honed your AR skills in the military, you might be accustomed to a 25-yd., or 25-meter, zero range. That is a relatively standard procedure, but it doesn’t prepare you to engage targets at varying distances. In the military, the targets used for qualification are E-type silhouettes that are 39" tall and around 19" wide, leaving plenty of room for error. For smaller targets, you might want to change your zero distance.
As with the amount of accessories available for the AR, there is also an abundance of ideas as to where you should zero your carbine. Being a professional trainer I will tell you that the overall best results come with a 50- or 100-yd. zero, and it all has to do with trajectory. Without addressing the light, heavy, hot, or subsonic loadings, most standard .223 Rem. and 5.56x45 mm NATO loads follow a similar flight path out to 200 yds. Beyond 200 significant differences can emerge, but for now let’s worry about what happens between 1 and 200 yds.
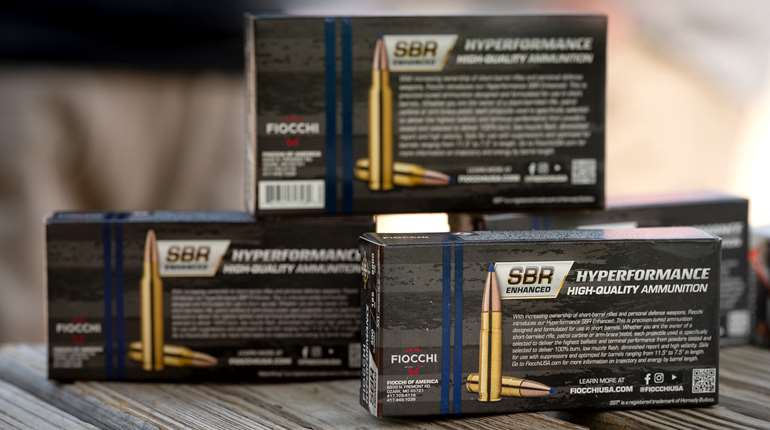
Using Hornady 55- and 70-gr. GMX loads for comparison, we can demonstrate how zero distances can affect trajectory. (This data is courtesy of Jeremy Millard, one of Hornady’s ballisticians.) With the 55-gr. bullet traveling at 3131 f.p.s. from my 16" barrel, if I choose to zero at 100 yds. I will be 0.7" low at 50; and 2.2" low at 200 yds. There’s not much to think about here since you will be within 2.5" of your point-of-aim out to 200. With the same ammunition zeroed at 50 yds., you will be 1.5" high at 100 yds. and 0.8" high at 200, with your second zero being at 215 yds. Once again, there’s not much to worry about with regard to hitting your target given these numbers.
With the 70-gr. GMX load at a velocity of 2715 f.p.s. from a 16" barrel there is a little more to think about. If you zero with this load at 100 yds. you will be 0.6" low at 50 yds. and 3.3" low at 200 yds. Not significant, but more variance than the 55-gr. ammunition. If you zero at 50 yds. with the 70-gr. bullet you will be 1.2" high at 100 and 0.9" low at 200 yds. with your second zero coming around 180 yds.
As you can see, it is important to have a basic understanding of the flight path of your chosen bullet. That knowledge takes the guess-work out of shooting and can greatly improve your accuracy at any distance. We’ve also demonstrated the importance of selecting the correct ammunition for your platform. Bullet weight, barrel length and the rifling’s twist rate all affect how a cartridge performs in your specific rifle. Shop around and find a load that works for you.
Finally, let me answer a question commonly asked by AR beginners regarding 5.56x45 mm NATO versus .223 Rem. ammunition. If you have a 5.56-marked barrel you can safely shoot both 5.56x45 mm NATO and .223 Rem. ammunition. If you have a barrel marked .223, I would avoid the use of 5.56 mm ammunition. More than likely it won’t be an issue, but, if it is a particularly hot day at the range, you may experience problems related to elevated pressure levels. It’s best to avoid such by using the correct loads.
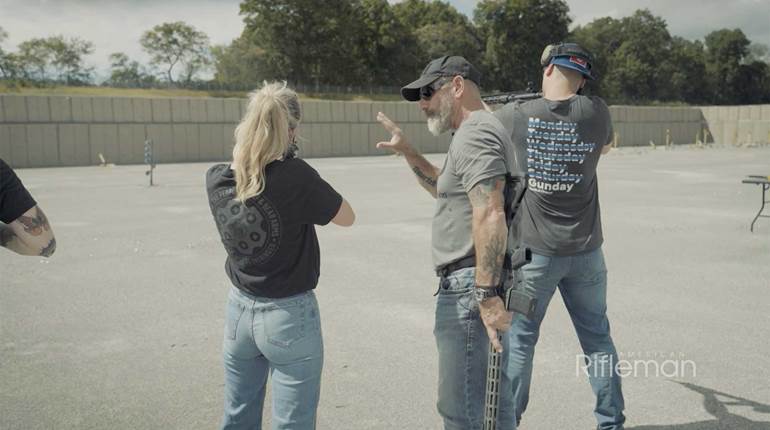
Standing Position
Now that you are able to lock in a stable prone position and understand the zeroing procedure, let’s talk about the standing position. The most common problem with new and old shooters when it comes to the standing position is squaring too much to the target. For years, many law enforcement and military trainers pushed shooters to stand  square to the target while shooting from the standing position. This technique was developed for shooters wearing body armor and premised on the idea that they should present their protected front to a threat, rather than an unarmored side. While there may be some sound arguments for the squared-up position, it is not ideal from a stability or biomechanical perspective. First, you naturally put your weight on your heels or, at a minimum, stand flatfooted, not a good place to be if you plan to shoot more than one round. Secondly, the support hand is forced to extend farther than is natural, increasing muscle fatigue and working against muzzle stability. It is really difficult to be aggressive standing flatfooted in a square stance.
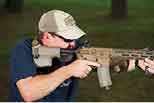
I prefer to have shooters get into a natural fighter’s stance, as though you were planning to fist fight. If you don’t understand this statement, watch the next MMA fight that comes on a sports channel and you will see the best examples. Once you assume this aggressive stance, place most of your weight on the front foot, or your support-side foot. There are several reasons for doing this. With your weight forward you will be able to better control recoil without being pushed back onto your heels, you will also be able to move the carbine quickly onto the target and to any follow-on targets.
Along with the bladed fighting stance, I push my support hand comfortably forward to get a good grip on the fore-end portion of the rifle. Commonly folks will grab the front of the magazine well to hold the carbine, but that technique does not allow for power to control recoil or move the rifle. It also compromises secure retention of the rifle for those who plan to use it for military or police work. Having a close grip takes the power away from the shooter, and that is the last thing we want to do. We want to stay in control.


I discussed correct stock length in the first article of this series, so confirm that you have the proper fit for a strong standing position. As you push the carbine up on target youwant to have the sights stop perfectly aligned between your shooting eye and the intended target. This takes some practice, you can dry fire to build muscle memory from the standing position. You don’t want to raise the rifle to the target, then drop your head into position. This is a time-wasting movement that isn’t needed. It also makes it hard to consistently establish the same sight picture. To practice, get on target with the sights and then lower the rifle, maintaining your focus on the target. Do not move your head. Now raise the rifle again, allowing it to stop as it becomes perfectly aligned with your eye and the target. Repeat this process until it is second-nature.
Use Your Safety
The safety on your rifle should be engaged every time you come off target. If you don’t have sights on a target your finger should be off the trigger and the safety should be in the “ON” position. A surefire mark of an inexperienced AR shooter is one who doesn’t religiously engage the safety. This is a must! It won’t slow you down, so use it. Left-handed shooters often come up with excuses as to why they can’t use the safety, since it is a little harder to manipulate for the southpaw. If you simply use the knuckle on your index finger to push the safety down you won’t have any issues. This will allow the easy disengagement of the safety and enhance your retention of the carbine since you are not changing your grip substantially. Even better, invest in one of the myriad ambidextrous safety selectors on the market. There are many to choose from, and installation is pretty straightforward. One issue I often encounter with left-handed shooters is the use of a bent trigger finger to engage the safety. Bending your trigger finger to place the carbine on safe is a sure way to have an accident. Keep your trigger finger straight, and use the top of that index finger to sweep the safety back into the engaged position. After running or climbing you lose a little bit of your dexterity. If you have been in a life-or-death situation you will have enough adrenaline in your veins to cause your hands to feel different than normal. These are the reasons I use the safer, straight-finger technique when shooting with the left hand.
Once you have your standing position dialed in, put yourself on a timer to see what the possibilities are. I use a shot timer with a delay to let me press the button, get ready, then react to the beep. This should be practiced from different yard lines with varying levels of difficulty. If you plan to shoot from 7 to 10 yds., use a 25-yd. pistol bullseye or smaller for your target. Remember to engage the safety every time you come off the target.
Offset For Close Range
There are a few things about AR ballistics that we must give some thought to as we shoot at closer distances. As discussed before, if you zeroed your rifle at 50 or 100 yds. your shots should travel within a fairly small “tunnel” between your zero distance and 200 yds. At ranges closer than your zero distance, however, you can expect shots to impact  significantly lower. This is due to the bullet just beginning the arc of its trajectory, and is exacerbated by the fact that on most ARs, the sights are mounted, on average, 2½" above the bore axis. These factors must be taken into consideration when shooting at short range.
Because of sight offset and trajectory, you will be low from 5 to 25 yds., even more so at close quarters distances, with the trajectory arc rising closer to your line of sight as the distance increases. Once you reach your zero line, which, for me is generally 50 or 100 yds., you will see the impacts move closer to where you are aiming. After passing this line your bullet will either rise of fall depending on where you zero. If you have a 50-yd. zero, you will impact slightly high at 100 yds., around 1.5". At 200 yds. you will be within 1 minute of angle (m.o.a.) of the desired impact point. With military ammunition, the bullet will cross your line of sight the second time around 160 yds.; with the Hornady 55-gr. load, your second cross will be at 215 yds.
The moral of the story, and a mantra I drill into my students is, “Aim where you need to aim, not where you want to hit.” Now get out there and train, train, train-then train some more.
Half-and-Half Drill
It’s all fine to talk about trajectory and offset, but more important is to understand it and practice compensating for it. Once you have a good zero, and have practiced manipulating your safety, it’s time to move onto some basic carbine drills to do just that.

Illustrated here is a drill called the Half-And-Half, which may seem difficult, but it can normally be accomplished after just a couple visits to the range. The only rounds that count are those that are in the black of the bullseye or in the “A” Zone of the VTAC DSTT Target. 
While performing this drill, focus on quickly and safely driving the carbine sights to the intended target. You should focus on moving just as fast at 20 yds. as you do at 5 yds. When you are ready to pull the trigger, slow down and make the hits count. As you mount the carbine, your sights should align at the same time your cheek hits the stock. If you are bringing the rifle up and then dropping your head into position, you need to improve that transition so that it’s one fluid motion. And remember, you won’t be successful if you only get one sight picture and then fire 10 rounds. You must continuously drive your sights to the aiming point, no matter how fast you are shooting or how close the distance.
An aggressive fighter’s stance will prevent you from getting knocked back on your heels while firing. Likewise, a strong support-hand grip on the carbine, pulling it into your shoulder, will aid in stability and keep you from getting kicked with every shot. A loose grip will allow the carbine to batter you, making it difficult to stay on target or shoot accurately, quickly.
Finally, make sure you use the safety. Switch it off as you raise the rifle, and on after each string.
Most Popular