While O.F. Mossberg & Sons is likely best known for its pump-action Model 500 shotgun and derivatives, the company’s been making semi-automatic shotguns since the 1980s.
In 2005, Mossberg introduced its 930, marketed as being reliable, affordable and one of the best values in semi-automatic shotguns yet made. While few can argue against such claims, given the success of the 930, Mossberg eventually found it difficult to stand out from the pack. So designers went back to the drawing board, enlisting the help of famed competition shooter Jerry Miculek, to devise a new gas system that would accommodate a wider variety of ammunition while also running more cleanly.
The resulting Model 940 was released in 2020, and, according to company claims, it will run reliably up to 1,500 rounds without maintenance, as compared to the 930’s theoretical 500-round limit.
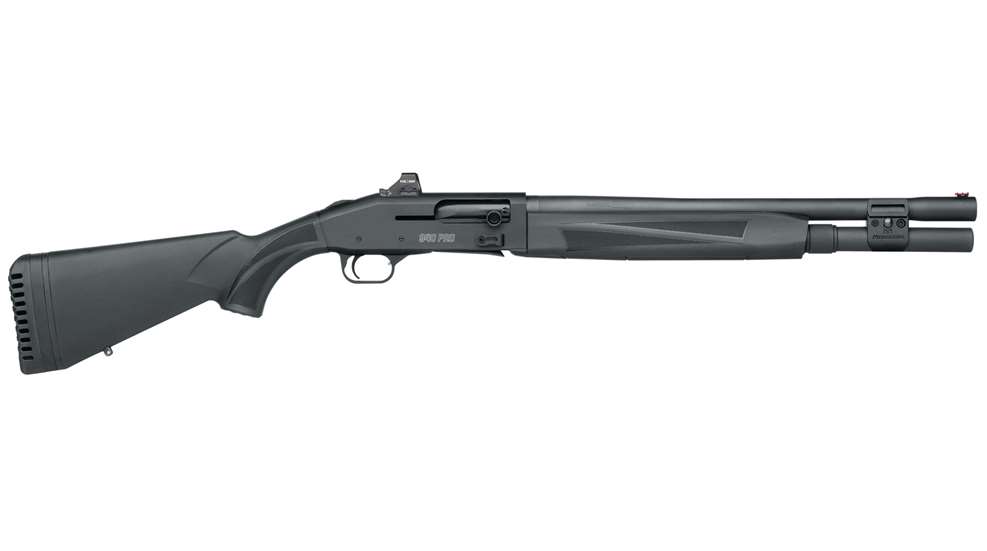
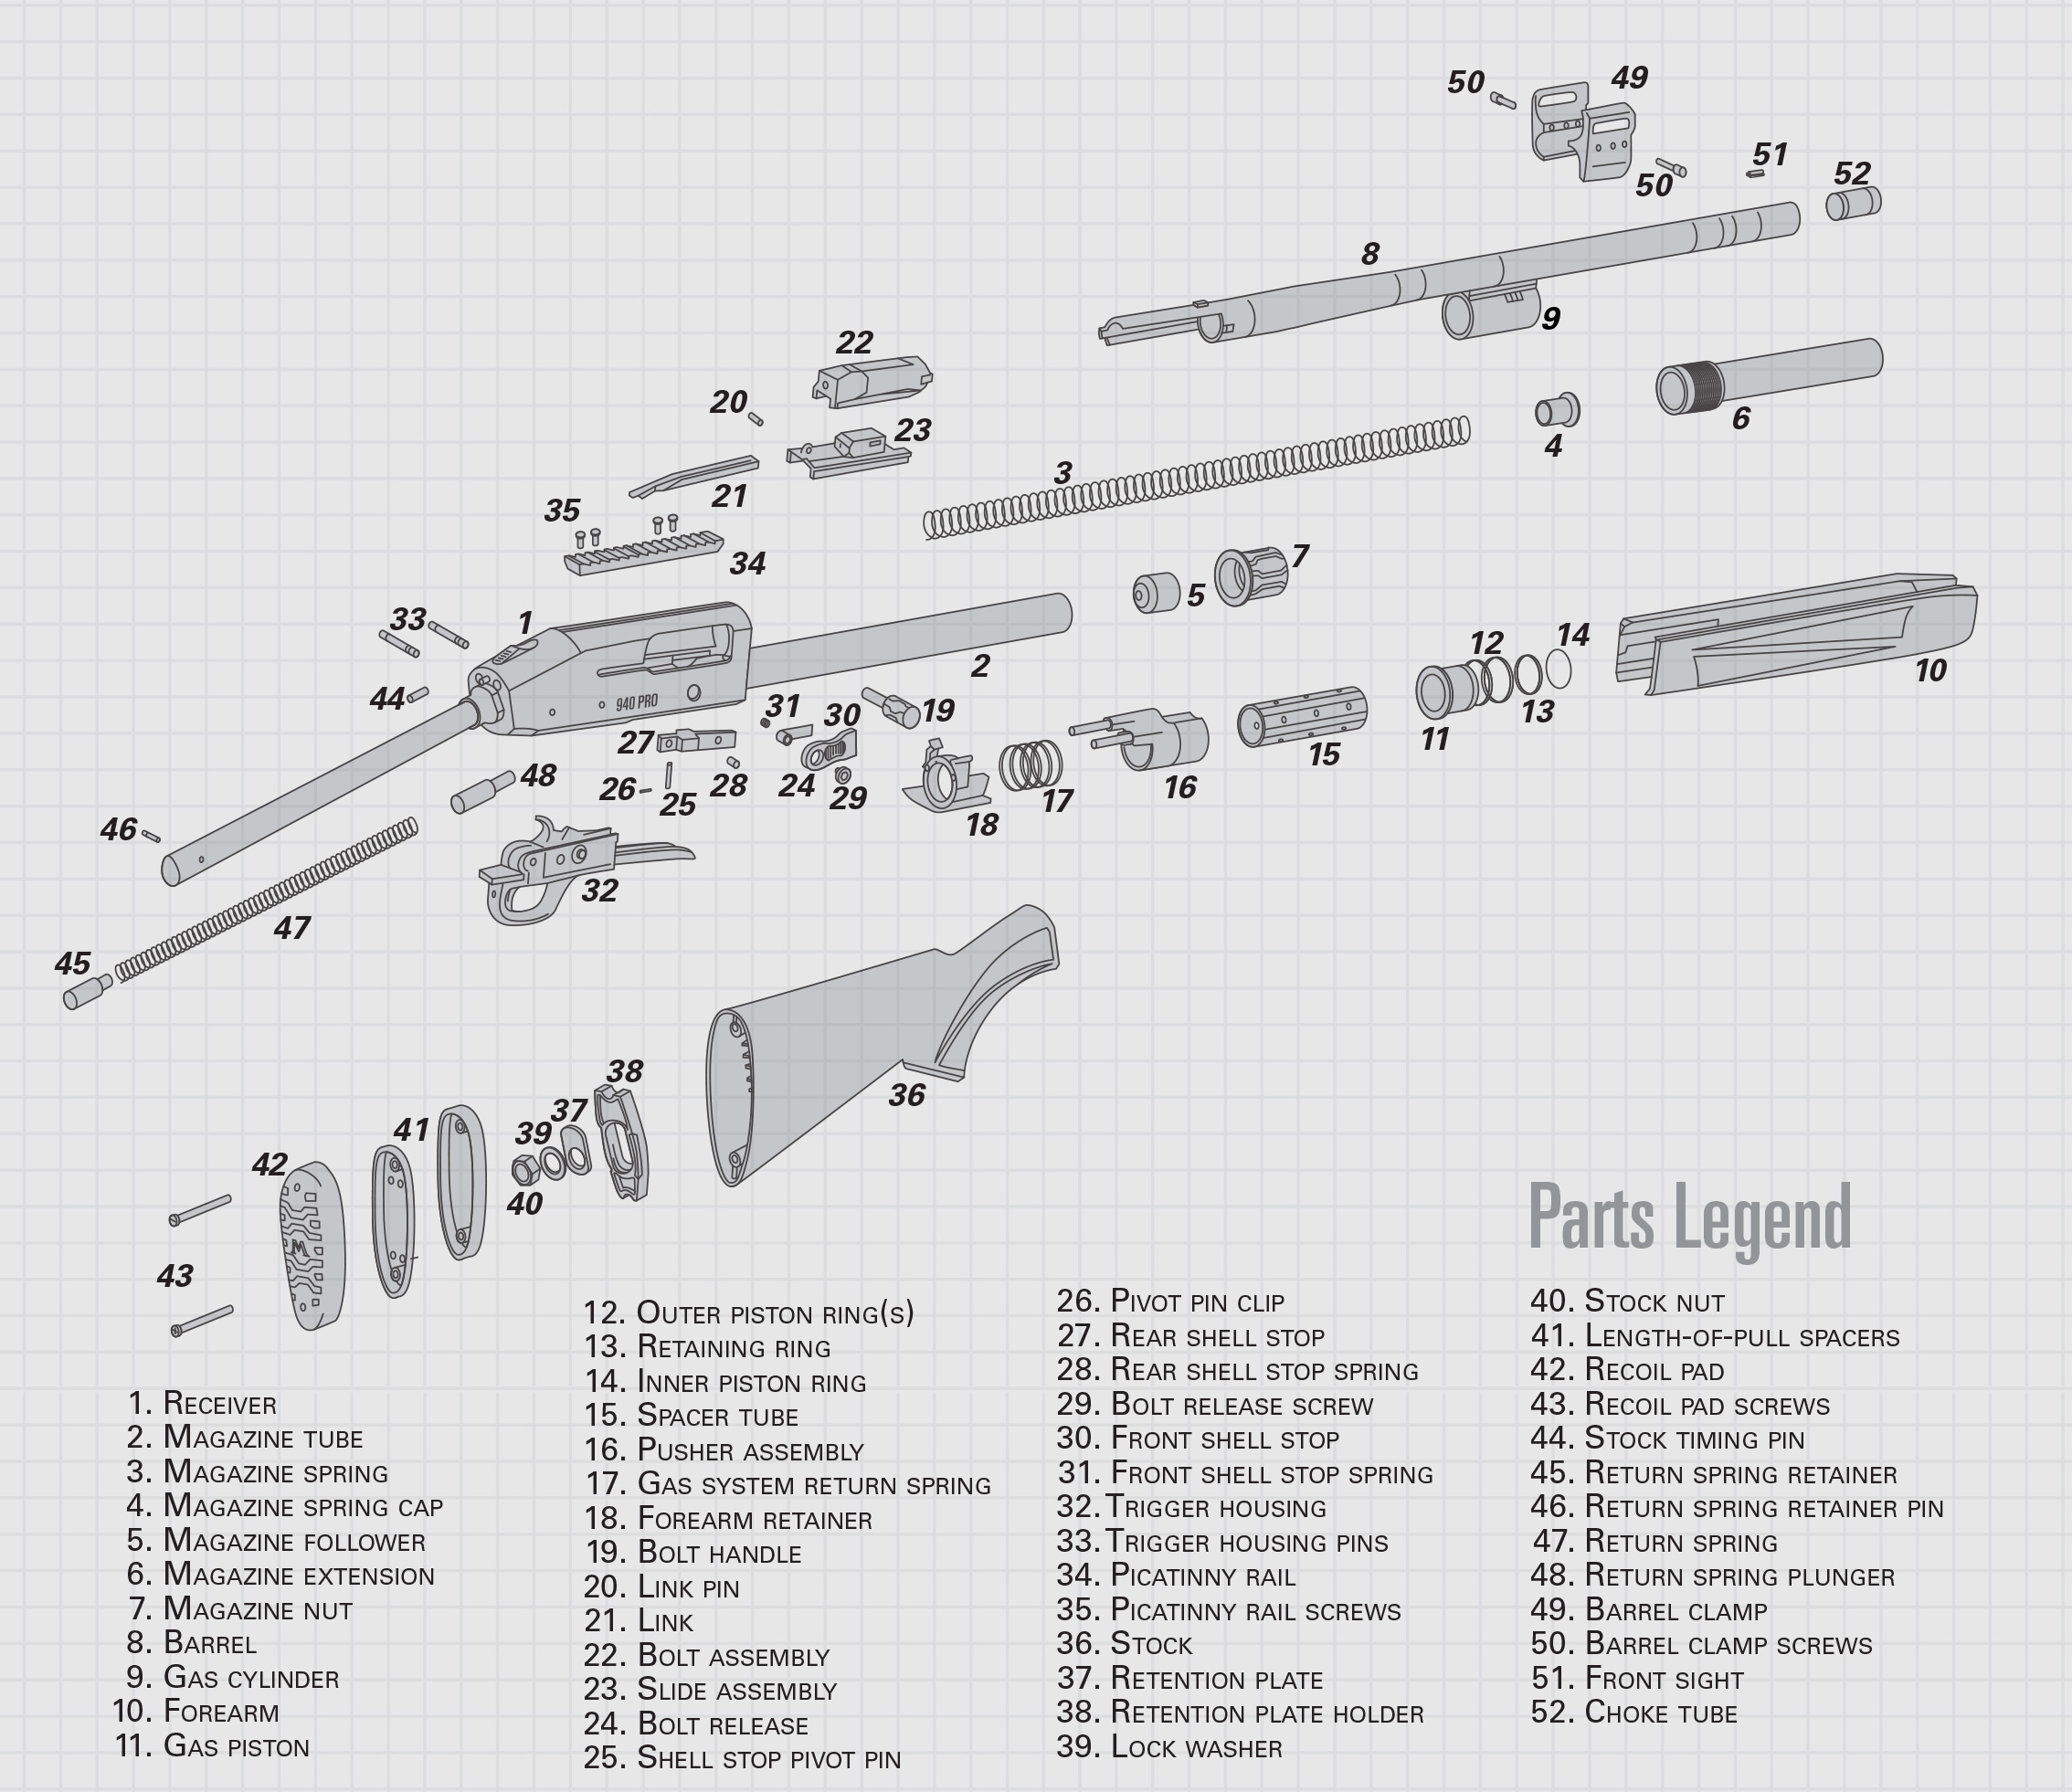
The first Model 940, the JM Pro, featured signature competition enhancements selected by Miculek. Hunting-specific models, such as the 940 Pro Turkey, launched shortly thereafter, followed by the 940 Pro Tactical shown in this diagram, which features a magazine-tube extension that increases overall capacity to eight rounds of 2¾" 12-ga. shotshells.
Despite the company’s 1,500-round reliability claim, Mossberg still recommends a thorough cleaning every 500 rounds to maintain performance. Following the disassembly procedure below before cleaning and lubrication will ensure each part can be fully cleared of carbon build-up and debris.
Disassembly Instructions
Before commencing disassembly, be sure the chamber, shell elevator and magazine tube are all free of shotshells and that the firearm is unloaded. The bolt (22) must be retracted fully rearward and the action locked open before proceeding. Unscrew the magazine nut (7), putting downward pressure on the cap (4) to counteract the pressure of the magazine spring (3). Carefully release spring tension, allowing the magazine spring to extend to its full length, then remove the spring.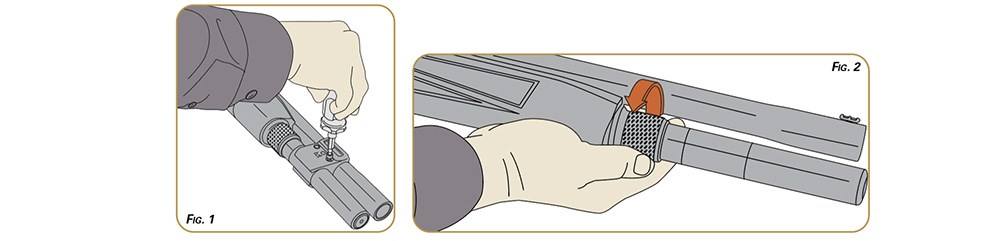
Some Mossberg 940 shotguns are equipped with a barrel clamp (49). Use a 5/32" Allen wrench to remove the screw (50) on each side (Fig. 1), then remove the clamp. Unscrew the magazine extension (6) two full turns, but do not remove the extension completely from the magazine nut (Fig. 2). Then unscrew the magazine nut (7), with the extension attached, from the magazine tube. Remove the extension with its attached nut, then slide the forearm (10) forward.
Pull the barrel (8) forward and free it from the receiver (1) and magazine tube (2), ensuring that the gas piston (11) remains in the gas cylinder (9) attached to the barrel. Angle the magazine tube downward to catch the magazine follower (5) as it falls out the front of the tube. Note its orientation for proper re-assembly. Remove the gas piston assembly from the gas cylinder. Then remove the spacer tube (15), pusher assembly (16), gas system return spring (17) and forearm retainer (18) from the magazine tube.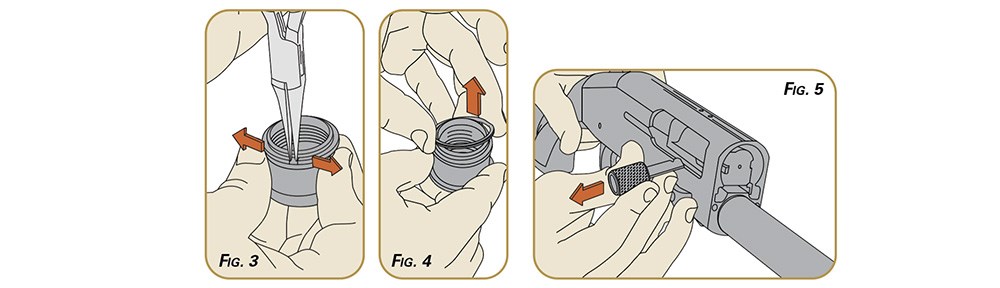
Some 940 gas piston assemblies are fitted with a single outer piston ring (12), while others have two outer rings secured by a retaining ring (13). For those with a single ring, insert a flat-bladed screwdriver between the outer piston ring and the rim of the gas piston and pry it up and away from the gas piston. For those with two outer rings, insert the screwdriver blade into the retaining ring notch or use a pair of snap-ring pliers to pry the ring out of the groove (Fig. 3). Then insert the blade under the ring, moving around the piston in a clockwise direction to pry it off the gas piston (Fig. 4). Then slide the two piston rings off the piston. Do not remove the inner piston ring on either gas piston type.
To remove the trigger housing (32), hold the operating handle, press the bolt release and ease the bolt into its forward position manually. Push out the two trigger housing pins (33) using a punch, then pull the trigger housing assembly straight out of the receiver.
Pull the bolt handle (19) straight out from the bolt (Fig. 5). Then, while depressing the bolt release (24), remove the bolt and slide assembly (23) through the front of the receiver while ensuring that the loose-fitting link pin (20) does not fall free during removal. Re-assembly is accomplished in the reverse order, taking care that the link (21) seats within the return spring plunger (48). Gas piston assemblies with two outer piston rings need to have the ring slots oriented 180 degrees apart during re-assembly.


