When I was researching secure gun storage options a few years ago, it was easy to see the product gap that exists between locking gun cabinets and fire-rated gun safes. Locking cabinets are usually light enough to be moved and installed by just one or two people but provide less theft deterrence than a safe. Gun safes are by far the most secure method of gun storage but they are heavy and difficult to move.

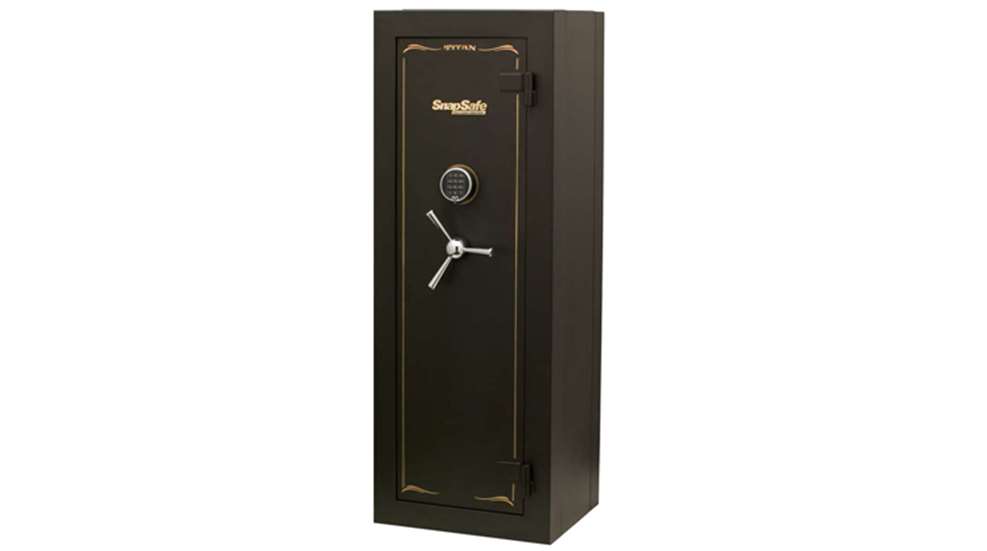
SnapSafe, a Hornady company, offers a much needed third option with the Titan series of modular fire-rated gun safes. The Titan is designed to offer the security of a conventional welded safe but is shipped in sections that are much easier to move, especially up or down flights of stairs.
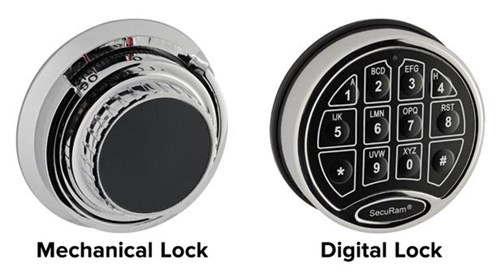
These safes are available in four sizes ranging from 375 to 850 lbs. with either a traditional spin dial (mechanical) or SecuRam digital lock. I contacted the company and requested the 12-Gun (smallest) model of the Titan to check out the features and see if I could really install it by myself.
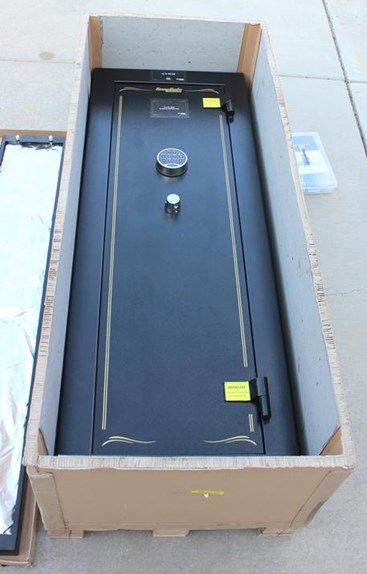
The Titan is delivered directly to your home or business. It arrives in a heavy-duty paste board crate with an integrated wood palette that supports and protects the contents. The Titan I worked with is the 375-lbs. version which means, with the tough crate and packaging, the weight was somewhere north of 400 lbs. Having a furniture dolly on hand that can handle that much weight is a good idea if you plan to move the unopened crate from the delivery point.
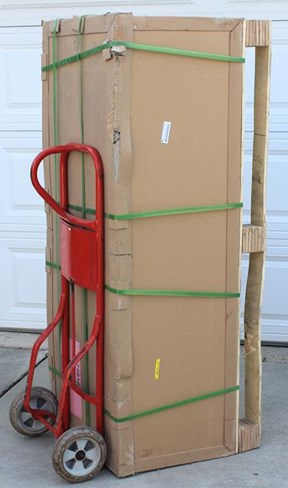
Some companies don't give as much thought as they should as to how their weighty products are packaged. The result is dents, scratches and damage to the product itself and, in some cases, other items riding in the same delivery van. SnapSafe does an excellent job of professionally packaging its safes to ensure they arrive ding free while being easy to access once they arrive. With the crate laying down, the shipping straps can be cut and the lid lifted off.
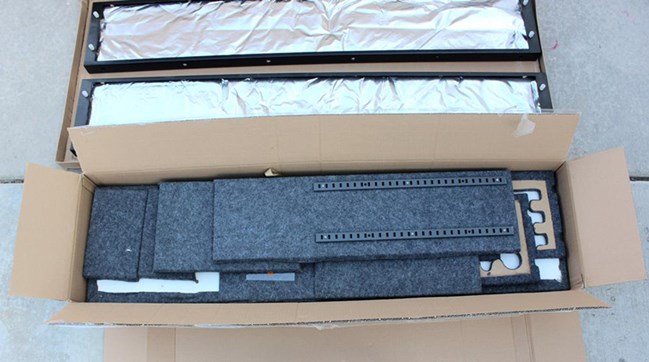
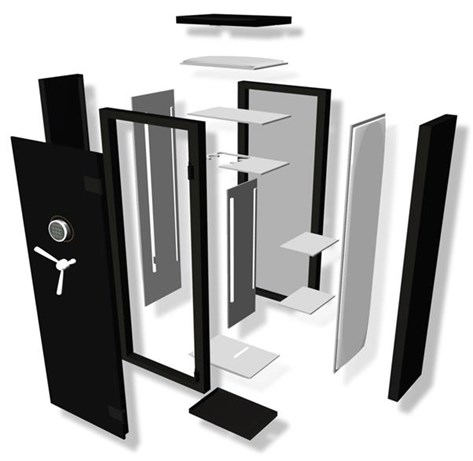
The first items out of the crate were the four 9-gauge steel exterior wall plates (the same thickness of steel is used for the front frame and back wall), a box containing the lined interior walls and shelves and a tool kit containing most of the tools and small parts required to complete the build.
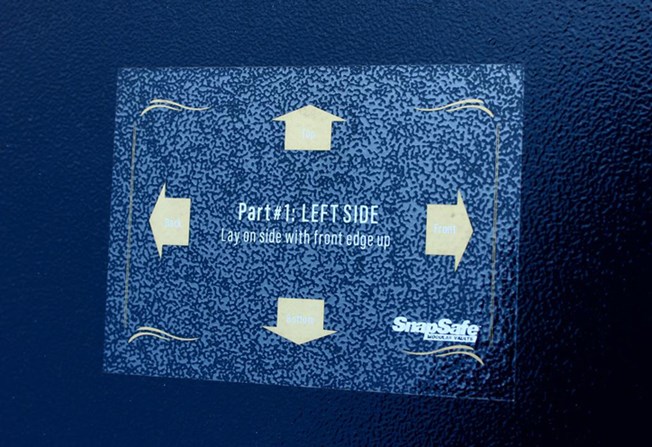
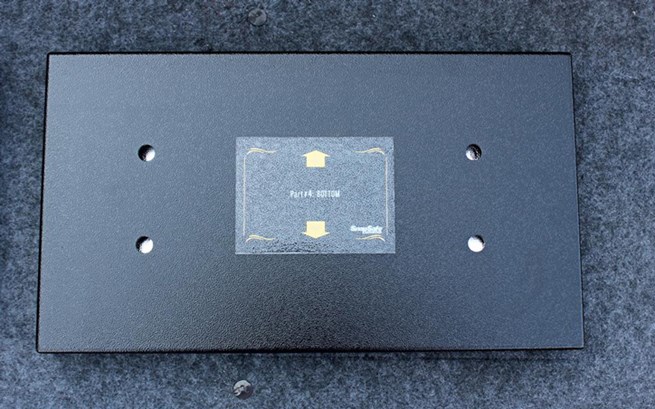
Each panel is treated with a corrosion-resistant powder-coated finish and clearly labeled with a removable decal that describes the location and orientation of the plate. The flexible silver insulation packs tucked into hollows of the exterior walls are part of the Fire Shield fire protection system, which is rated for up to one hour at 2300 degrees Fahrenheit. The bottom plate is pre-drilled so that it can be secured to the floor.
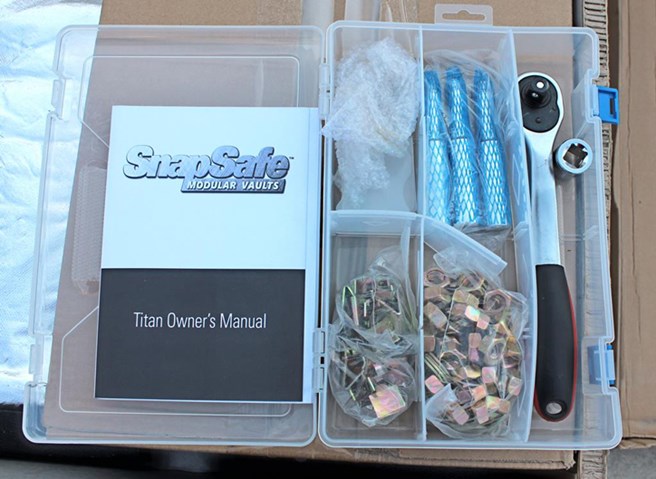
The provided tool kit items include the door handles, shelf supports, nuts, washers and an honest to goodness socket wrench with the appropriately sized socket. Providing a full-size, reversible wrench (instead of the useless stamped sheet metal wrenches so often found in furniture kits) was another professional touch that simplified and sped up the assembly process immensely. Two items necessary for the build that are not included are a Philips screw driver and a 9-volt battery (if you have the digital lock).
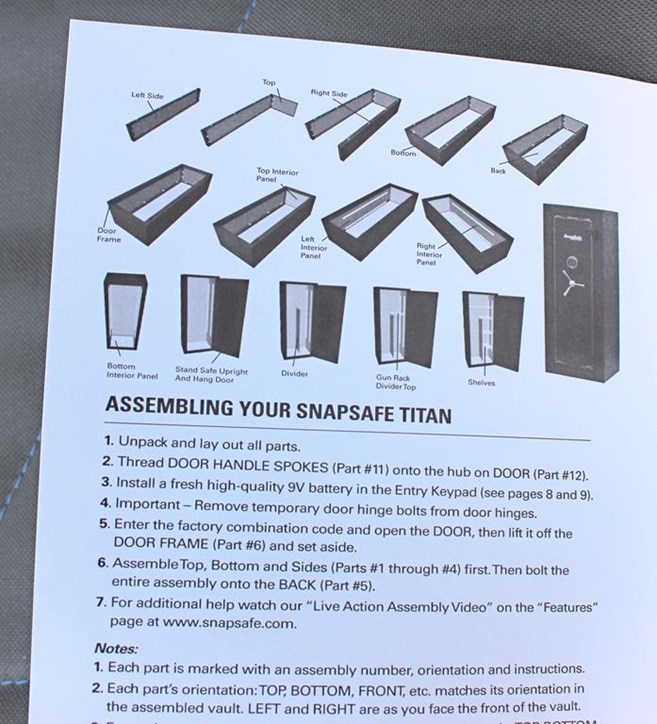
The instructions provided with the safe are clear and easy to understand. The assembly process is straightforward and uncomplicated but the order of the steps does matter at key points.
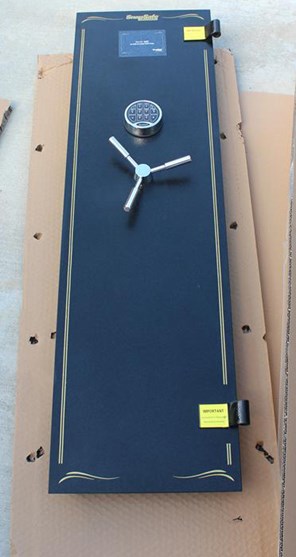
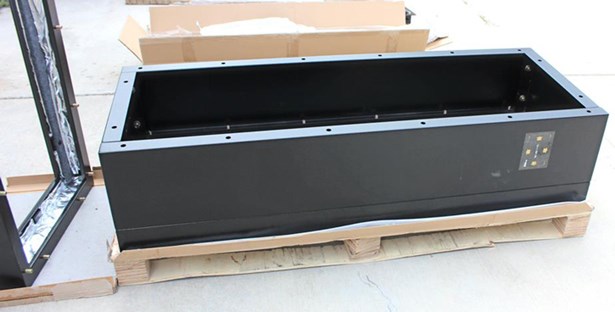
Half-way down into the crate was the front frame with the safe's sledgehammer and pry-bar resistant 3/16” solid steel door that features a spring-loaded relocker and eight 1” chrome steel locking bolts. The door alone weighs 92 lbs., so there's no practical way to lift it and the frame up out of the crate. Instead, I used a hammer to knock out the walls of the crate and tip the door frame up onto its bottom edge. At the bottom of the crate is the rear wall.
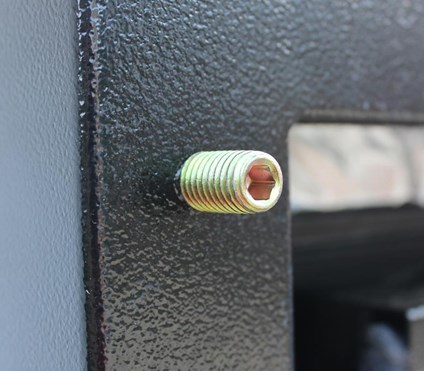
A look at the interior of the door frame reveals a felt-lined panel, more fire insulation packs and the locking bolts. The interior edge of the door frame is fitted with 16 of the 40 bolts that hold the safe together.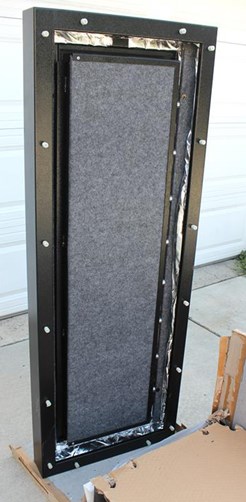
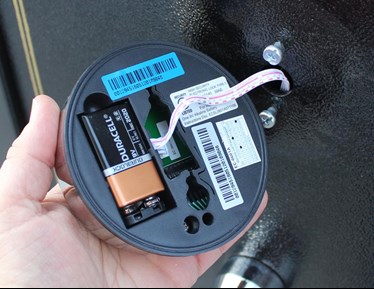
The door must be removed from the front frame before the safe is assembled. This is where the Philips screw driver and 9-Volt battery come into play. A pair of screws used to secure the hinges for shipping need to be removed from the hinges and the battery installed in the digital lock to release the 1" locking bolts.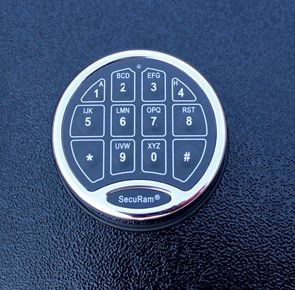
The door will then swing out to be lifted up and off of the frame. The hinges provide about 1.5" of space between the door and the frame to help avoid fingers getting pinched when the door is lifted into or out of the frame. With the door removed, the instructions read and all the parts laid out, it was time to assemble the safe.
While I was putting the safe together, I followed an assembly trick my Dad taught me as a kid which has served me well over the years. When driving the nuts into place over the provided washers, don't tighten them down all the way. Instead, leave the nuts a little loose so that there's some room to maneuver the sections into place. When all the bolts are properly slotted and all 40 nuts are in place, then go to work cinching them all down nice and tight.

SnapSafe recommends assembling the safe in a horizontal position since this is the easiest way to align the bolts and holes while allowing gravity to do some of the work for you. However, the safe can be put together in the upright position if your situation requires it. Just be aware that when the sections are vertical they will rock back and forth making lining the bolts up a bit more challenging.
The four wall plates are assembled using eight of the nuts and washers with the insulation packs removed to provide access to the bolt holes.
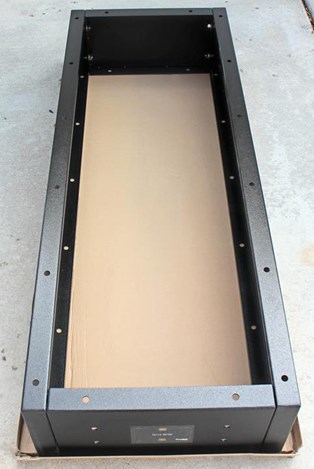
The assembled wall plates are then lowered onto the back wall.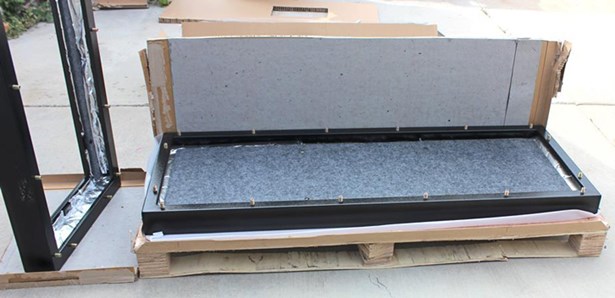
The empty front door frame is then lowered onto the wall plates. Now the 32 remaining nuts and washers can be installed and all the nuts fully tightened.

Felt covered interior panels are installed in the back wall and the door at the factory. The remaining panels with support rails for the shelving are simply pressed into place, supporting each other without the need for fasteners.
![]()
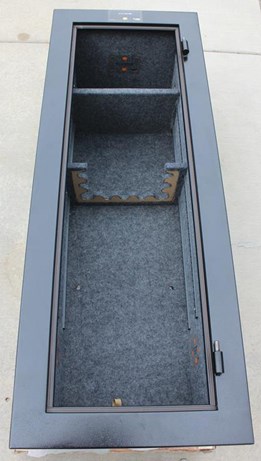
The felted shelving shipped with the Titan allows for two primary configurations. Use a divider to set up three small shelves with a rack for up to six long guns and an additional storage shelf up above. Or set aside the divider and shelves and use the full-size rack to accommodate up to 12 long guns.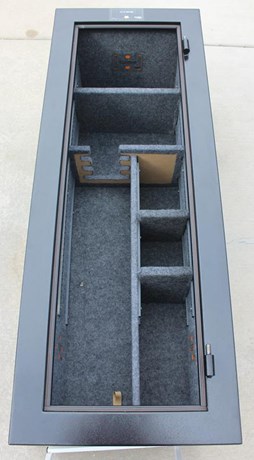
SnapSafe advertises that the Titan, "assembles in minutes ..." which I'm going to agree is true once everything is in place and ready to assemble. If you can break down a semi-automatic pistol, clean it and put it back together again then you have the mechanical skills required for building this sturdy, secure gun storage system. I set the three major sections together horizontally and vertically to see which was easier. If you can work horizontally, do it. It’s more challenging to align the 32 bolts properly in the vertical position. Nevertheless, it can be done in either position in less than an hour.
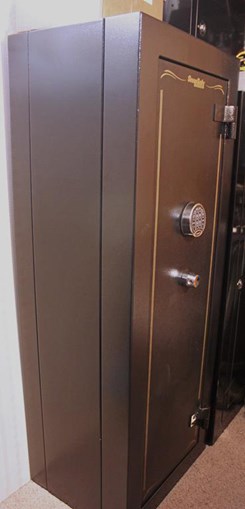
I've sold gun safes at retail stores, moved them and visited a factory to see welded safes roll off the assembly line. Based on my experience, I'm impressed with what the SnapSafe Titan has to offer. It provides the quality and security of a full feature, fire-rated gun safe with the portability of a locking gun cabinet. Welded safes of the same size can cost anywhere from $800 to $1,800 depending on the features. This Titan has a suggested retail price of $1,249 placing it, price wise, in the middle of the market. But to borrow a line from Star Trek, it can boldly go where no safe has gone before. That certainly makes it a worthwhile investment. Titan safes ship with a lifetime warranty.
Specifications:
Manufacturer: SnapSafe
Model: Titan
Lock: Mechanical (No. 75020 ) or Digital (No. 75010)
Locking Bolts: Eight 1" Chrome Steel Bolts
Exterior Walls: 9-Gauge Steel
Exterior Dimensions: 59" High, 22" Wide, 17.5" Deep
Exterior Finish: Black Powder Coating
Interior: Lined with Adjustable Shelving
Interior Dimensions: 55.125" High, 17" Wide, 14.5" Deep
Fire Rating: 1-hour 2300°F Fire Shield Protection, Heat Activated Door Seals
Weight: 375 lbs. (Empty)
Capacity: 12+ Long Guns
MSRP: $1,249