11/26/2012
Responsible armed citizens should never shoot at targets they can’t see and identify, which is why a good flashlight is so important. There are many tactical lights to choose from today, but early in my law-enforcement career, choices were much more limited.
I first used the RayoVac Sportsman light, which held about five batteries and was long and ungainly. Then, along came the Kel lights, which were supposed to be an improvement, but they were long, ungainly and heavy.
Today’s small, compact, yet sturdy, tactical lights, using lithium batteries, are a vast improvement. They are so handy that they should be a part of every defensive kit. Still, having a good tactical light and knowing how to use it are two different things. What follows are three of the more basic defensive flashlight techniques.
The FBI Technique
The the oldest of the three has been taught by the FBI in its training schools for many years. In this method, the light is held in the support hand with the hand extended well away from the body. The light can be held high, low or in between, depending upon the needs of the moment. In addition, there is quite a bit of flexibility of movement with this technique that allows one to follow a moving target.
The idea behind this method is that when the bad guy sees a light, he tends to shoot at the light. Holding the flashlight away from the body may cause the attacker to miss completely.
The downside to the FBI technique is that if one is not careful he can very easily illuminate himself. Also it is uncomfortable to hold just about anything out at arm's length for very long. One tends to start bending the elbow and then the method loses its effectiveness. Another problem is that if the citizen must fire, it must be done with only one hand, thus reducing the chances of a fight-stopping hit.
The SureFire Technique
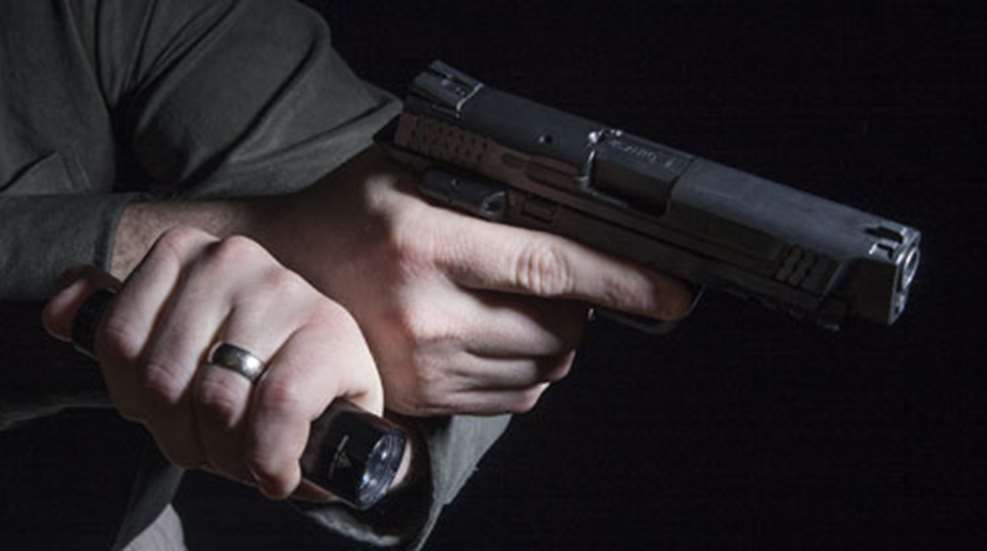
This method works best with the small tactical lights that have a rear cap button switch. The light is held in the support hand as if using a syringe. The barrel of the light is held between the index and middle fingers, while the rear cap button switch is operated by pressure from the base of the thumb. The last two fingers of the support hand are wrapped around the shooting hand in the manner of the regular two-hand combat grip. This allows for a more secure shooting grip and for the light and gun muzzle to move in the same direction.
The SureFire technique is obviously much more secure than the FBI method. It does take a little practice to get used to, but when mastered it allows for very accurate fire. Obviously, the SureFire technique does not work well unless the flashlight has a rear cap button switch.
The Harries Technique
The flashlight is gripped in the support hand with the head of the light being nearest the little finger. Depending upon the location of the light's switch, a finger or the thumb can be used to operate it.
With the handgun fully presented toward the target, the support hand moves underneath the gun, placing the back of the hands together. The support elbow is bent, pointing straight down, while pressure is applied to the back of the hands to create isometric tension. This is not the typical push-pull of the Weaver grip, but it provides adequate control of the pistol during recoil.
I use the Harries technique more than the other two because I just find that I shoot better when using it. Also, this method allows the light to move with the gun muzzle at all times. If your muzzle is pointed at something, you can light it up.
The only downside to the Harries technique that I have found is that it seems to require the most practice of any of the three. Still, that's not all that bad because we certainly ought to practice with our tactical lights. Further, the value of learning all three of these flashlight techniques is that the individual can use the method that best deals with a given situation.
When a person first begins to practice in low-light situations, he or she often tries to center the sights in the middle of the light beam. This is just wasting precious time. A little practice will reveal the fact that all one needs is enough light to see the target and the sights; nothing has to be centered.
One should never light up a target from the same place twice. Movement is your friend. And, if the bad guy can anticipate your location, the light will be more of a hindrance than a help. In addition, during a confrontation, the tactical light should not be turned on while it is pointed at the ground or when assuming the flashlight-ready position.
If a target has been shot, the decision must be made whether to follow it to the ground or turn off the light and move. If a stopping hit was not made, it will be necessary to find the target again. If there is more than one attacker, leaving the light on will easily identify your position. One must assess each particular situation and be ready to make this decision.
If it becomes necessary to reload the pistol, the light should be turned off. It can be quickly placed in the armpit of the shooting arm or in a front pocket. Many lights come with a lanyard that can be slipped over the thumb or wrist of the support hand. Using a lanyard, one simply turns the light off and lets it dangle on the end of the lanyard while making the reload. When manipulating the light in this situation, or any other, one should be particularly careful to never let the gun muzzle cover the support hand.
There is no doubt that tactical lights are a great aid for legally armed citizens. Get a good one. Practice with it, and don't leave home without it.