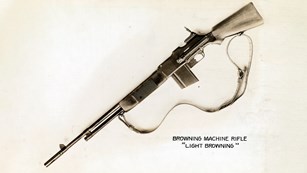
Ruger's Redhawk .44 Magnum revolver, introduced in 1979, was, in the words of Ruger promotional materials, "an entirely new firearm, representing the most significant advance in the development of heavy-frame double action revolvers in many decades." The new gun's lineage was quite clear: the Redhawk shared with its predecessor, the Security Six, a solid frame with disassembly via a removable trigger guard, a button-type cylinder release, a transfer-bar ignition system and many styling similarities.
There were innovations, too, however. While front cylinder lockup in the Security Six utilized the traditional spring-loaded plunger that engaged the recessed tip of the ejector rod, front lockup in the Redhawk was accomplished by a crane-mounted front latch that engaged a slot in the frame in the area below the barrel threads. Also new was the Redhawk's offset ejector rod, which permitted more meat in the frame around the barrel threads as well as the use of a larger barrel thread designation, both of which increased gun strength. Other changes included a new cylinder latch system; interchangeable front sight blades with different-colored plastic inserts and the use of a single coil spring to power both trigger and hammer.
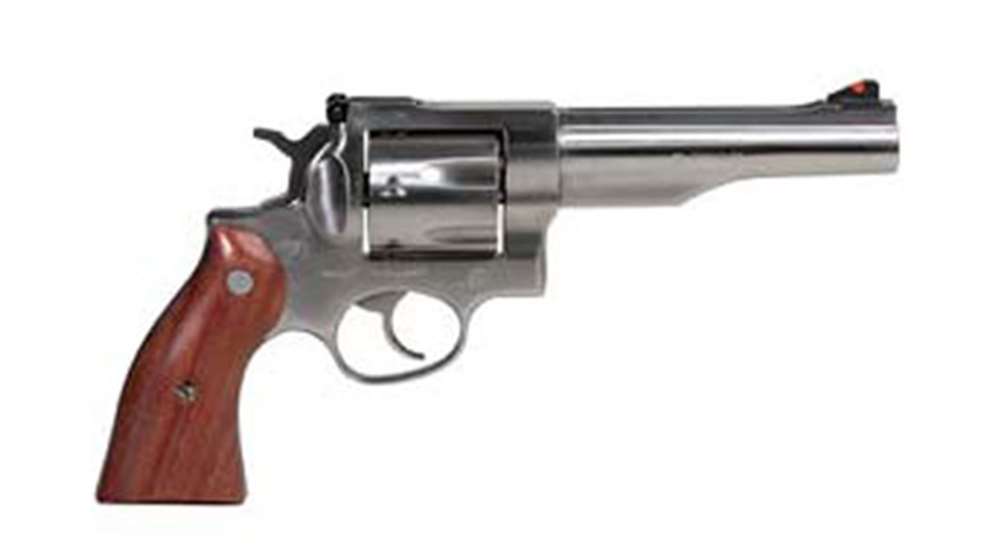
Originally issued in 410-series stainless steel with a walnut grip and a 7 ½-inch barrel, the Redhawk soon became available in a 5 ½-inch barrel length and in blued steel. In 1984, both .357 Magnum and .41 Magnum models were brought out, which were produced through 1991. Since its introduction a number of variants have been produced, mostly resulting from changes in sighting rib width, hammer pivot tab location and ejector. Currently, Ruger catalogs models in .44 Mag. and .45 Colt with either 5 ½- or 7 ½-inch barrels. It is estimated that by the late 1990s, more than 300,000 Redhawks had been produced since the gun's introduction.
Disassembly
First ensure that the revolver is unloaded. Turn out the grip screw (43) and remove the grips (42) from the frame (36). Cock the hammer (44), remove the disassembly pin (19) from its hole in the grip panel locator (41) and insert the pin about halfway into the hole visible in the end of the mainspring strut (55) (Fig. 1). Pull the trigger (69) with the thumb on the hammer spur; ease the hammer down gently and remove the hammer pivot assembly (50), using a brass or plastic punch if required. Point the muzzle down and lift the hammer upward out of the frame. Some manipulation of the hammer, trigger, mainspring lever (54) or hammer link hook (49) may be required to free the hook from the mainspring lever and allow the hammer to be lifted free.
NOTE: Redhawk revolvers with serial numbers below 500-09367 have the hammer link assembled to the hammer with the hook pointing downward. For these guns, the hammer link must first be disconnected from the mainspring lever using a punch or probe. Then, with the trigger pulled, the hammer pivot assembly and hammer can be removed.
Using a small punch, push out the lever pivot pin (51) and, using a slight twisting motion as the parts are drawn rearward, remove the mainspring lever from the frame with mainspring (52) and strut intact. Do not remove the disassembly pin, as it retains the compressed mainspring.
Pull the trigger guard latch (71) rearward using the mainspring lever as a tool, and simultaneously pull the trigger guard (70) and its attached parts down out of the frame (Fig. 2). Push the crane latch (6) inward, open the cylinder (13) and pull the cylinder and crane (5) forward off the frame. No further disassembly is recommended. Reassemble in the reverse order.
Reassembly
When reattaching the trigger guard assembly to the frame, first hook the lip at the front of the guard into its recess in the frame, then swing the guard up into position while holding the trigger guard latch rearward. Ensure that the pawl enters its frame recess and that the transfer bar is located to the rear of the firing pin. Test for proper assembly by pulling the trigger; the cylinder should rotate and lock into position.
Be sure to properly position the front end of the mainspring strut on the trigger link (74) at the rear of the trigger (Fig. 3) when the mainspring lever, mainspring and strut are reinstalled on the frame.
Point the Redhawk's muzzle up while re-inserting the hammer in order to position the hook on the hammer link so that it engages the pin in the mainspring lever. Manipulation of the hammer link with a punch or probe may be required.