A couple of times a year I get the bug to make something. I’ve done rifle stocks, knives, you name it-anything cool that you can make with hand tools, I’m likely to try. That’s how what started as a foray into gripmaking turned into an entire revolver project. Drawing from some of the “experiments” that I’ve conducted on the BullShooters blog, I decided that I wanted to customize a revolver. This do-it-mostly-yourself project left only the very technical elements to the experts; the rest was done in my backyard shed using hand tools.
I’ve always loved big-bore, single-action revolvers, not so much the fixed-sight “cowboy” guns that won the West, but the Keith No. 5-inspired hunting handguns perfected by the likes of John Linebaugh and Hamilton Bowen. I have a few such revolvers, but none that I’ve worked on myself.
This revolver was to be a primary hunting arm, not a sidearm, carried for utility targets of opportunity. Therefore, size was not a constraint. I chose a Ruger Bisley with the 7½ inch barrel as my base gun and set out to make some functional and aesthetic modifications to suit my tastes. I’ll take you through the process from beginning to end-keep in mind that I’m not only an amateur, but a beginner when it comes to most of this.
Before making the grips, I wanted to start with a flat working surface. Using a file and some marking fluid, I took the high spots out of the grip frame.

Starting with a handgun size chunk of Turkish walnut from Luxus Walnut, I traced the factory grips as a guide.

I used a friend’s band saw to cut them to rough external dimensions before going to work with chisels and files. Using inletting tools, I fit the blanks as closely as possible to the top of the frame and then drilled the blanks and installed the Brownells grip screw and escutcheon. 
With the grips secure, it was time to shape them. An old gunmaker once said, “to make a stock, you remove all of the wood that doesn’t look like a gunstock.” The same is true here, file away until they look and feel good to you-lots of trial and error.

Once the shape is correct, it’s time to sand out the file marks. I started with a very rough 80 grit and went all the way to 400 before I started the finishing process. Leaving the wood secured to the metal ensures that you don’t round off any edges. Since I planned to totally refinish the Bisley, I didn’t worry about the bluing.

With the grips sanded, I used Pro Custom Oil to seal and finish the walnut. This product is very user-friendly, and the level of gloss can be adjusted to suit one’s taste.

While the finish on the grips cured, I disassembled the entire revolver for the metal refinishing task. The Bisley is fairly easy to detail strip using hand tools, but removing the barrel requires some special equipment to be done correctly. Brownells set me up with a Power Custom Frame Block that holds the revolver securely in the vice. They also supplied a barrel wrench and set of barrel blocks. With everything secure, the barrel is simply screwed out of the frame. If you don’t have a sturdy vice, you can actually use two barrel wrenches to perform the same task.

The factory finish looked good on my Bisley, but I wanted something a bit more unique. I removed all of the factory finish using a chemical blue remover. Then, using EDM stones and fine sandpaper, I removed all of the small tool marks and created flat, square surfaces on the entire revolver-everything was eventually polished to 600 grit.

Rust bluing is not only considered the finest of firearm finishes, it is a finish that the hobbyist can perform with minimal equipment. After carefully stripping the parts of all grease and oil, I covered the steel in Laurel Mountain Forge’s rust blue solution until a nice layer of rust formed. The parts then went into a small tank of boiling water on my barbecue grill to convert the rust to black oxide. After removing the excess oxide away with a wire wheel, the process is repeated until the color is right. While this was going on, I sent the frame, hammer and loading gate to Turnbull Mfg. for case coloring. Both the bluing and coloring came out looking great.

There are some tasks that I’m just not comfortable tackling-I steer away from anything relating to triggers, sears and safeties. The potential consequences of an unsafe firearm are too great not to solicit professional help. I bagged-up the whole works and enlisted the help of Alabama gunmaker John Gallagher. John is a Trinidad State trained gunsmith who has spent a couple of decades building fine guns including countless single-action revolvers. John performed an action job on the Ruger, as well as install a Belt Mountain locking cylinder base pin and a “free spin” pawl. John also reassembled the entire package and properly timed the front sight. John is a gentleman, his work is first rate and I highly recommend him.
At this point, we have a unique, attractive revolver with a great trigger and a few functional upgrades, including a set of grips literally made to fit my hand. The only thing left to tackle is to see that the internal dimensions are correct. To ensure great accuracy, a revolver must maintain a tight grip on the bullet as it travels into and through the barrel. This means that the chambers, forcing cone, barrel and muzzle must get progressively smaller (or at least the same size) as they go.
Many revolvers have small chambers and “thread choke” in the barrel, which will swage the bullet down to a minimal diameter, ruining accuracy. Chambers can easily be measured by pushing a sized bullet through; the bullet should pass through with minimal resistance. To detect thread choke, a lubed slug of soft lead is pushed through the bore from the muzzle-any constrictions along the way will be obvious. This revolver exhibited about .0015 inches of thread choke, since anything more than .001 inches will generally cause accuracy problems, it had to be addressed.

Unless you have a lathe, a special reamer and the knowledge to cut a Taylor throat, the only way that I know of to address barrel constriction is by fire-lapping. This process involves embedding an abrasive compound into soft lead bullets that are fired through the bore at minimal velocity. It is time consuming and messy, but it works. After 80 lapping rounds, the thread choke was minimal and I was anxious to do some serious accuracy testing.

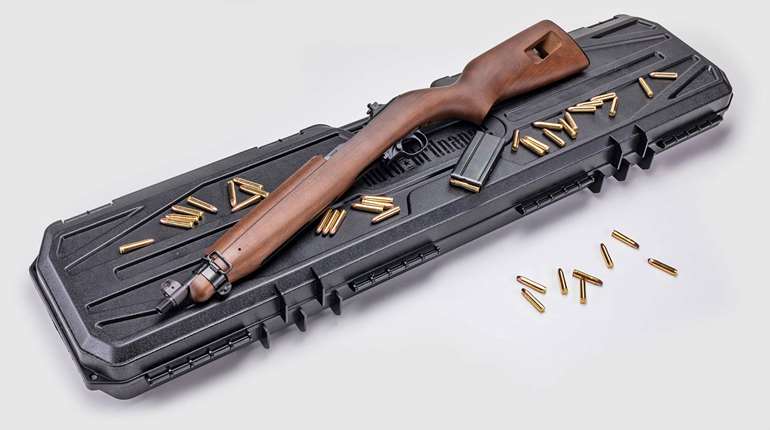
It was finally time to put some full-power rounds through this revolver and see how it would perform. As much as I like the looks of this Bisley, hunting isn’t a beauty contest-it had to be able to shoot. I had a decent selection of factory ammunition available and I also loaded up some of Beartooth Bullets’ LBT-style 300-grain LFNGC loaded with 21 grains of WW-296 and Federal Magnum Pistol primers, a medium-hot load that allows me some room to increase velocities.
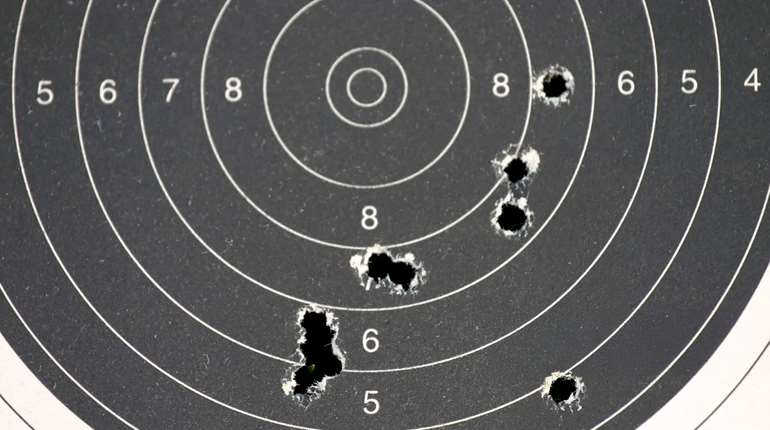
The first few groups were fired with standard velocity factory ammo and were nothing to write home about. My experience with the .45 Colt is that it’s at its best with near-max loads and heavy bullets. My handloads showed some real promise with good accuracy but they weren’t the stars of the show. DoubleTap Ammo’s 365-grain WFNGC +P load produced an average velocity of 1,104 fps and repeatedly put five rounds in 1-inch groups at 25 yards when I managed the trigger correctly.
That is impressive accuracy for an iron-sighted revolver with a factory barrel and generically sized bullets. Veral Smith at LBT just cut me a 300-grain WFNGC mold sized at .453 inches specifically for this revolver. With that bullet at max velocity, I think we can do even better.
Here’s the finished product, I hope you like it.