Over the past decade, I have put more than 1,000 students through the NRA Basic Rifle course, as well as the Long Range Precision Course at Renaissance Firearms Instruction. During this time, I have concluded that most shooters don’t arrive with an understanding of what is required to properly affix a scope to their firearm. Most shooters (myself included) don’t realize how unforgiving the process is until their handiwork fails while they are shooting. I recall a time when I couldn’t understand why my groups were walking until after that final shot when my scope plopped right off of my rifle. Since then, I’ve learned a bit and have come up with a system that has yet to fail me. It goes something like this:
Step No. 1: Prepare Your Rifle
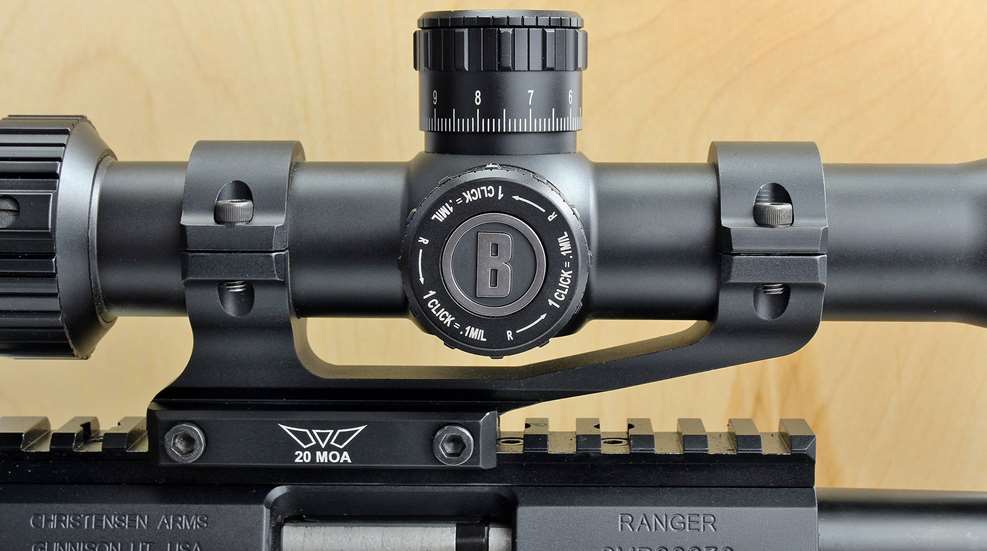
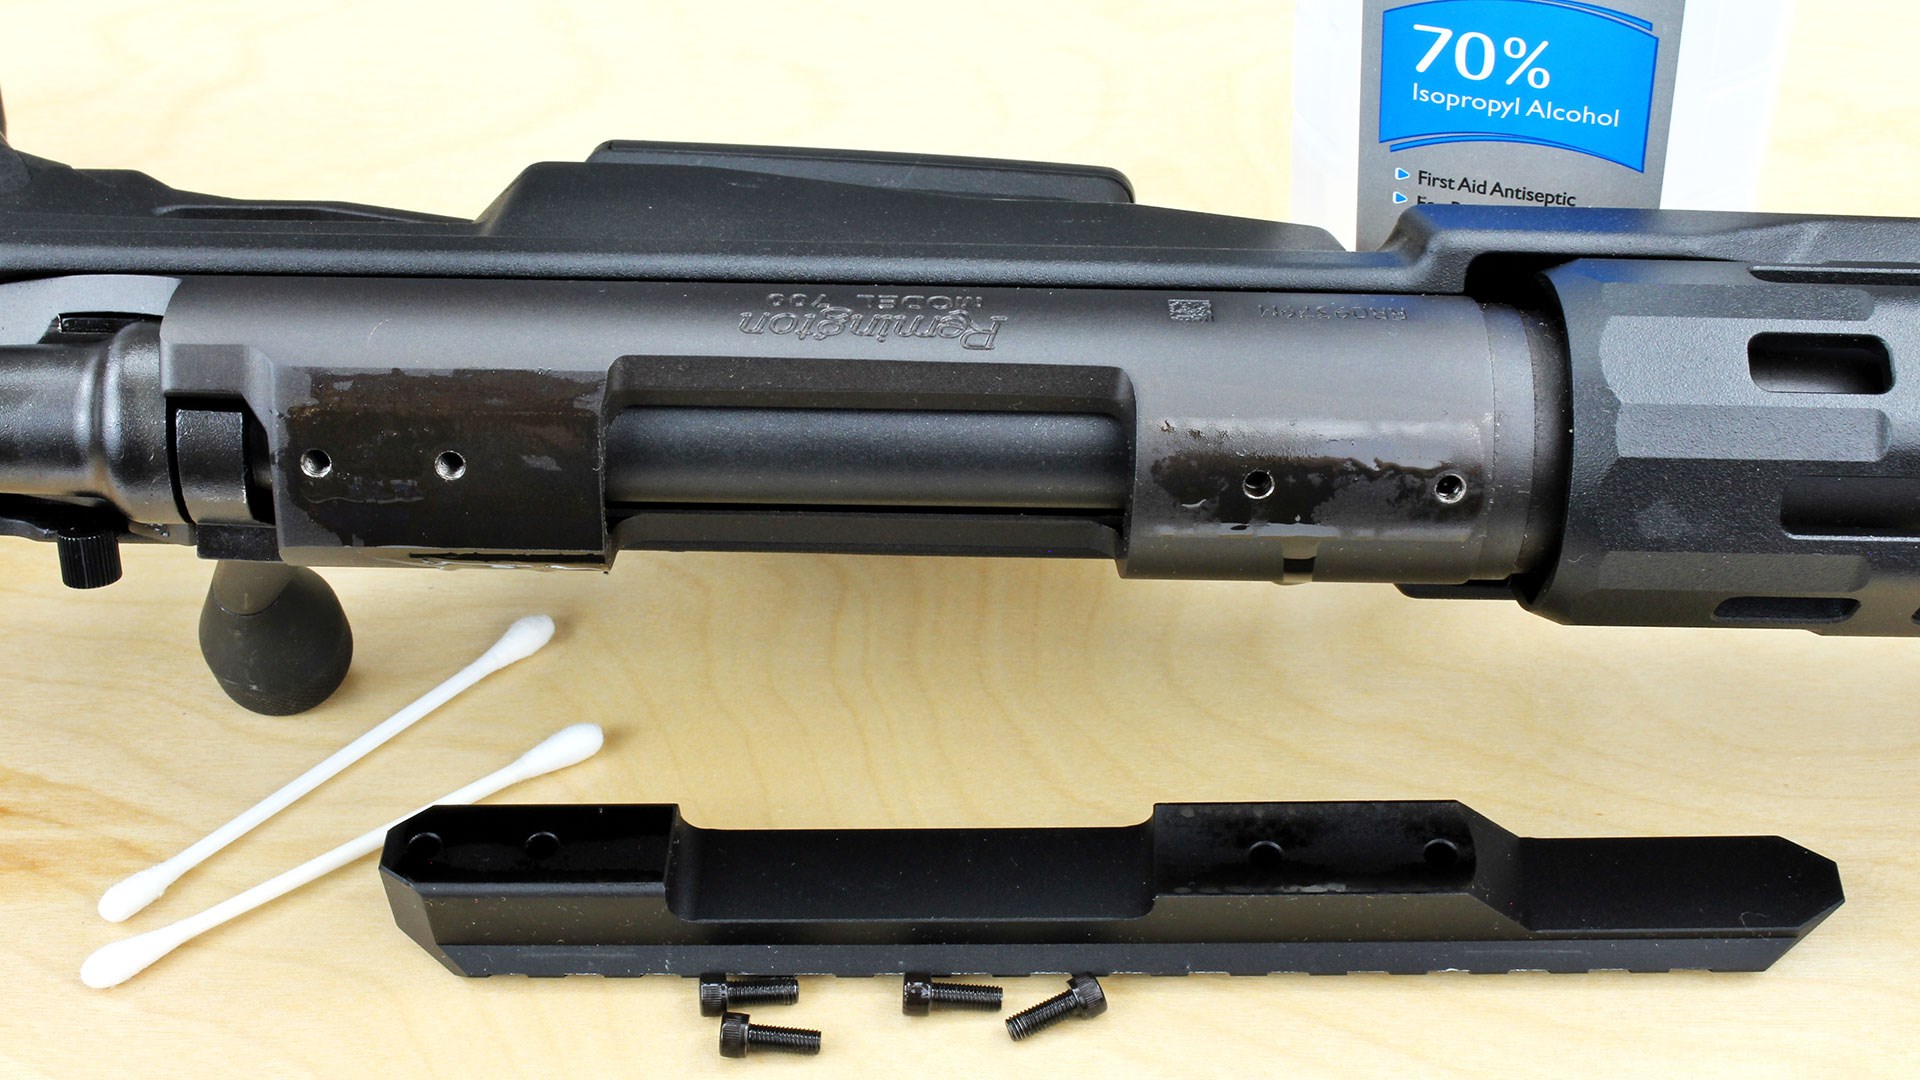
First, we have to make sure that the rifle is ready to accept a scope. That pre-mounted rail (or pair of bases) isn’t guaranteed to be put on correctly. Manufacturers are notorious for not tightening rail hardware nearly enough. Furthermore, there is usually residual oil on the receiver threads that you’ll want to remove. With the proper tools, remove the mounting screws and clean them with rubbing alcohol, as well as the threads inside of the receiver. Cotton swabs make short work of this task. Next, before you put that rail (or bases) back onto your gun we’ll need to make a few decisions. First, would a 20 m.o.a. canted base be better for your application? Reference your scope's manual and get an idea of how much adjustment you have.
If you plan on going long with your rifle, you just might want to sub-in a quality long-range base if one is available for your model rifle. Be careful, however, because if your optic is built on a 1" main tube, then it might mean sacrificing a short-range zero. A ballistics app will be your friend here. Simply plug in the requested data and see how much adjustment you will need to reach the maximum intended target, then decide if you need that extra 20 m.o.a. Remember, this will change for each cartridge and even each loading to some degree, so you might want to check a few different ones. Once you’ve settled on hardware, it’s time to mount up.
Begin by getting each screw started with just one full turn. Next, in a crisscross pattern, turn each screw an equal amount until they are snug. Using a torque driver, set each to 25 percent of the manufacturer's recommended torque spec, then 50 percent, then 75 percent and eventually 100 percent. This method ensures that each screw is tightened equally and that the base isn’t being held up by one in particular. Last, and I know this is taboo, remove one screw, place removable thread locker (the blue stuff, not the red) on it, and reinstall it back to 100 percent of the torque spec. Repeat this with each screw one at a time. If done with the proper tools and to the correct specs, you have little worry about stripping the screw heads if the time ever comes to remove them.
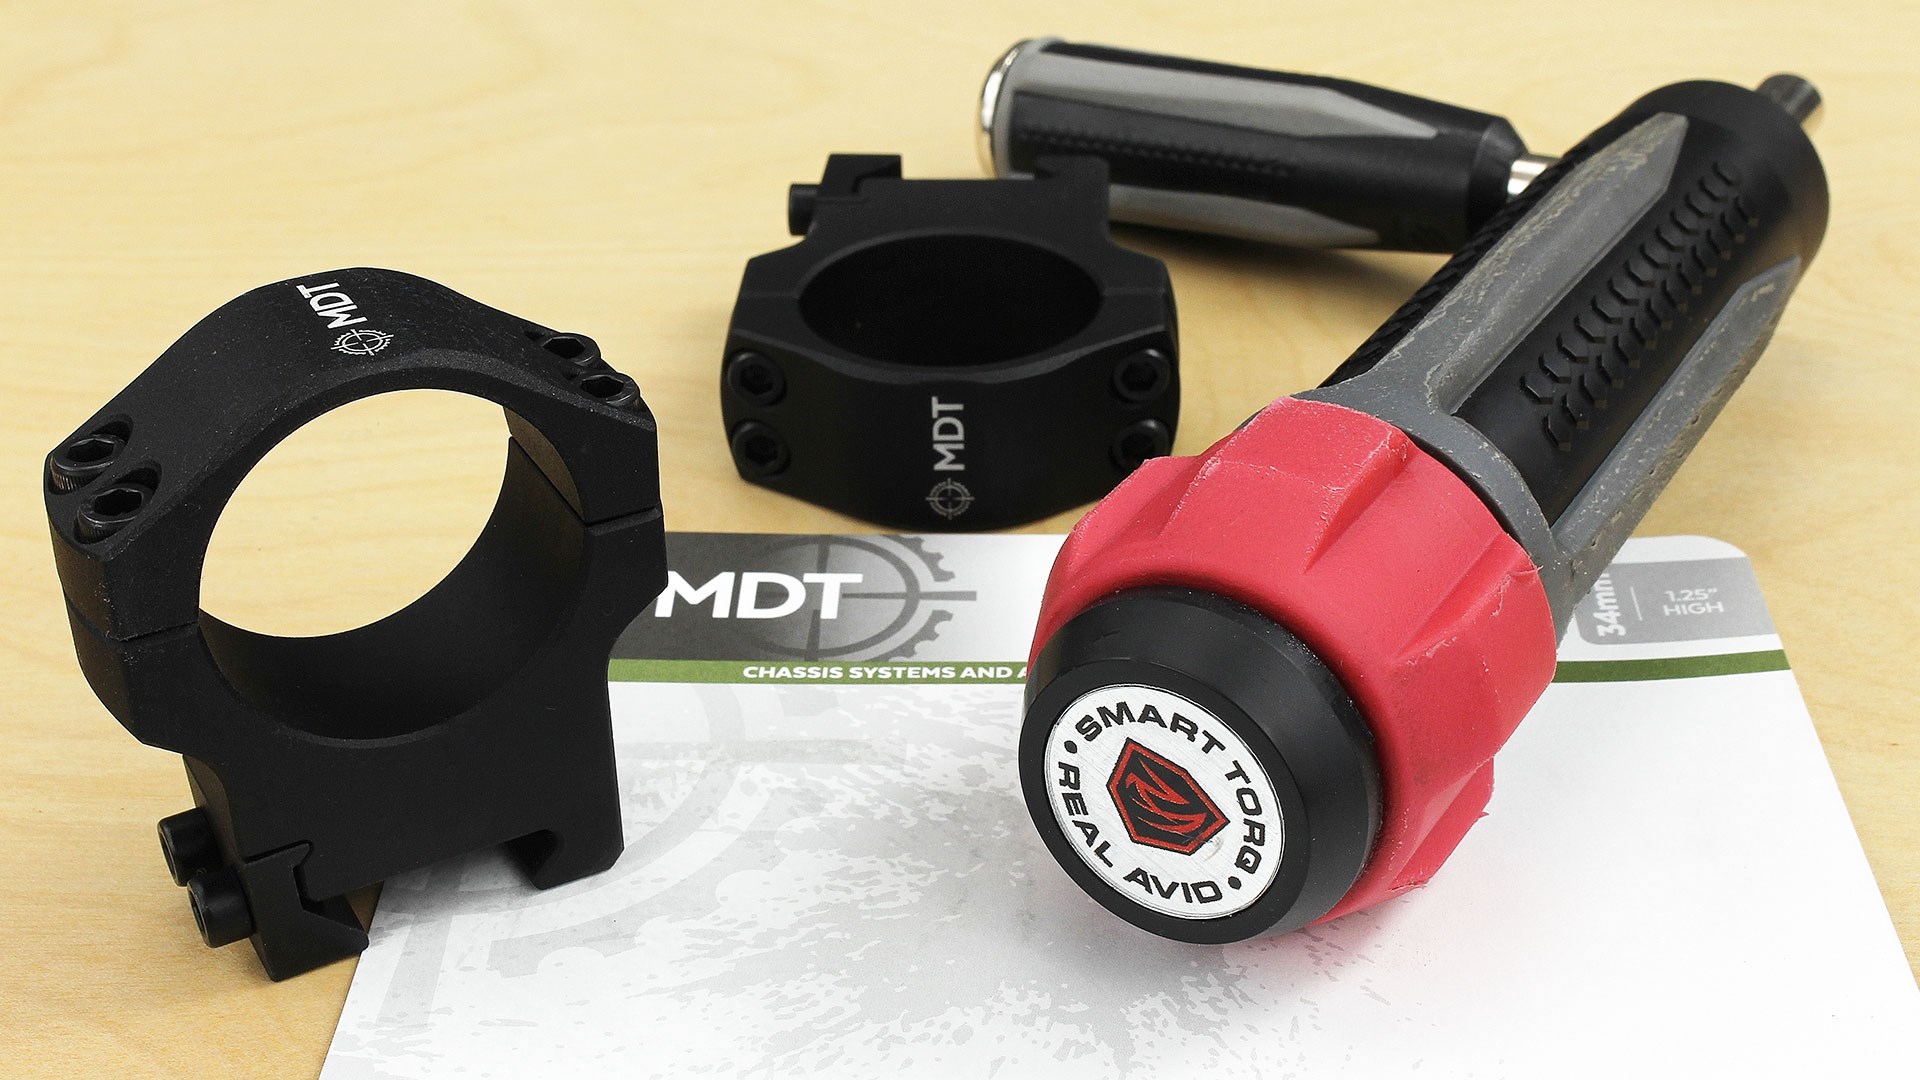
Step No. 2: Prepare Your Base Or Rings
Just like your rifle, your rings or one-piece mount is going to need a little prep-work before installation. Start with taking them/it apart as much as you can. Using the same method that you applied to your receiver, clean all of the hardware and thread surfaces. Also, be sure to wipe down the internal mating surfaces of the rings themselves. If there is any sort of tape-like material on the inside, get that out of there, along with any glue that is left behind.
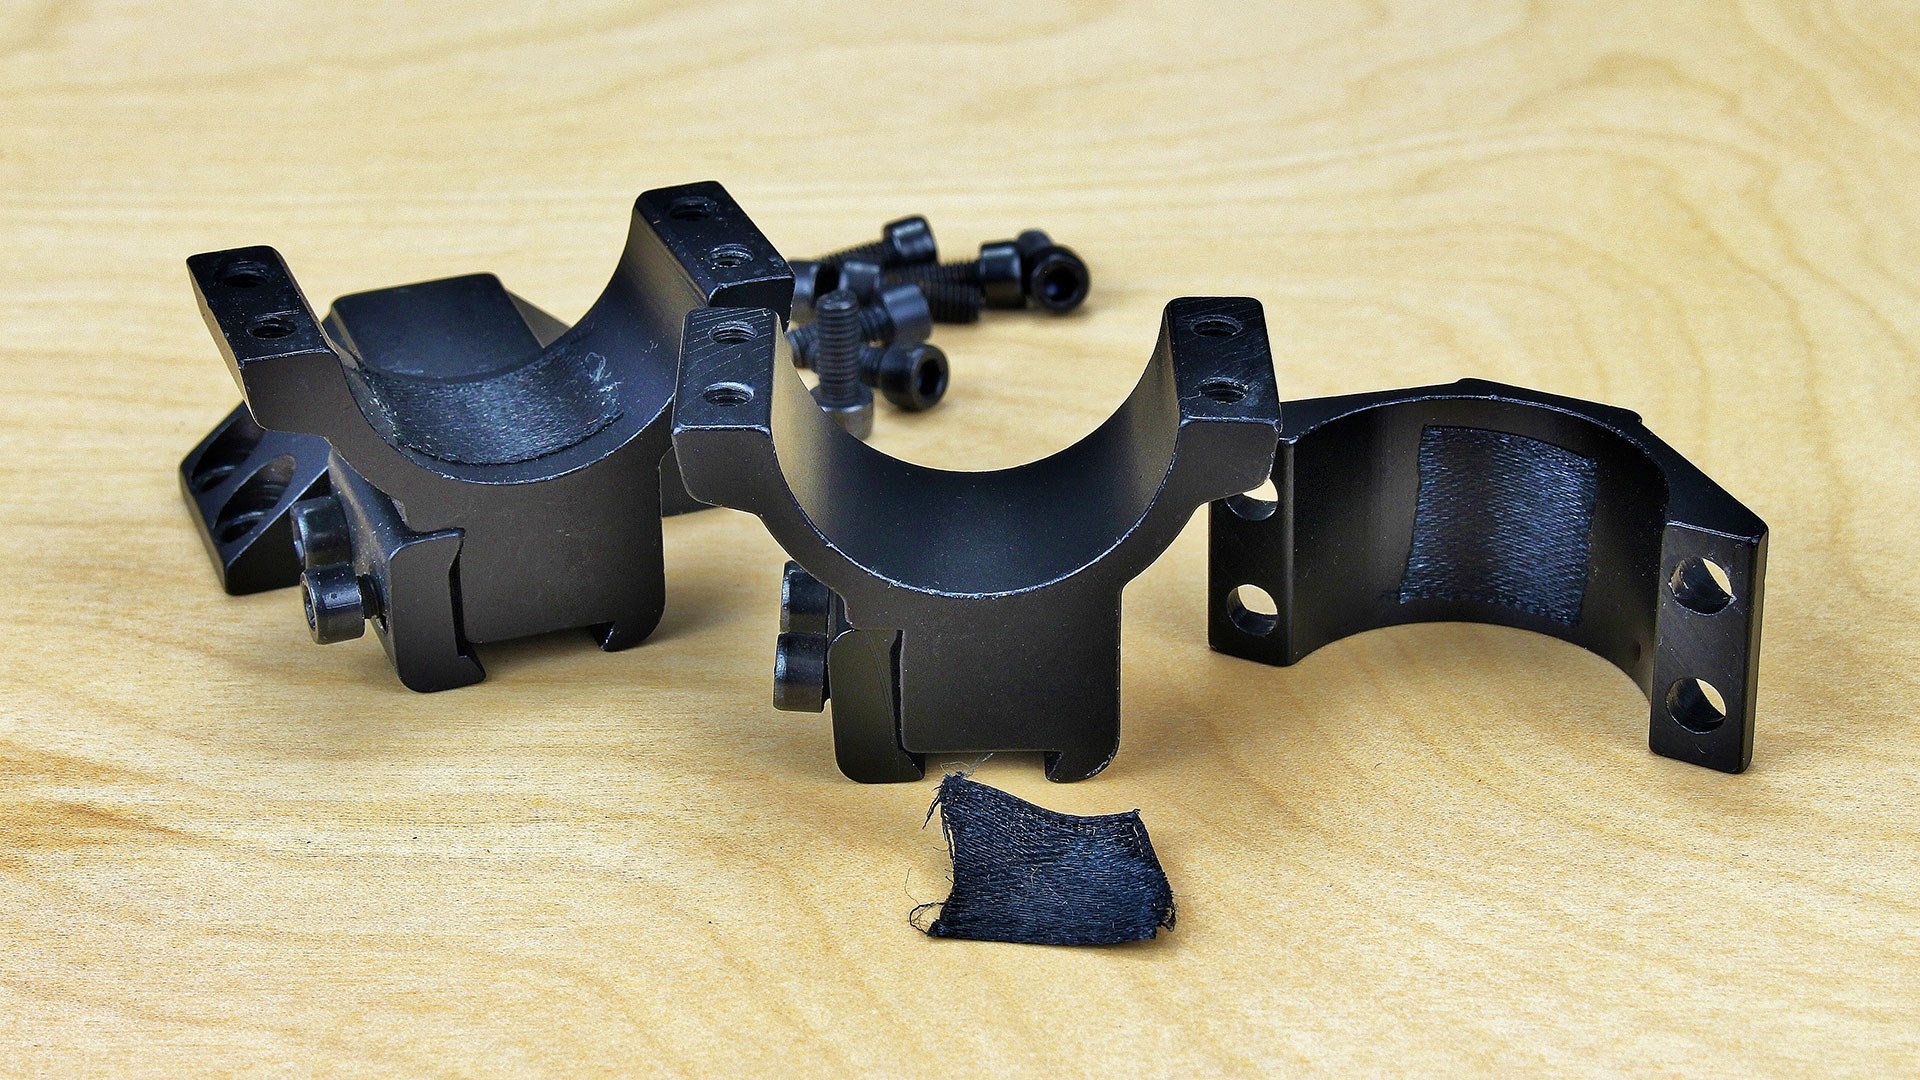
For this reason, and many others, it pays to buy quality scope rings from companies like Warne, Contessa and MDT (just to name a few). The engineers from companies like these have a better understanding of precision rifle shooting, and their products reflect it. Once prepared, the next step is mounting this hardware to the base. When doing so, I ensure that each mounting screw or bolt is tightened equally, in the same manner that I tighten the receiver hardware. Then I again remove each screw (one at a time) and apply thread locker. This process ensures that one ring is not offset from the other or in the case of a one-piece mount, it doesn’t wind up with any yaw. Either situation could make it tough to dial in enough windage to zero.
Step No. 3: Setting The Scope
Now that the table is set, it’s time to invite in the guest of honor: the optic. Go ahead and place it into the rings and then install the ring caps with just one full turn of each screw. As the scope is now secured to the rifle, go ahead and assume a shooting position and set your eye relief by sliding the optic back or forth until you have a full field of vision. It’s best to do this at the highest magnification setting, as eye relief is often less forgiving. After you think you have the scope where you want it, go ahead and check that eye relief in several different shooting positions. If things aren’t looking so great in one position or another, you’ll have to make a decision based on which shooting position you plan to spend the most time in and adjust accordingly. Unless of course, you have an adjustable stock, in which case you can likely adjust for most shooting positions. Just ensure that is the case before moving onto step No. 4.
Next, we’ll go ahead and snug the cap screws in the same manner that you snugged all of the other screws thus far, but first ensure that your bolt handle (if applicable) clears the optic throughout its full range of motion. Once that is a go, close both eyes, shoulder the rifle, plant your cheek, and open your eyes…what do you see? If your answer is anything other than “a flawless field of view” you are going to have to do a little work. If your rifle has an adjustable cheek riser, make some adjustments until you can pass “the blindfold test." If you can’t get there by adjusting your stock, or if there isn’t any adjustment that can be made, you may want to consider repeating the process with mounting hardware that is slightly higher or lower so that you can maintain a proper cheek weld.
Step No. 4: Eliminate Scope Cant
Before finalizing your scope installation, you are going to need to check and eliminate any canting of the reticle. Companies like Wheeler, Real Avid and Axeon make terrific products to handle this task, but for those who can’t justify the investment, a simple bubble level will do the trick with a bit of work. Start by placing the level on a sturdy surface and ensure that the bubble is absolutely centered. Shim it, if necessary. Next, set up your rifle on an equally sturdy, level surface as far away as you can while still being able to clearly see the level through your scope. While supporting the gun on a rest, rotate the scope until the horizontal portion of the reticle is perfectly aligned with the level. Make sure that the gun itself is also level throughout this entire process. If done correctly, the bottom of the vertical cross hair will line up with the seam in your stock or another distinguishable center-point on the rifle, confirming that you are as straight as can be.
Step No. 5: Lock It Up
Now it’s time to lock up the ring hardware, the trickiest part of the entire process. In the same criss-cross of 25-percent, 50-percent, 75-percent and 100-percent pattern, lock up those last screws. If done correctly, the scope will stay put, but I won't lie to you, sometimes it takes a few attempts. Although tedious, this part is worth your time, because if you do wind up with any cant, your elevation adjustments will also have a windage component to them, wreaking havoc when it comes time to determine a wind call or dial-up for a long-range shot. After everything is right, it’s up to you if you want to put thread locker on these screws. If you decide to do so, use the same method that you used when you put it on your receiver screws. If I’m mounting a scope on a rimfire, I typically skip this step, but sometimes I do so if I’m using a quick-detach base, because that scope will likely wind up on a centerfire rifle at some point.

If everything has been done correctly, your work should be able to pass the tall target test. This test uses a perfectly vertical line for a target with a small bullseye towards the bottom. After zeroing for the target’s distance, you will place your crosshairs at this six-o’clock point of aim, fire a group, dial halfway through your scopes range, fire another group, and dial as much as possible before firing your final group. If your scope is level, all of your shots should land on the line. If you find them skewed, then it’s back to the drawing board. If conditions allow, it’s not a bad idea to try to correct the issue right at the range. However, if you have followed these steps to a “T,” you’ll likely be spending the rest of your day enjoying your freshly scoped rifle and, of course, the satisfaction of a job well done.